From zero to hero: using SQL databases in Node.js made easy
The way you organize and manage data started with relational databases and SQL. Despite the growing popularity of NoSQL databases, such as MongoDB and Firebase among JavaScript developers, SQL databases remain a reliable and widely used tool for storing data. This tutorial will explain the basics of SQL databases and how to use them with Node.js. You'll also learn about different database drivers and ORM libraries that allow you to connect SQL databases with Node.js while building the backend of a simple expense tracker.
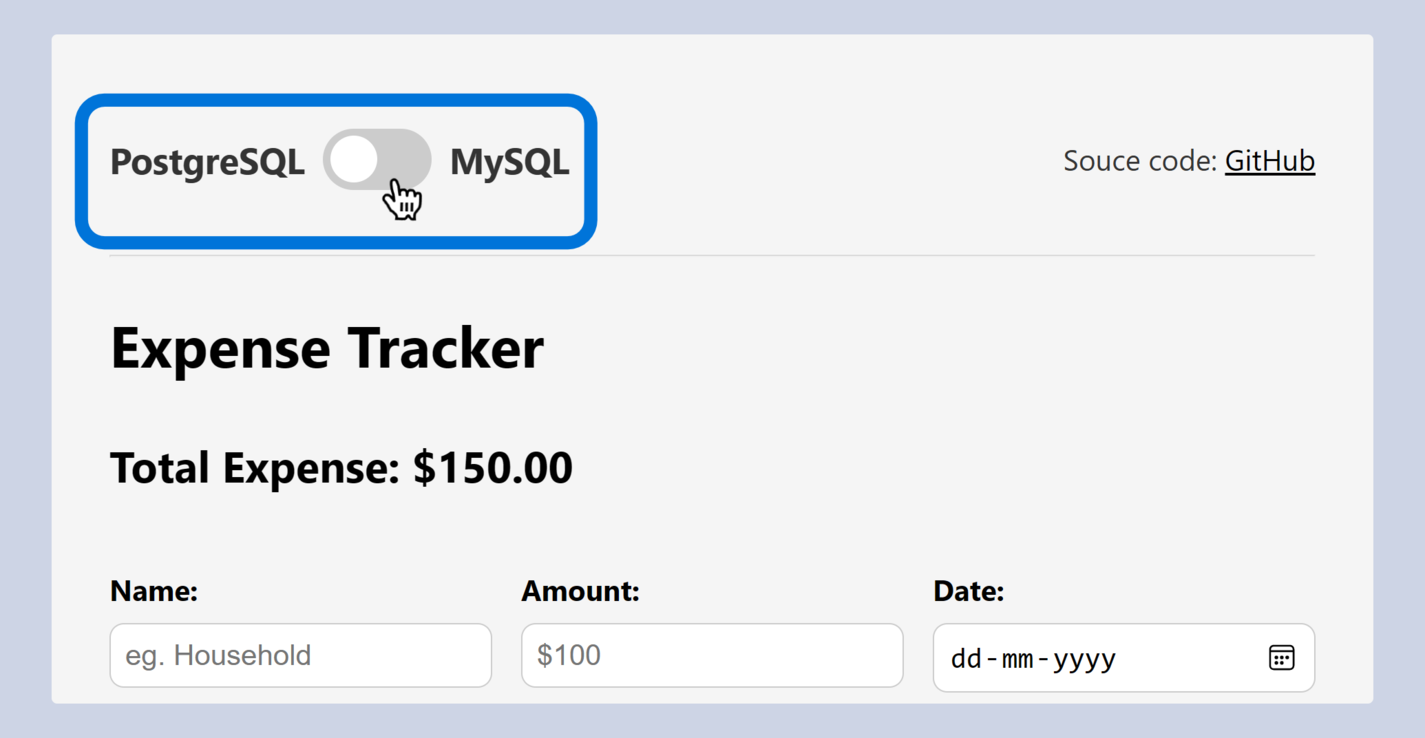
Here's the final demo and source code.

Prerequisites
Before you start following this tutorial, you should have the following:
- Solid foundational knowledge of JavaScript and Node.js
- A basic idea about REST API and how to make an API endpoint using Express.js
- Node.js, MySQL and PostgreSQL servers installed on your machine
If you haven't installed these, you can find the instructions to download and set them up on their official websites.
Setting up the project
To get started, you need to set up the project. I created a starter code for you to concentrate on understanding how to connect the database. You can get the code here or start coding online in this codesandbox.
Alternatively, you can clone the repository to your local machine using the following command in your terminal:
git clone -b starter https://github.com/giridhar7632/relational-node
Now, install all the dependencies using the command:
npm install

# or

yarn
Once everything is set up, you can begin building the backend of the expense tracker application.
Introduction to SQL databases
If you're new to the world of databases, SQL databases are a great place to start. Essentially, they are organized tables that store data in a very structured way. This structure is what makes SQL databases different from other databases, such as NoSQL, which are more flexible and can store different data types in various formats.
SQL databases offer a more rigid and organized data storage and management approach, making them easier to query and analyze. They have been around for decades and have a track record of proven reliability and scalability, making them a good choice for applications requiring complex queries or transactions, such as banking or finance.

Querying the database
Querying the database means getting information out of it. In Node.js, there are two primary ways: using a specific database driver or an ORM.
Using a database-specific driver involves using a library that gives you access to the low-level functions of the database. You write SQL queries to get the needed data and use the database's tools to make it happen.
Using an ORM library is a higher-level approach. These libraries make interacting with the database easier by providing a more user-friendly API for performing database operations. This way, you can write your queries in JavaScript rather than SQL.
Using a specific database driver
SQL is a language used to interact with databases. It has various queries, including SELECT, INSERT, UPDATE, and DELETE. To use SQL queries in Node.js, you need a driver specific to your database. For this project, let's use PostgreSQL and its popular driver, pg.
To start with pg, create a folder called /databases in the root directory and add a router file named postgres.js to define PostgreSQL routes.
/databases/postgres.js
const express = require("express")
const router = express.Router()

module.exports = router
Use this router inside index.js to make the routes accessible.
/index.js
const express = require('express')
// ...

const pgRouter = require('./databases/postgres.js')

app.use('/pg', pgRouter)

app.listen(...)
Creating the database
First, let's create a database in PostgreSQL. If you still need to install it, do so first. Then, you can make a database to store your budget data using the following script.
CREATE DATABASE budget_tracker;

\c budget_tracker;
This code creates a new database called budget_tracker and then switches to it using the \c command.
If you are using PostgreSQL for the first time, you should create a user and grant access to the database.
# Create a new user
CREATE USER <username> WITH PASSWORD '<password>';

# Grant access to the database
GRANT ALL PRIVILEGES ON DATABASE budget_tracker TO <username>;
CREATE TABLE expenses (
  id SERIAL PRIMARY KEY,
  name TEXT,
  amount NUMERIC,
  date DATE
);
The above query creates a new table named expenses with four columns.
idis the primary key that automatically generates a unique ID for each expense;namedescribes the expense;amountspecifies the cost of the expense;- Finally, the
daterecords the timestamp when the expense was created.
To connect to the database from the Node.js app, you can use a "connection string" that includes your secret information. You should save this string as an environment variable in the .env.local file. Then, you can use the Pool constructor to create a pool of clients that will allow you to perform operations on the database.
/.env.local
PG_CONNECTION_STRING=postgresql://<your-user>:<your-password>@<host>:<port>/<your-database>
/databases/postgres.js
const { Pool } = require("pg")
// ...

// Create a new pool for handling database connections
// using variables
const pool = new Pool({
  user: "your-user",
  host: "localhost",
  database: "your-database",
  password: "your-password",
  port: 5432,
})

// or using connection string
const pool = new Pool({
  connectionString: process.env.PG_CONNECTION_STRING,
  ssl: true,
})
Performing CRUD operations using SQL
Awesome! Now that you have established the connection to the database, you can begin performing database queries. Provide the SQL query string to pool.query() to execute the query and obtain the output.
Let's create an endpoint to retrieve all the rows from the expenses table.
/databases/postgres.js
// ...

// Define route to get all expenses
router.get("/expenses", async (req, res) => {
  try {
    const query = "SELECT * FROM expenses"
    const { rows } = await pool.query(query)
    res.json(rows)
  } catch (err) {
    console.error(err)
    res.status(500).json({ error: "Internal server error" })
  }
})

// ...
To add a new expense to the expenses table, you first need to take the values from the request and then run an INSERT query.
/databases/postgres.js
// ...

// Define route to add a new expense
router.post("/expenses", async (req, res) => {
  try {
    const { name, amount, date } = req.body
    const query =
      "INSERT INTO expenses (name, amount, date) VALUES ($1, $2, $3) RETURNING *"
    const { rows } = await pool.query(query, [name, amount, date])

    res.status(201).json(rows[0])
  } catch (err) {
    console.error(err)
    res.status(500).json({ error: "Internal server error" })
  }
})

// ...
This query uses the INSERT INTO statement to add values to the expenses table. The values in the array passed as the second argument to the query function will replace the placeholders $1, $2, and $3.
To update an existing expense, you can run an UPDATE query. Use the primary key (id) to identify and update the specific row.
/databases/postgres.js
// ...

// Define route to update an expense
router.put("/expenses/:id", async (req, res) => {
  try {
    const id = req.params.id
    const { name, amount, date } = req.body
    const query =
      "UPDATE expenses SET name = $1, amount = $2, date = $3 WHERE id = $4 RETURNING *"
    const { rows } = await pool.query(query, [name, amount, date, id])
    res.status(201).json(rows[0])
  } catch (err) {
    console.error(err)
    res.status(500).json({ error: "Internal server error" })
  }
})

// ...
Now, if you want to remove an expense, you can use its unique id to delete it by executing the DELETE query.
/databases/postgres.js
// ...

// Define route to remove an expense
router.delete("/expenses/:id", async (req, res) => {
  try {
    const id = req.params.id
    const query = "DELETE FROM expenses WHERE id = $1"
    await pool.query(query, [id])
    res.sendStatus(200)
  } catch (err) {
    console.error(err)
    res.status(500).json({ error: "Internal server error" })
  }
})

// ...
Great job! You have successfully connected a PostgreSQL database to your Node.js app and performed CRUD operations on the expenses table. You can now test your application without encountering any issues. In the next section, you will learn about another method of integrating databases with Node.js, which involves using an ORM.
Using an ORM library
Object-relational mapping (ORM) libraries make it easy to work with databases in JavaScript. They help you define models and relationships between them and handle the SQL operations needed to work with the data. This way, you don't need to write complex SQL queries. ORM libraries also provide features like migrations that help you manage changes to the database schema over time. Overall, ORM libraries make building complex applications with JavaScript databases easier.
Let's use the Sequelize library to work with the MySQL database for our project. Create a new router file named sequalize.js in the /databases folder to define MySQL routes.
/databases/sequalize.js
const express = require("express")
const router = express.Router()

module.exports = router
Remember to use this router in the index.js file.
/index.js
// ...

const seqRouter = require("./databases/sequalize.js")

app.use("/seq", seqRouter)

// ...
Creating the table
First, connect to the database using the connection string or variables.
/databases/sequalize.js
const { Sequelize, DataTypes } = require("sequelize")

// Create an instance of Sequelize and connect to the database
const sequelize = new Sequelize(process.env.MYSQL_CONNECTION_STRING)

// or

const sequelize = new Sequelize("database", "username", "password", {
  host: "localhost",
  dialect: "mysql",
})
Then, to create a table, define your model using built-in data types and validation rules provided by Sequelize. When you synchronize with the database, the sequelize.sync() method examines the current state of the database and compares it to the state defined in the models. If there are any differences, it automatically generates the SQL statements necessary to update the schema, such as creating or dropping tables, adding or removing columns, or modifying data types.
/databases/sequalize.js
// ...

// Define the Expense model
const Expense = sequelize.define(
  "expense",
  {
    id: {
      type: DataTypes.INTEGER,
      primaryKey: true,
      autoIncrement: true,
    },
    name: {
      type: DataTypes.TEXT,
      allowNull: false,
    },
    amount: {
      type: DataTypes.NUMERIC,
      allowNull: false,
    },
    date: {
      type: DataTypes.DATE,
      allowNull: true,
    },
  },
  {
    timestamps: false,
  }
)

// Synchronize the model with the database
sequelize.sync({ forced: true })

// ...
Performing CRUD operations using JavaScript
It will be easier to perform database operations using Sequelize than writing SQL queries. You can use the findAll() method to retrieve all of the records in your database.
/databases/sequalize.js
// ...

// Define route to get all expenses
router.get("/expenses", async (req, res) => {
  try {
    const expenses = await Expense.findAll()
    res.json(expenses)
  } catch (err) {
    console.error(err)
    res.status(500).json({ error: "Internal server error" })
  }
})

// ...
Here, the findAll() method returns an array of all the records in the table. You can also use the where property of the query object to filter the results based on conditions you specify.
If you want to create a new record in the database, you can use the build() method to create a new instance of the model, set the values of its properties, and then use the save() method.
/databases/sequalize.js
// ...

// Define route to create new expense in the table

router.post("/expenses", async (req, res) => {
  try {
    const { name, amount, date } = req.body
    const expense = await Expense.create({ name, amount, date })
    await expense.save()
    res.json(expense)
  } catch (err) {
    console.error(err)
    res.status(500).json({ error: "Internal server error" })
  }
})

// ...
Similarly, you can use the save() method to update a record in the database.
/databases/sequalize.js
// ...

// Define route to update a specific expense in the table
router.put("/expenses/:id", async (req, res) => {
  try {
    const expense = await Expense.findByPk(req.params.id)
    if (expense) {
      const { name, amount, date } = req.body
      expense.name = name
      expense.amount = amount
      expense.date = date
      await expense.save()
      res.json(expense)
    } else {
      res.status(404).json({ message: "Expense not found" })
    }
  } catch (err) {
    console.error(err)
    res.status(500).json({ error: "Internal server error" })
  }
})

// ...
Here, the findByPk() method finds the record with the provided primary key (id) and updates the record. If you want to delete a record that matches certain conditions, use the destroy() method.
/databases/sequalize.js
// ...

// Define route to delete a specific expense in the table
router.delete("/expenses/:id", async (req, res) => {
  try {
    const expense = await Expense.findOne({
      where: {
        id: req.params.id,
      },
    })
    if (expense) {
      await expense.destroy()
      res.json({ message: "Expense deleted" })
    } else {
      res.status(404).json({ message: "Expense not found" })
    }
  } catch (err) {
    console.error(err)
    res.status(500).json({ error: "Internal server error" })
  }
})

// ...
You can try the application by switching the database using the front end. You should be able to perform all the operations smoothly without any issues. If you encounter any errors, you can debug and resolve them with the final source code and the internet.
Improving database performance
So far, you have learned about implementing basic queries using drivers and ORMs in Node.js. However, in real-world applications, databases use complex questions that require improving performance and security. Two essential techniques for this are database indexing and caching.
Database indexing
Database indexing creates a structure that allows faster access to data, making queries more efficient. It is recommended to create indexes on frequently searched or sorted columns and a table's primary key column(s).
CREATE INDEX name ON expenses (name);
In Sequelize, you can define an index on a model attribute by setting the index option to true in the attribute definition. The following code will allow a faster search for the expenses based on the name.
const Expense = sequelize.define("expense", {
  name: {
    type: DataTypes.TEXT,
    allowNull: false,
    index: true, // Index on 'name' column
  },
})
Database caching
Database caching helps reduce the number of queries sent to the database, improving application performance. You can store frequently used data in memory or on a disk to retrieve it quickly without having to query the database. In pg, you can implement caching using a library like node-cache or Redis.
In Sequelize, you can enable caching by passing a caching object as the options.cache argument when defining a model.
const Expense = sequelize.define(
  "expense",
  {
    name: {
      type: DataTypes.TEXT,
      allowNull: false,
    },
    amount: {
      type: DataTypes.NUMERIC,
      allowNull: false,
    },
  },
  {
    cache: {
      ttl: 60, // Cache for 60 seconds
    },
  }
)
Conclusion
In conclusion, using SQL databases with Node.js can significantly improve the performance and security of your applications. You have learned two approaches for integrating databases: a database driver and an ORM library. The approach you choose will depend on various factors, such as your project requirements, the size and complexity of your database, and your development expertise. It's also essential to improve performance by implementing database indexing and caching; this can optimize your Node.js applications and make them more efficient, secure, and scalable. With these tools and techniques, you can confidently use SQL databases in your Node.js applications and build robust, high-performing software.

Written by
Giridhar TallaGiridhar loves programming, learning, and building new things. He enjoys working with both JavaScript and Python.