A comparison of Node.js environment managers
A nuisance that often crops up when working on JavaScript projects pertains to managing the different versions of the tools needed to build or run a project. This essentially boils down to the fact that different projects have different version requirements for their dependencies. For example, one greenfield project might require the latest version of Node.js due to its use of an experimental feature, while a legacy project might depend on deprecated features that make it unable to run on newer releases.
Installing different versions of Node.js or some other package typically involves uninstalling the current version, followed by installing the version that is needed, and then repeating this process over and over as you switch between projects. This is where the value proposition for virtual environment managers becomes apparent. They provide an isolated environment that allows the installation of several versions of a software package so that it's easy to use a specific version of a package for a project without affecting other applications that depend on different versions of the same package.
In this article, we will examine some of the most common virtual environment managers for Node.js and describe their features, as well as the pros and cons of each one. After reading this piece, you'll have enough context to choose the right environment manager that best suits your needs!
1. Node Version Manager (NVM)
The Node Version Manager is the most popular way to install, upgrade, and manage Node.js releases on a Linux or macOS system. After installing NVM through its install script, it will modify your shell configuration file, such as .bashrc or .zshrc, to load correctly on each subsequent shell invocation. Once the nvm command is available, you can use it to install the latest Node.js release by entering nvm install node on the terminal.
NVM supports installing several versions of Node.js at the same time, and its easy to switch between the different versions that you have installed. You can install a specific Node.js version by specifying the version number to the install subcommand, and you can switch between installed versions through the use subcommand. Here's a few useful NVM commands you might want to check out:
$ nvm install 16.6.2 # install Node.js v16.6.2
$ nvm use 16.5.0 # switch to version 16.5.0 on the current shell instance
$ nvm alias default 16.6.2 # set the default version for new shell instances
$ nvm ls-remote # list all available versions
$ nvm ls # list all installed versions
$ nvm # view nvm usage information
One advantage of using NVM to install Node.js over your operating system's package manager is the ability to install npm packages globally without elevated privileges. This means you no longer need to prefix the command to install packages globally with sudo. Global packages are scoped to the current Node.js version and installed to $HOME/.nvm/versions/node/<version>/bin/. This has the effect of making them inaccessible when you switch to a different Node.js version. To combat this, NVM offers a way to migrate global packages while installing a different version.
NVM is pretty great at what it does, but it has some downsides. For example, it only supports POSIX-compliant shells, such as bash or zsh, leaving users of the popular Fish shell out in the cold. Support for Windows is also lacking, except if you use Windows Subsystem for Linux (WSL) or projects like Cygwin. It has also been observed that NVM slows down shell initialization by several milliseconds, which could be noticeable on some systems. These are all reasons to not go with NVM compared to some of the other options on this list.
2. N
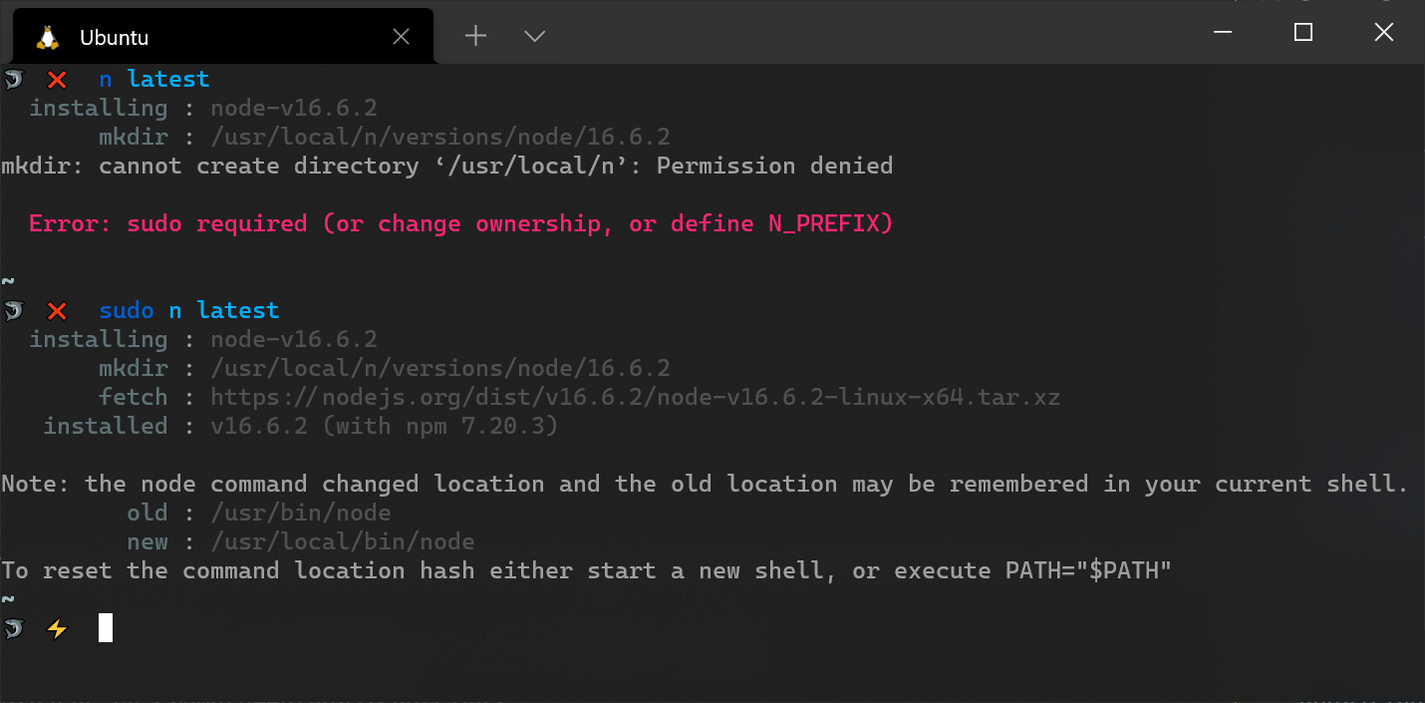
The curiously named n project is another popular way to manage several Node.js versions on a single machine. n is a node.js module, so it can be installed through npm. This means that an existing Node.js installation (perhaps the one provided by your operating system's package manager) is required to install it since npm typically comes with Node. There are also some third-party installers that can help you install n without requiring Node.js or npm.
Once you've downloaded n, you can use it to install, upgrade, and manage Node.js releases. It works by downloading (and caching) the pre-built binary for a specific release to the n/versions/node directory inside /usr/local and subsequently installs it to the /usr/local/bin directory, which has the effect of overriding any existing version that is present. Note that you'll likely need to use sudo when using n to install Node.js releases to avoid permission errors. Some guidelines for avoiding the use of sudo for n and npm global installs are provided in the project's README document.
The main advantage of n's approach to managing Node.js releases compared to NVM is that global npm packages are not affected when you switch between different versions of Node. On the other hand, NVM lets you use different Node.js versions in different terminals through its nvm use command, while n does not. Once you switch to a different Node.js version, the change is reflected system wide. You can get around this by using the n use subcommand to invoke a specific Node.js binary without switching to that version. This can come in handy when performing one-off script executions.
$ cat index.js
console.log(`Current Node.js version is: ${process.version}`);
$ node --version
v16.7.0
$ node index.js
Current Node.js version is: v16.7.0
$ n use 16.6.2 index.js
Current Node.js version is: v16.6.2
3. Fast Node Manager (FNM)
Fast Node Manager is a cross-platform Node.js version manager written in Rust and claims to be up to 40-times faster than NVM while providing most of the same features. Unlike its predecessor, and perhaps due to its Rust origins, support for both the Windows (Powershell) and Fish shell is present, making it suitable for a wider range of users.
Once FNM is installed, its usage is similar to NVM. You can inspect all the available commands provided by the tool in this GitHub document.
$ fnm ls-remote # list remote Node.js versions
$ fnm install 16.5.0 # install a specific version
$ fnm use 14.17.5 # switch Node.js version
$ fnm ls # list installed versions
$ fnm default <version> # set a default version
FNM installs Node.js binaries in the $HOME/.fnm/node-versions directory and symbolically links them in the /tmp/fnm_multishells directory on shell start-up so that you can use a different Node.js version per shell. The behavior of global packages is also identical to NVM, meaning that they are tied to a specific version of Node.js and will not be accessible once the current Node.js version is changed to a different release.
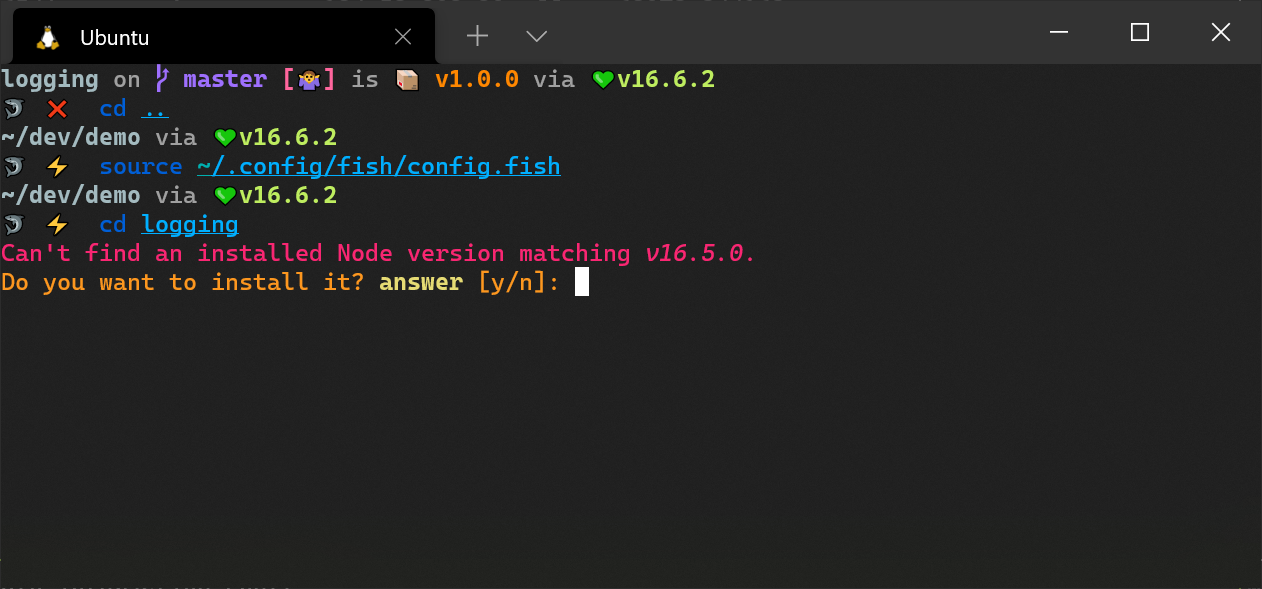
Migrating to FNM from NVM or other version mangers should be seamless due to its support of the .node-version and .nvmrc file formats, which are used to set the correct version of Node.js for a project. Once either file is present in a directory, you can run fnm use to change to the specified Node.js version. If the release is not installed, you will be prompted to install it.
Automatically switching Node.js versions when you change a directory is also possible, although it involves some additional setup. You need to run fnm env --use-on-cd to print out the script needed to set up auto switching and then copy it to the appropriate config file (.bashrc, config.fish, etc) for your shell. Afterwards, it should work seamlessly without any perceptible overhead.
4. Volta
Volta is a relatively new JavaScript tooling manager that does a lot more than just install and manage Node.js releases. Like FNM, it's written in Rust, and it supports both Unix systems and Windows. Installing Volta is quite easy; a script is provided for Unix systems, and an installer is available for Windows.
The main value proposition of Volta is that it can manage an entire JavaScript toolchain by keeping track of the exact package versions needed based on a project's package.json file. Under the hood, Volta uses a shim to route to the correct version of a tool and executes it with the appropriate Node.js engine. For example, Node.js packages can be installed globally for the current user through its install command:
$ volta install yarn@1.22.11
success: installed and set yarn@1.22.11 as default
$ volta install jest
success: installed jest@27.0.6 with executables: jest
$ volta install typescript
success: installed typescript@4.3.5 with executables: tsc, tsserver
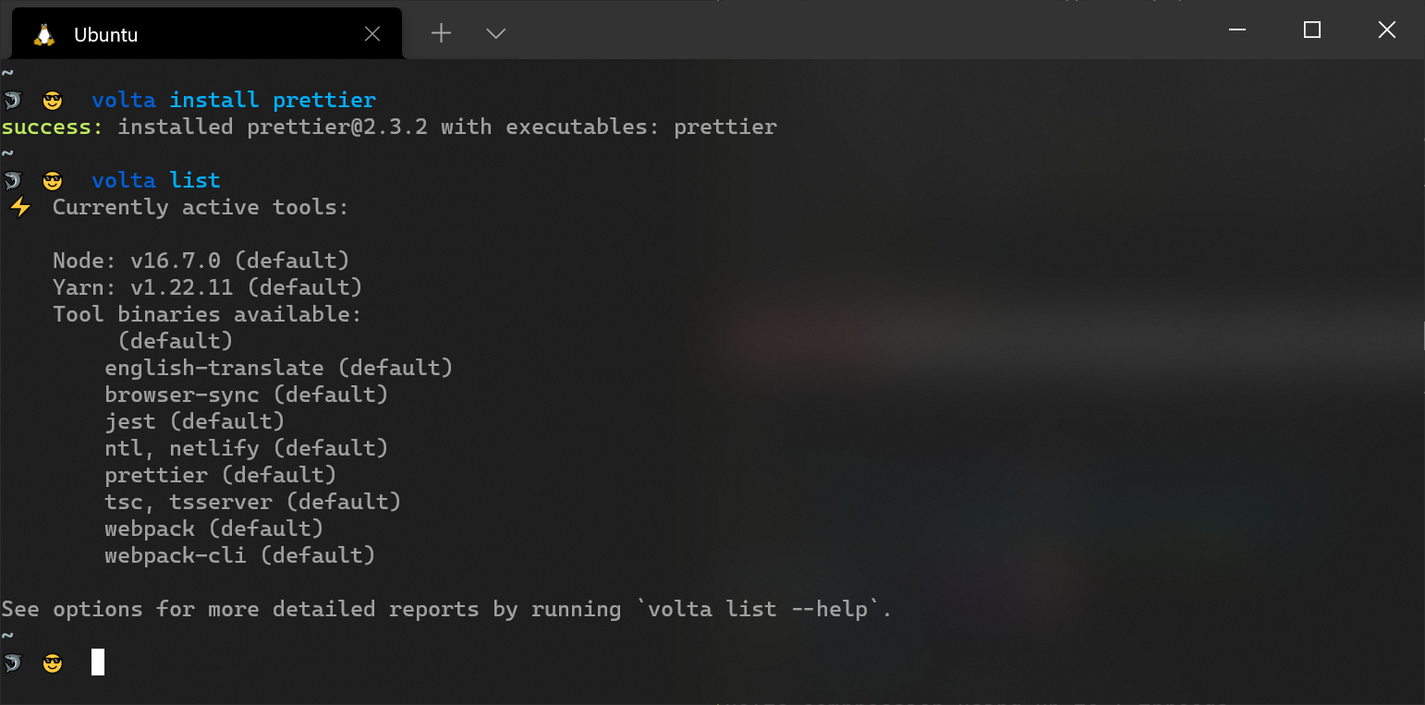
The binaries for each tool are downloaded to the .volta/bin directory in the user's home directory on Unix systems. On Windows, the location for downloaded binaries may vary depending on how you installed Volta. After installing a package with Volta, you'll be able to run it directly in your terminal as if you installed it globally through npm. When you change to a project that has the same package as a dependency, Volta will automatically and seamlessly switch to the locally installed version to guarantee compatibility.
$ tsc --version
Version 4.3.5
$ cd node_project
$ cat package.json | grep 'typescript'
  "typescript": "^4.0.8",
$ tsc --version
Version 4.0.8
Notice how we get the correct version without changing the command that is being run. This is one of Volta's main advantages over the previously examined environment managers. This feature also works the same way if you opt to install packages globally through npm or yarn instead of volta install. Volta will auto-switch between the globally and locally installed variants as needed.
You can also use Volta to install and manage Node.js releases. The command below will install the latest version of Node.js. If you leave out the @latest suffix, the latest LTS release will be downloaded instead.
$ volta install node@latest
success: installed and set node@16.7.0 (with npm@7.20.3) as default
Once the specified Node.js release is installed, it is also subsequently set as the global default, as observed in the command output above. If you want to guarantee that a specific Node.js version is used against a project, you can use Volta to specify the desired version through its pin subcommand:
$ volta pin node@14.17.5
success: pinned node@14.17.5 (with npm@6.14.14) in package.json
This adds the following entry to the project's package.json file:
"volta": {
  "node": "14.17.5"
}
With the above entry in place, anyone who uses Volta will automatically get the correct Node.js version specified in the package.json file when they cd into the project directory. If the corresponding Node.js release is not available locally, it will be downloaded and installed directly.
$ node --version
v16.7.0
$ cd node_project
$ cat package.json | grep 'volta' -A 2
  "volta": {
    "node": "14.17.5"
  },
$ node --version
v14.17.5
5. Asdf
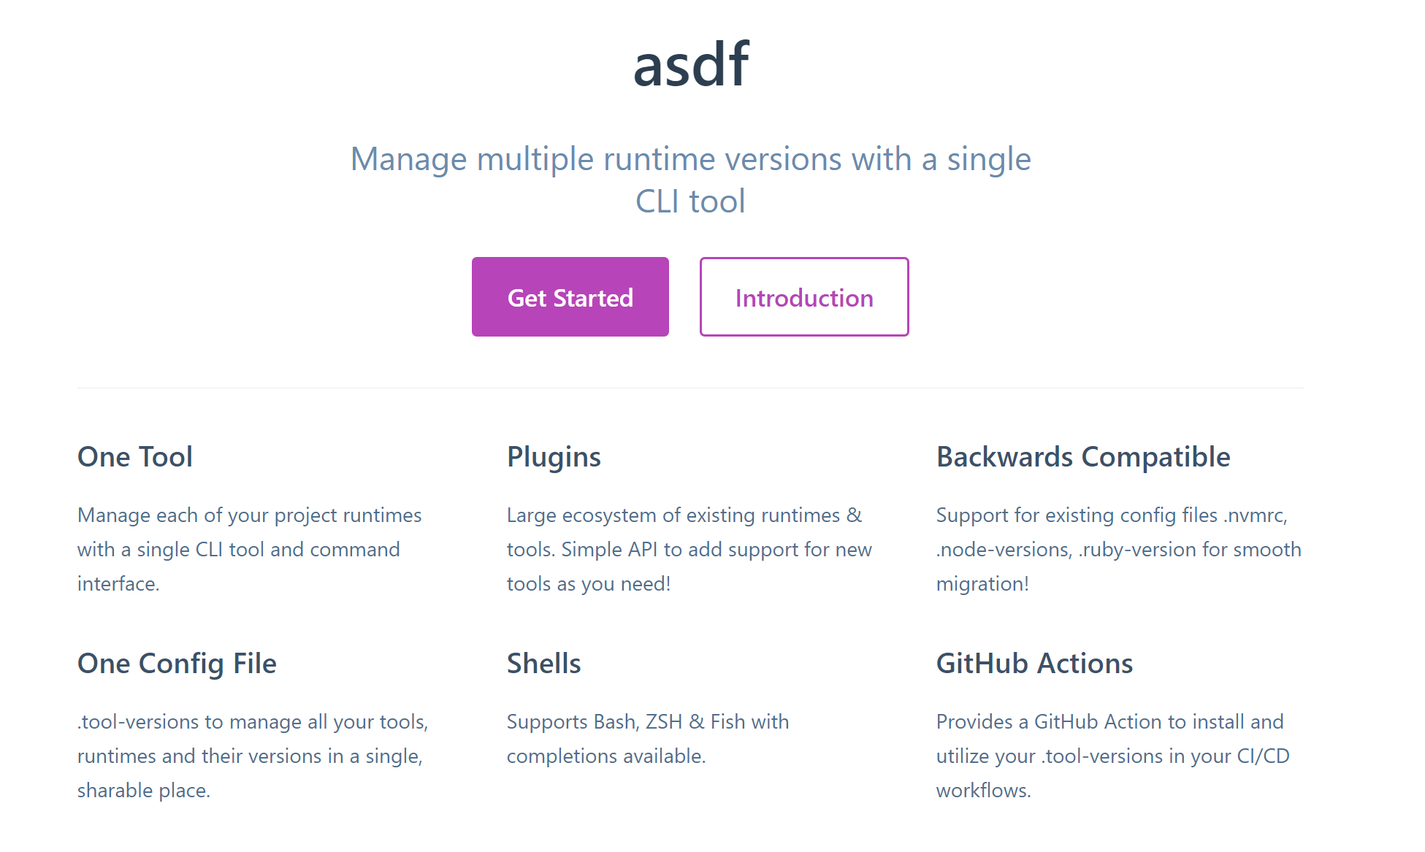
Unlike all the other tools discussed so far, Asdf is not specific to the Node.js ecosystem. It is a tool for managing multiple language runtime versions on a per-project basis, and it aims to replace language-specific environment managers, such as nvm, rbenv, and pyenv. Asdf may be the right choice for you if you develop applications in several languages and need a more efficient way to manage your environment for each language rather than juggling several unrelated tools.
Asdf only supports Linux and macOS, so you won't be able to use it on Windows, except through WSL. After installing the core CLI, you'll need to install the plugin for the language you're interested in. Asdf provides first-party plugins for Node.js, Ruby, Elixir, and Erlang, while other languages are supported through community-driven plugins. Here's the command you need to install the Node.js plugin for Asdf:
$ asdf plugin add nodejs https://github.com/asdf-vm/asdf-nodejs.git
Once you've installed the relevant plugin, you can install a version for the tool, such as the latest release of Node.js:
$ asdf install nodejs latest
Setting the default Node.js version can be achieved through Asdf's global subcommand:
$ asdf global nodejs latest
This will add the following line to the $HOME/.tool-versions file:
$ cat ~/.tool-versions
nodejs 16.7.0
$ which node
/home/<user>/.asdf/shims/node
If you rely on global npm packages, you may specify them in $HOME/.default-npm-packages so that they are automatically installed after installing each Node.js release:
$ cat ~/.default-npm-packages
create-react-app
eslint
@ayoisaiah/f2
To utilize a specific version of Node.js in a project, you need to run asdf local nodejs <version> in the project directory. If the version is not installed, you'll need to install it first with asdf install nodejs <version>. Afterwards, Asdf will automatically switch to the local node version once you cd into the project directory.
Asdf also understands .nvmrc and .node-version, so migrating from other environment managers should be a breeze. You'll need to add the following line to your $HOME/.asdfrc file to ensure that Asdf can read from both files:
legacy_version_file = yes
Conclusion
We've covered a bunch of environment managers in this article, and its clear that they all share a similar feature set with slightly different implementations. Regardless of which option you choose, you'll be able to easily switch between different versions of Node.js on demand, and upgrading to the latest version will be a breeze.
I suggest going with Volta due to its unique ability to easily switch between multiple versions of a package based on project requirements, and it supports all the major operating systems. Asdf might be a better pick if you tend to work with multiple languages, and FNM is a great choice if you'd like a faster NVM alternative that also supports Windows. There are other options, such as nvs and nodeenv. Feel free to check them out if none of the options discussed in this article works for you.
If you have any other tips regarding Node.js environment managers, feel free to share them on Twitter. Thanks for reading, and happy coding!

Written by
Ayooluwa IsaiahAyo is a developer with a keen interest in web tech, security and performance. He also enjoys sports, reading and photography.