How to dockerize a Django and React application
Docker makes deployment flawless because a Docker image works the same way regardless of the system, and the image includes all application requirements. Docker also helps with collaboration; by just sharing the image, your colleague can run the application with no dependency issues.
Writing the instructions for a Django application is straightforward. The challenging part is when you are building an application that needs other technologies to work. For example, you may have an application built with Django, React, Postgres, or Redis. It is important to know how to piece all these technologies together.
This article will show you how to use Docker and Docker Compose to containerize an application built with Django and React. We will build a simple application with Django and React and then look at how it can be containerized with Docker and Docker Compose. You can find the whole project on GitHub.
Prerequisites
This tutorial will be a hands-on demonstration. If you'd like to follow along, be sure you have the following:
- Docker and Docker Compose installed.
- Django and Node.js installed.
What is Docker Compose
Docker Compose is a tool used to run applications with multiple containers at once with a single command. It also facilitates the sharing of multi-container applications. In Docker Compose, each image that it handles is known as a service. The instructions for Docker Compose are included in a YAML file.
Docker Compose also helps in single-host deployment. Since Docker compose can run all your services, you can run the whole application with a single server instead of running each service independently.
Building the base application
In this section, we will build an application that just displays the time and date to keep things simple. We will build the backend before going into the frontend. Create the project folder and name it django-react-docker. This folder will contain everything related to our project.
Building the API
Inside the folder you just created, create another folder named api. This is where the code for the API will be located.
Navigate to django-react-docker/api on your command line and run the following command to create a new Django project:
django-admin startproject project .
Now, create a new file in /project directory named views.py and paste the following code, which uses Python’s datetime module to generate the current date and time and output a JSON response so that React can read it.
from django.http import JsonResponse
from datetime import datetime

def index(request):
    current_time = datetime.now().strftime("%-I:%S %p")
    current_date = datetime.now().strftime("%A %m %-Y")

    data = {
        'time': current_time,
        'date': current_date,
    }

    return JsonResponse(data)
Next, update the urls.py file with the following code to direct the view to the home page:
from django.contrib import admin
from django.urls import path
from .views import index

urlpatterns = [
    path('admin/', admin.site.urls),
    path('', index),
]
Finally, we need to update the settings so that React can access the API. You can do this by adding React port to whitelist using django-cors-headers.
ALLOWED_HOSTS = ['0.0.0.0'] # this is the host that Docker uses to run application
INSTALLED_APPS = [
    'corsheaders' # this will be installed later
]
...
# this should be put at the end of the settings.py file
CORS_ORIGIN_WHITELIST = [
     'http://localhost:3000'
]
You also need to add a middleware class to listen in on responses:
MIDDLEWARE = [
    ...,
    "corsheaders.middleware.CorsMiddleware",
    "django.middleware.common.CommonMiddleware",
    ...,
]
Building a Docker container for Django
On your text editor, navigate to api/, create a new file with the name Dockerfile, and then paste the following code. The Dockerfile contains the step-by-step process of how the Docker image should be built. In the code below, use six instructions:
FROM- Every Dockerfile starts with this command. It specifies the Parent Image from which your application will be built. In our case, we are using a lighter version of Python 3.8.13 (python:3.8.13-bullseye). You can find more information on Docker hub.ENV- This is used to set environment variables in key-value pairs. Here, we are using it to tell Python to show thestdoutandstderrstreams in the command line instead of getting buffered.WORKDIR- This is used to state the directory where the application will be located and where the rest of the instructions in theDockerfilewill be run.COPY- This is used to copy files or folders.RUN- This is used to run a command line command.EXPOSE- This is used to expose a particular port in the image. Here, we will expose port8000because it is the port on which Django runs.
FROM  python:3.8.13-bullseye

ENV PYTHONUNBUFFERED=1

WORKDIR /api

RUN pip install django django-cors-headers

# copy from the current directory of the Dockerfile to /api in the image
COPY . .

EXPOSE 8000
Building the frontend
Next, we will create the frontend that will display the time and date obtained from the API.
First, run the command below to create a boilerplate for a React application.
npx create-react-app frontend
On your text editor, navigate to frontend/src/App.js and replace what you find there with the code below. The code is fetching the time and date data from the backend and displaying it on the frontend.
import React, { useState, useEffect } from 'react';
import './App.css';

function App() {
  const [currentTime, setCurrentTime] = useState(0);
  const [currentDate, setCurrentDate] = useState(0);
  useEffect(() => {
  fetch(' http://127.0.0.1:8000/').then(res => res.json()).then(data => {
      setCurrentTime(data.time);
      setCurrentDate(data.date)
    });
  }, []);
  return (
    <div className="App">
      <header className="App-header">
      <p>The date is {currentDate} and the time is {currentTime}.</p> <br/>

      </header>
    </div>
  );
}

export default App;
Building a Docker container for React
Writing the Dockerfile for the frontend follows the same process as the backend, but the commands are different. On your text editor, go to /frontend, create a file named Dockerfile, and paste the following code:
FROM node:14.17.3

WORKDIR /frontend

COPY . .

RUN npm install

EXPOSE 3000

CMD ["npm", "start"]
Creating a Docker Compose file to run the app
Here we will create a Docker Compose file that will build and run our Docker images together. Each Docker image in the Docker compose file is represented as a service. In the root of your project, create a new file named docker-compose.yaml and paste the following code, which will build the individual images and running them in a container.
services:
  api:
    build: ./api
    ports:
      - "8000:8000"
    volumes:
      - ./api:/api
    command: bash -c "python manage.py runserver 0.0.0.0:8000"

  web:
    build: ./frontend
    ports:
      - "3000:3000"
    volumes:
      - ./frontend:/frontend
Here is what the commands in the file above are doing:
build - This is used to build each image/service.
ports - This is used to map the host port to the container port
volumes - This is used to copy changes made to the project to our image in real time.
command - This handles the command used to run our project in our Docker container.
Now, you can now build the image by running docker-compose build. The build will take some time; when it is done, run docker-compose up to run the container.
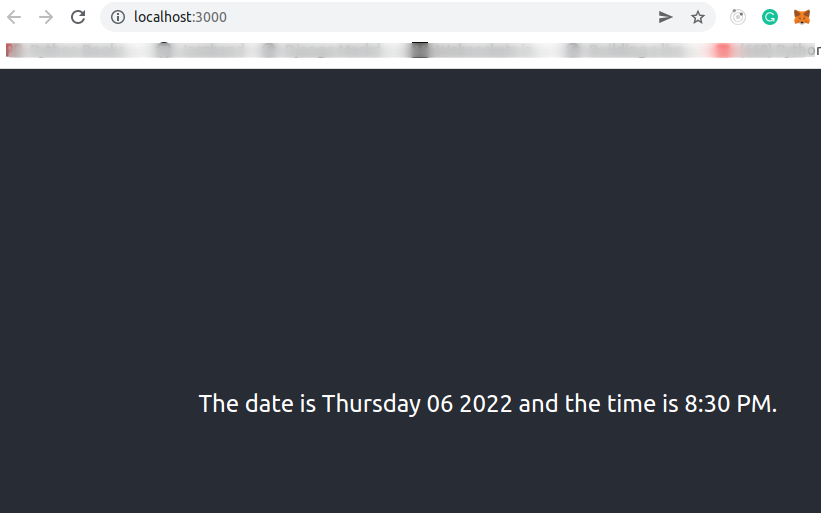
Now, open http://localhost:3000/ on your browser, and you will see the application come up.
Conclusion
With this article, we took the DevOps initiative to containerize an application built with Django and React. This is important as you grow as a developer and stay relevant in the software engineering space.
In this article, we built a simple time and date application with Django and React. Then, we containerized an application built with Docker and Docker Compose.
You can further increase your knowledge on this topic by adding a tool like NGINX to the mix and seeing how it is handled. You can also add a database, such as MongoDB or Postgres to Django, and then do more research on what the Docker Compose file will look like.

Written by
Muhammed AliMuhammed is a Software Developer with a passion for technical writing and open source contribution. His areas of expertise are full-stack web development and DevOps.