Deploying a React App to AWS Elastic Beanstalk
Have you been looking for a way to deploy React applications to AWS Elastic Beanstalk? If so, then this tutorial is for you. In this tutorial, you will crisply build a React application, dockerize it, and deploy it to AWS Elastic Beanstalk. You will also learn how to automate the deployment with GitHub actions on every code change.
The complete application can be found on GitHub.
Prerequisites
If you’d like to follow along, you should have the following:
- AWS Command-Line Interface (CLI) – This tutorial uses AWS CLI v2.
- AWS User with Elastic Beanstalk permission.
- EB CLI v3.14.6 installed.
- An existing GitHub account and GitHub repository.
Building a React Application
To illustrate the process of deploying a React app to AWS Elastic Beanstalk, we will quickly build an application with React. This application will simply fetch some dog-related data from an API and display it on a web browser.
On your home directory, run the following command to create a React app called dog-app.
mkdir react-ebn #creates a working directory
npx create-react-app dog-app #creates the react app
cd dog-app #Go into the react app
code . #Open up the react project with your preferred code editor
Create a components folder and a styles folder. In the components folder, create a file named Dogs.jsx and paste the following code.
This code defines a React component that fetches and displays a random dog image from a public API. The component uses useEffect and useState hooks to manage states and perform side-effects. The component displays a loading message while the image is being fetched, as well as a button to fetch a new image after the image loads.
import { useEffect, useState } from "react";
import '../styles/dogs.css'

const Dogs = () => {
    const loadDogs = () => {
        setLoading(true)
       fetch("https://dog.ceo/api/breeds/image/random")
            .then((res) => res.json())
            .then((data) => {
                setDog(data.message)
                setLoading(false)
            });
    }
    const [dog,setDog] = useState([]);
    const [loading, setLoading] = useState(true);
    useEffect(() => {loadDogs()}, []);

    if(loading) {
       return <h1>Getting dog...</h1>
    }

    return (
        <div>
            <div className="dog-app-container">
                <h2>Get random dog images</h2>
                <div className="image-container">
                    <img src={dog} alt="Dog"/>
                </div>
                <button onClick={loadDogs}>Fetch dog! </button>
            </div>
        </div>
    );

}

export default Dogs;
In the styles folder, create a dogs.css file and paste the following code snippets. This will perform some basic styling for the homepage.
@import url('https://fonts.googleapis.com/css2?family=Comfortaa:wght@500&display=swap');

h1{
    text-align: center;
    font-family: 'Comfortaa', cursive;
}

h2{
    font-family: 'Comfortaa', cursive;
}

.dog-app-container{
    display: flex;
    flex-direction: column;
    justify-content: center;
    align-items: center;
    margin: 50px;
}

.image-container {
    width: 350px;
    height: 350px;
    border: 3px solid rgb(128, 106, 106);
    border-radius: 5px;
}

img{
    width: 100%;
    height: 100%;
    display: block;
}

button{
    margin: 20px;
    padding: 10px;
    background-color: hsl(244, 80%, 60%);
    border: none;
    color: white;
    cursor: pointer;
    font-family: 'Comfortaa', cursive;
}

button:hover{
    filter: brightness(90%);
}
Now, add the code snippets below to the App.js file to utilize the Dogs component we created earlier:
import Dogs from './components/Dogs'
import './App.css';

function App() {
  return <Dogs/>
}

export default App;
Finally, remove the margin property in the index.css file, leaving you with the following CSS styles:
body {
  font-family: -apple-system, BlinkMacSystemFont, 'Segoe UI', 'Roboto', 'Oxygen',
    'Ubuntu', 'Cantarell', 'Fira Sans', 'Droid Sans', 'Helvetica Neue',
    sans-serif;
  -webkit-font-smoothing: antialiased;
  -moz-osx-font-smoothing: grayscale;
}

code {
  font-family: source-code-pro, Menlo, Monaco, Consolas, 'Courier New',
    monospace;
}
Open a terminal window and run the following command to open the React application in your favorite web browser. You should see the following output running on localhost:3000.
npm start

Dockerizing the React Application
Elastic Beanstalk requires your application to be dockerized before deploying it. On the root of the dog-app directory, create a Dockerfile and add the following configuration settings.
The configuration settings in the Dockerfile is what Elastic Beanstalk will use to build the image to deploy the React application.
FROM node:17.1-alpine as build-stage
WORKDIR /app
COPY package*.json ./
RUN npm install
COPY . .
RUN npm run build

FROM nginx:1.22.1-alpine as prod-stage
COPY --from=build-stage /app/build /usr/share/nginx/html
EXPOSE 80
CMD ["nginx", "-g", "daemon off;"]
Run the Docker commands below to confirm the React application is running as intended on your host machine:
docker build -t react-ebn  .
docker run --name react-ebn_c -p 8080:80 react-ebn
If you have the React application running on localhost:8080, then you are ready to proceed with Elastic Beanstalk.
Now, push the React application (Dog-app) to your Git repository using the commands below. This step is essential, as Elastic Beanstalk uses the Git archive of the most recent commit. Since you don’t have Git initialized in the React project, Elastic Beanstalk will have nothing to deploy with and will incur errors.
git init #Initialize git project
git add . #adds changes to staging area
git commit -m 'first-commit' #commits your changes
git remote add origin git@github.com:github_username/react-elastic-beanstalk.git #Your own repository goes here
git push -u origin master #Push to GitHub repository master branch
Setting Up Elastic Beanstalk CLI for the React Application
At this point, you have created a React app and built a Docker container for it that is accessible on your machine. Now, you will deploy the React application to Elastic Beanstalk using the Elastic Beanstalk(EB) CLI.
First, you’ll need to set up the AWS Elastic Beanstalk environment for your project in your working directory dog-app by running the following command:
eb init
The EB CLI will prompt you to select a region. Select the default region by pressing Enter.
Next, it will prompt you to give the application a name; this tutorial uses an application name react-app.
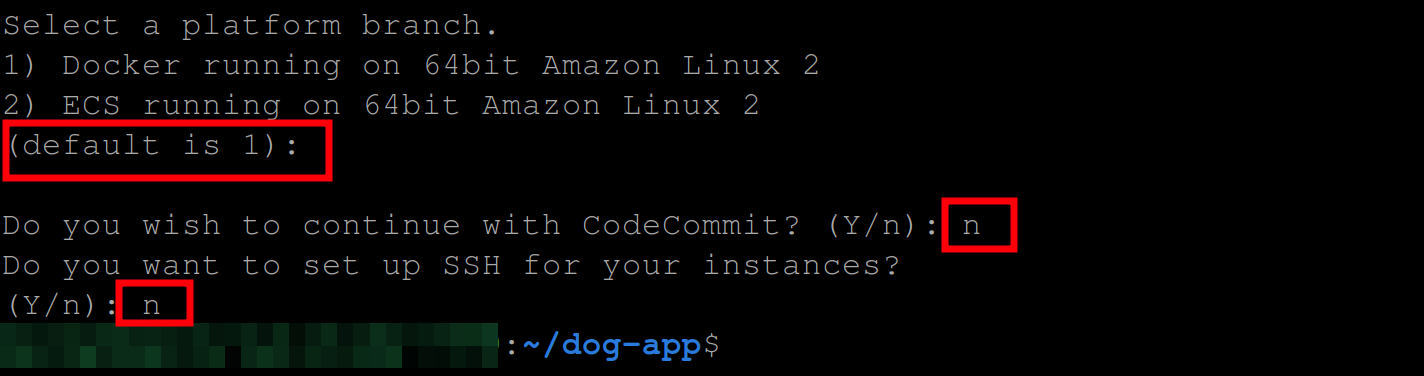
Then, it will ask you to confirm the platform you are currently working with, which is Docker; press enter to continue.

Now press Enter to use the default platform branch. Hit (n) to disable CodeComit, and hit (n) so the EB CLI won’t set up ssh for your instances.
Create an environment for the React application by executing the following command:
You’ll need to do this so that EB CLI can deploy your application.
eb create
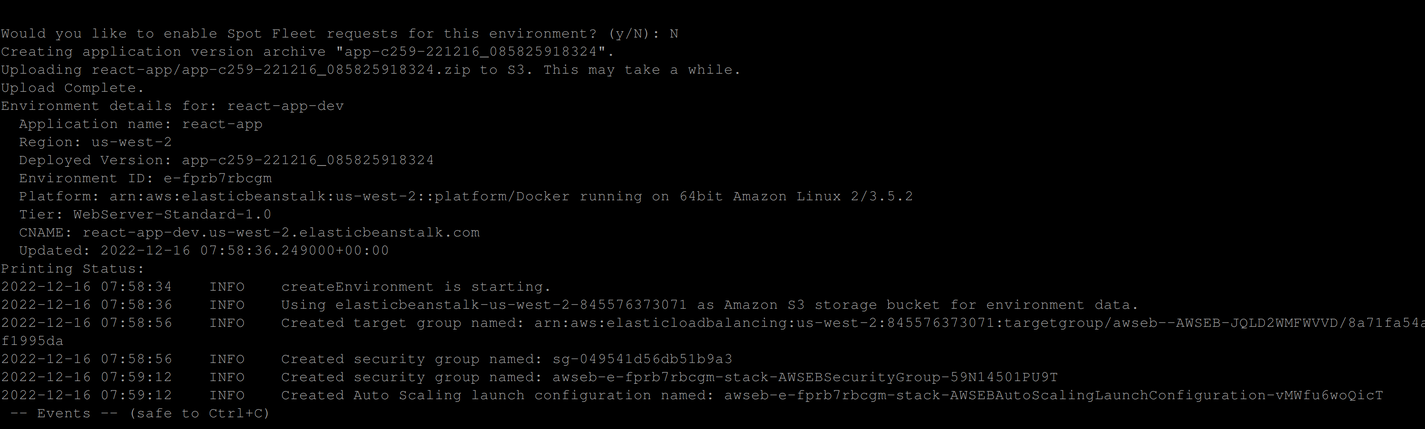
The command above will prompt you to provide values for the Environment name, DNS CNAME, and LoadBalancer type of the environment. You will select their defaults, hit (n) to disallow EB CLI from enabling Spot Fleet requests for your environment, and proceed to creating your application environment.
If your development was created successfully, you should have the following output:
Now, to access your application, run the following EB command:
eb open
Next, by default, Elastic Beanstalk stores your application in a storage bucket (Amazon s3). Therefore, to see your application, search s3 on the navigation menu and select s3 as shown below:
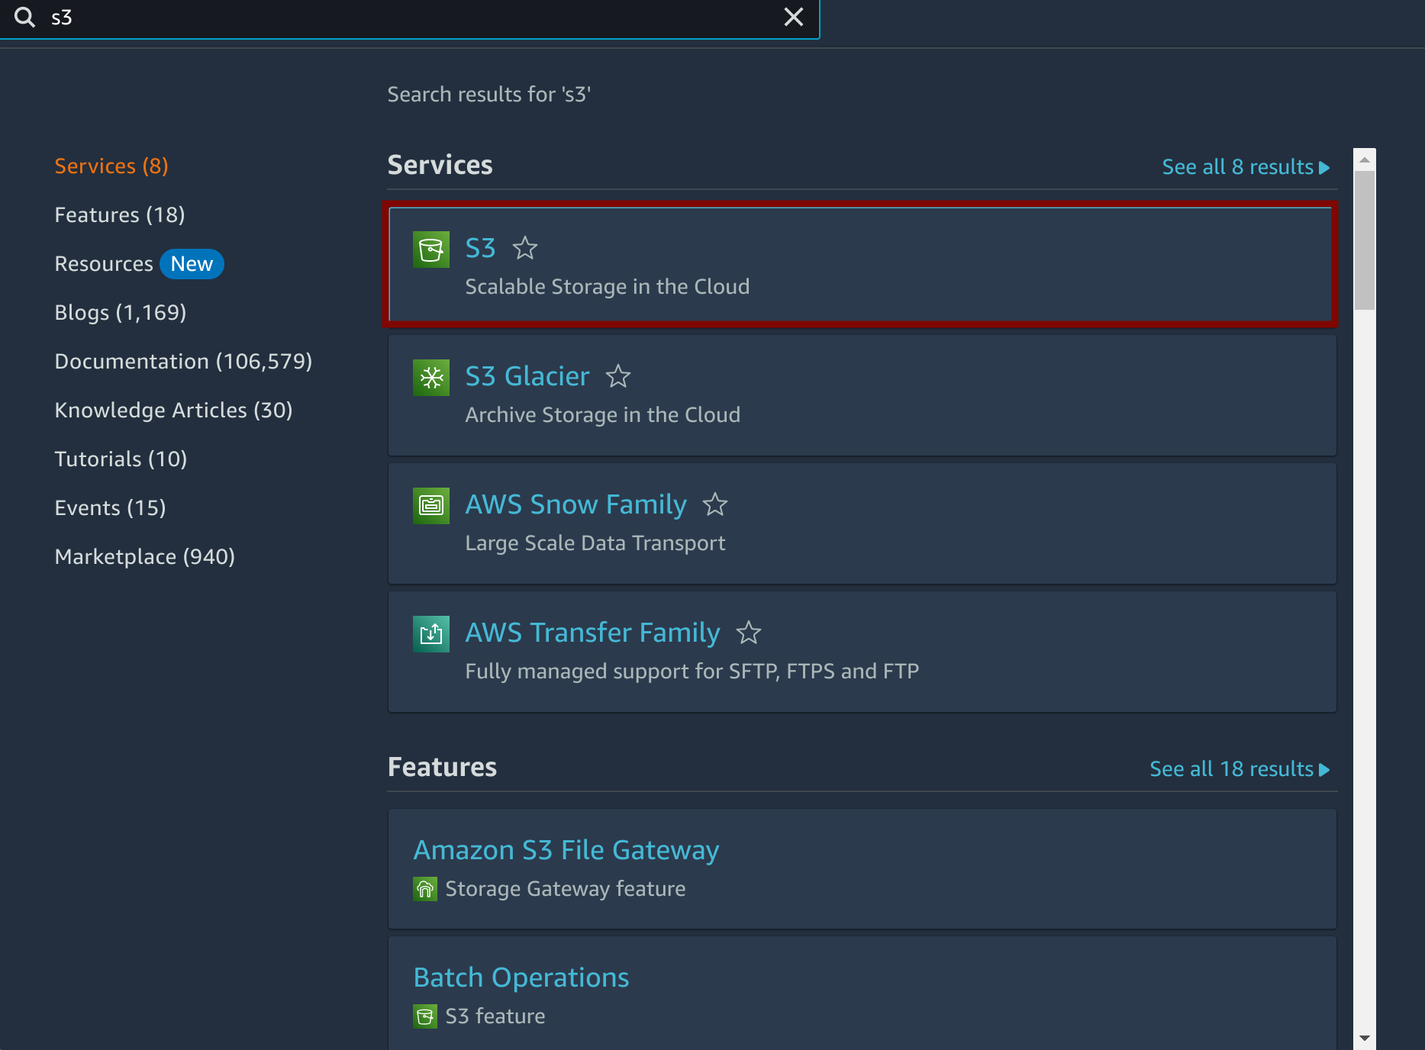
You should see a screen containing your application, its region, and the date it was created.
Finally, if you click on it, you will see all the other details for your application and its resources.
Automate Deployment to Elastic Beanstalk with GitHub Actions
GitHub Actions is a platform that allows you to perform CI/CD operations. Thus, other than the EB CLI, you can use GitHub Actions to create workflows to test, build and deploy your application to Elastic Beanstalk based on every commit on your GitHub repository. You can also set instructions to perform other checks with GitHub actions.
In your Dog-app directory, create a .github/workflows directory. This will contain your workflow files.
Next, create a file called eb.yaml and add these configuration settings:
name: Deploy React App from GitHub to AWS Elastic Beanstalk
on:
  # activates the workflow when there is a push on the master branch
  push:
    branches:
      - master
jobs:
  deploy:
    runs-on: ubuntu-latest # the operating system your job should run on
    strategy:
      matrix:
        node-version: [17.x]
    steps:
      - name: Checkout Latest Repo
        # checks out your repository under the GitHub workspace so that your workflow can access it
        uses: actions/checkout@v2

      - name: Generate Deployment Package
        # zip all files except .git
        run: zip -r deploy-dog-app.zip * -x "**.git**"

      - name: Get timestamp
        uses: gerred/actions/current-time@master
        id: current-time

      - name: Run string replace
        uses: frabert/replace-string-action@master
        id: format-time
        with:
          # replaces '[:\.]+' in the timestamp with '-'
          pattern: '[:\.]+'
          string: "${{ steps.current-time.outputs.time }}"
          replace-with: '-'
          flags: 'g'

      - name: Deploy to EB
        uses: einaregilsson/beanstalk-deploy@v21
        with:
         #  input the credentials you used to setup AWS CLI and credentials for the application environment
          aws_access_key: "${{ secrets.ACCESS_KEY }}"
          aws_secret_key: "${{ secrets.SECRET_ACCESS_KEY }}"
          application_name: react-app
          environment_name: react-app-dev
          version_label: "app-${{ steps.format-time.outputs.replaced }}"
          region: us-west-2
          deployment_package: deploy-dog-app.zip

      - name: Deployed!
        run: echo App deployed to ELB
There are a few things to note while deploying any application to AWS Elastic Beanstalk with GitHub Actions:
- First, you have to zip the application files so that they can be deployed to Elastic Beanstalk.
- Second, you need to create an IAM user and provide that user with AdministratorAccess-AWSElasticBeanstalk and AWSElasticBeanstalkReadOnly permissions.
- Third, you should only specify an existing
APPLICATION_NAMEandENVIRONMENT_NAMEthat was created either using the EB CLI or through the AWS Elastic Beanstalk management console.
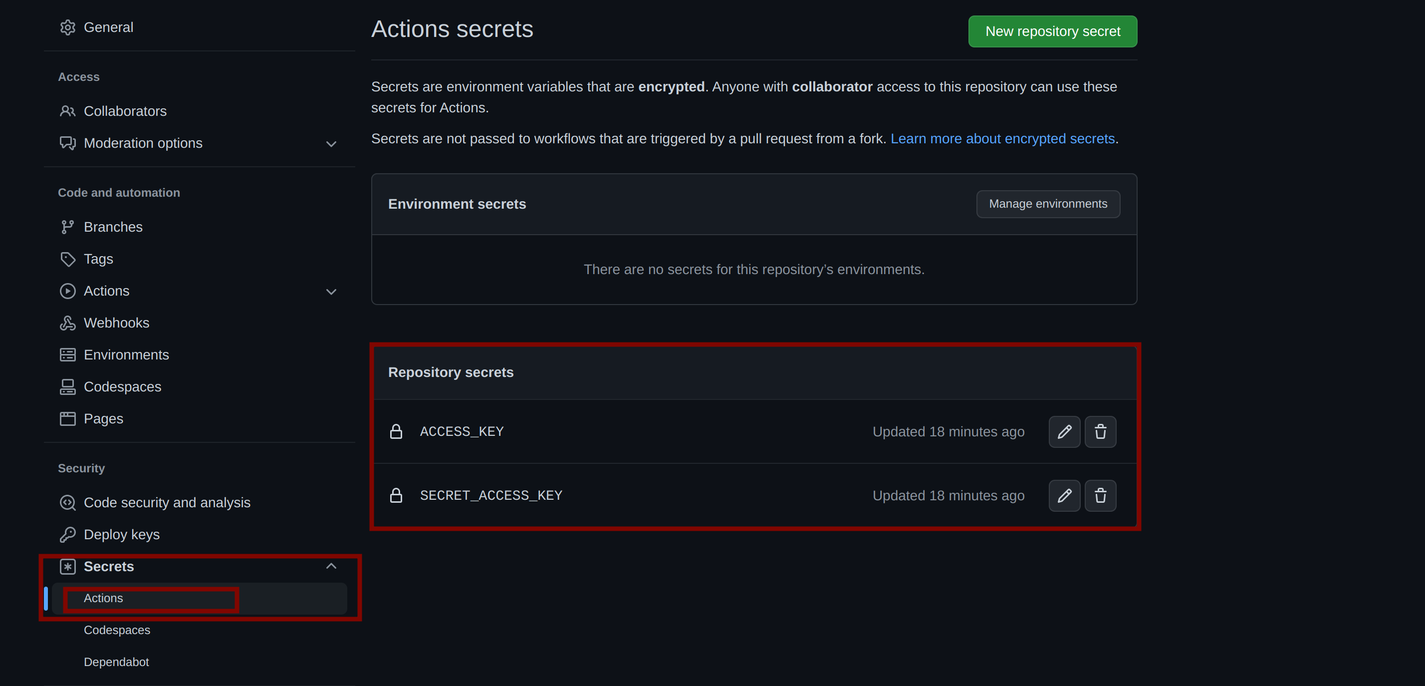
Now head over to your GitHub repository and add the ACCESS_KEY and SECRET_ACCESS_KEY for the IAM user as secrets in your repository.
Run the following commands to push your commits to trigger the GitHub workflow:
git add .
git commit -m 'Added GitHub workflow'
git push origin master
Head over to your Git repository, and then click on the “Actions” tab to see the status of your workflow. The yellow rolling icon beside the workflow run indicates that your workflow is in progress.
You’ll need to wait awhile for your workflow to complete its run successfully.
To check other details about your workflow and the jobs that succeeded, click on the workflow run, and you should see a list of jobs in the same order it was defined in your workflow file.
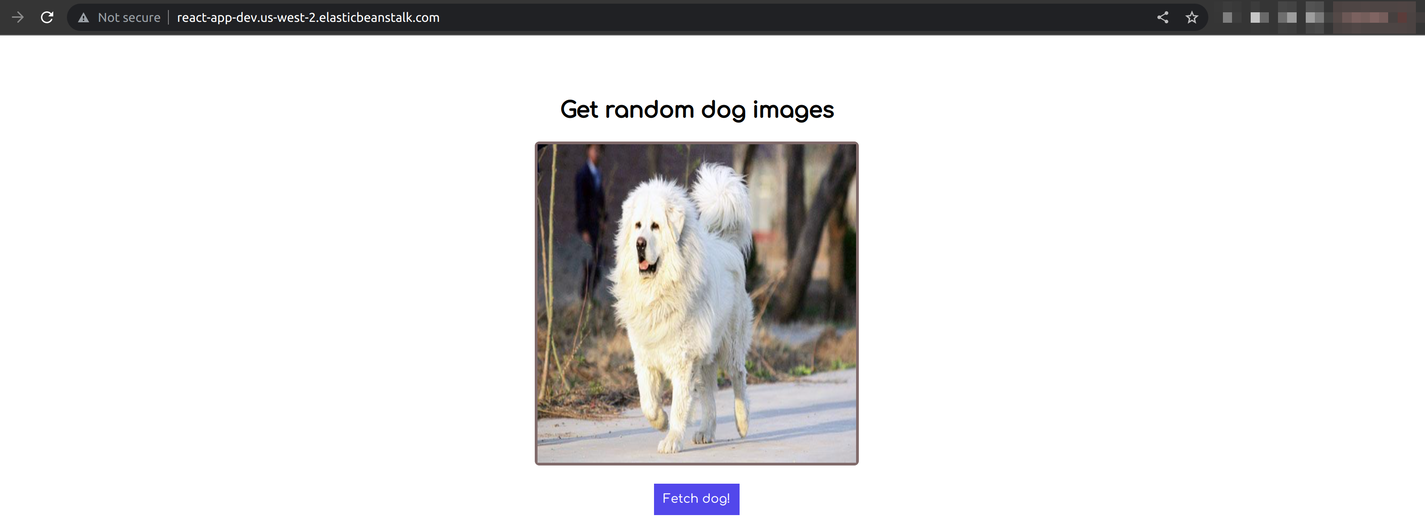
Run the command below to open up your deployed application:
eb open
You should see your React application (Dog-app) opened in your browser as shown below:
At this point, as you develop the React application and commit the changes to your GitHub repository, a new workflow is run, and your application is deployed automatically to AWS Elastic Beanstalk.
Conclusion
In this article, you have learned how to deploy a React (Dog-app) application to AWS Elastic Beanstalk. You have also learned how to use GitHub Actions to develop a workflow that automatically deploys every commit made on the Git repository housing your application to Elastic Beanstalk.
You can take this a step further by adding more steps to your GitHub Actions pipeline, such as testing and other checks.

Written by
Muhammed AliMuhammed is a Software Developer with a passion for technical writing and open source contribution. His areas of expertise are full-stack web development and DevOps.