Get more from your Python integration testing with Honeybadger
Integration testing is an essential part of development, ensuring applications can survive the rigors of deployment and function in the real world.
Getting the most out of them is key. It’s about making sure you write meaningful tests that ensure your code works as expected.
If you’re running integration tests in Python, you may appreciate better visibility and deeper insights into application errors. In this article, you’ll learn more about Python integration testing and see how Honeybadger can deliver the improvements you need and become a key part of your development cycle.
I'd encourage you to follow along with the code, and you're welcome to check out the final product on GitHub.
What is Python integration testing?
Integration testing is the process of seeing how the building blocks of your product or service fit together and ensuring everything works. While unit testing tests an individual piece of code, making sure individual components work, integration testing tests several together and makes sure they function correctly when interacting.
It’s testing at the larger scale. Instead of focusing on the details, you want to know what happens when the moving parts collide. The moving parts could be separate units of code developed within your organization, or they could be the services and data that your main application interacts with.
Examples of integration tests
One example of integration testing would be testing your stock market blog with a service that provides share values. It could be testing your catalog module with your shopping cart, or it could be testing that users are retrieved correctly from your database.
More specifically, it could include verification that services deliver the correct data. What happens if it is corrupted, delayed, or in the wrong format, without the required parameters? Are there any bottlenecks or resource issues when multiple components execute together?
For an integration test, you will need the required services or data sources available, though you can provide test data with mocks. Capturing all the interactions and then evaluating them in a meaningful manner is the challenge.
There are different types of integration testing, too. Big bang testing is when you test all the different components at once. Incremental testing is when you test separate modules and individual units against others, and this can be done in a top-down or bottom-up manner.
The importance of integration testing in Python
Integration testing ensures everything works together. Like all software testing, it helps you spot and fix issues before they make it into deployment. It detects errors and prevents costly failed deployments. It also helps you drive improvements by collecting performance metrics in a relatively stable environment.
Integration testing is unique in that it lets you test your product as a whole and ensure the whole system works correctly. There are often unforeseen errors when components interact. Predicting and responding to these errors is particularly difficult.
Though testing can seem a chore, the benefits are potentially extraordinarily high. Missing an issue that affects customers can mean a significant loss of revenue. Compare that to the costs of implementing a few simple tests, which can be ready in minutes.
Writing Python integration tests
Let’s take a look at an example. I’ll show you how to perform integration testing in Python. I’ll test the interactions between a Flask blog and an external service, in this case, a weather API that returns values after a simple call.
The tests use the Pytest framework with the Coverage module installed to list code coverage. These can be installed via pip install pytest coverage. You could just as easily use other testing frameworks. I’m using general testing tools rather than any dedicated Python integration testing framework.
Adding integration tests
The blog program I'm working with already includes some tests, broken down by class, but I’ll create a new test file for testing services, test_service.py.
Here’s a test that just looks to validate expected text in the JSON returned by a call to the weather API made by the get_weather endpoint. This test lets you verify the method works properly and returns something resembling the expected result.
def test_service(client):
    response = client.get("/get_weather")
    assert b"weather" in response.data
This goes in alongside existing tests, though in its own test class. When we run them in Pytest, it returns a list of what passes, along with a figure for the code coverage, like this:
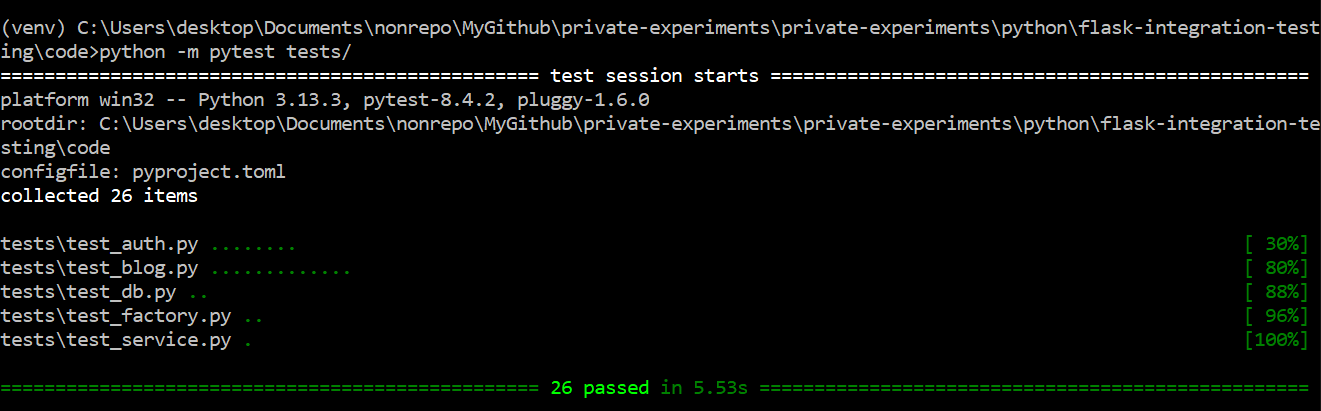 The Pytest output including a new integration test
You can see our new Python integration test in there, with all the tests passing in this case, along with the code coverage. I’ve managed to hit 100% coverage, which is a nice bonus and higher than for other test cases.
Now let’s add a negative test to be thorough.
def test_service(client):
    response = client.get("/get_weather")
    assert b"weather" in response.data
    assert not b"404" in response.data
It’s always nice to include a negative test when integration testing Python apps. This one checks there’s no “404” text in what’s returned.
You might think, great, now that’s testing sorted, we're all done! While in one sense you’d be right, you’d also be wrong. You can do more to support your app, and that’s where Honeybadger comes in.
How Honeybadger can complement your integration tests by catching what they don't
Testing is an imperfect art. It simply isn't possible to predict every problem that could occur. As anyone with testing experience knows, things can and do slip through the gaps. What would be useful is a tool that could spot the problems you miss.
The honeybadger is a small, but tenacious and brave mammal, famous on YouTube for taking on much bigger beasts. Similarly, the Honeybadger exception tracking tools are lightweight, but more than capable of facing down the daunting task of effective testing. Hunting the awkward bugs that your integration tests don't catch is a perfect task for it to sink its teeth into.
Sign up for a free Honeybadger developer account, and then install it with the following command:
pip install honeybadger
pip install blinker
In my case, Flask also requires the blinker library for automatic error reporting. If you need help, check out Honeybadger's Python documentation.
Then you can add it to your projects. Let’s look at how to add it to our earlier Flask project.
First, I import the FlaskHoneybadger class from the honeybadger package and add its config variables to the beginning of my __init__.py file, alongside existing code, like this:
import os

from flask import Flask
from honeybadger.contrib import FlaskHoneybadger

def create_app(test_config=None):
    """Create and configure an instance of the Flask application."""
    app = Flask(__name__, instance_relative_config=True)
    app.config.from_mapping(
        SECRET_KEY="foo",
        DATABASE=os.path.join(app.instance_path, "flaskr.sqlite"),

        HONEYBADGER_ENVIRONMENT = "production",
        HONEYBADGER_API_KEY = "hbp_YourKeyHere",
        HONEYBADGER_PARAMS_FILTERS = "password, secret, credit-card",
        HONEYBADGER_FORCE_REPORT_DATA = "true",
    )
    FlaskHoneybadger(app, report_exceptions=True, reset_context_after_request=True)
You’ll need to use your own HONEYBADGER_API_KEY, which you’ll get after registering on the site and creating your first Honeybadger project. I’ve also obscured my SECRET_KEY here.
If it’s working correctly, it should detect errors and report them both in the stack trace and the Honeybadger dashboard. When it detects its first error, it will show up on the install screen like this:
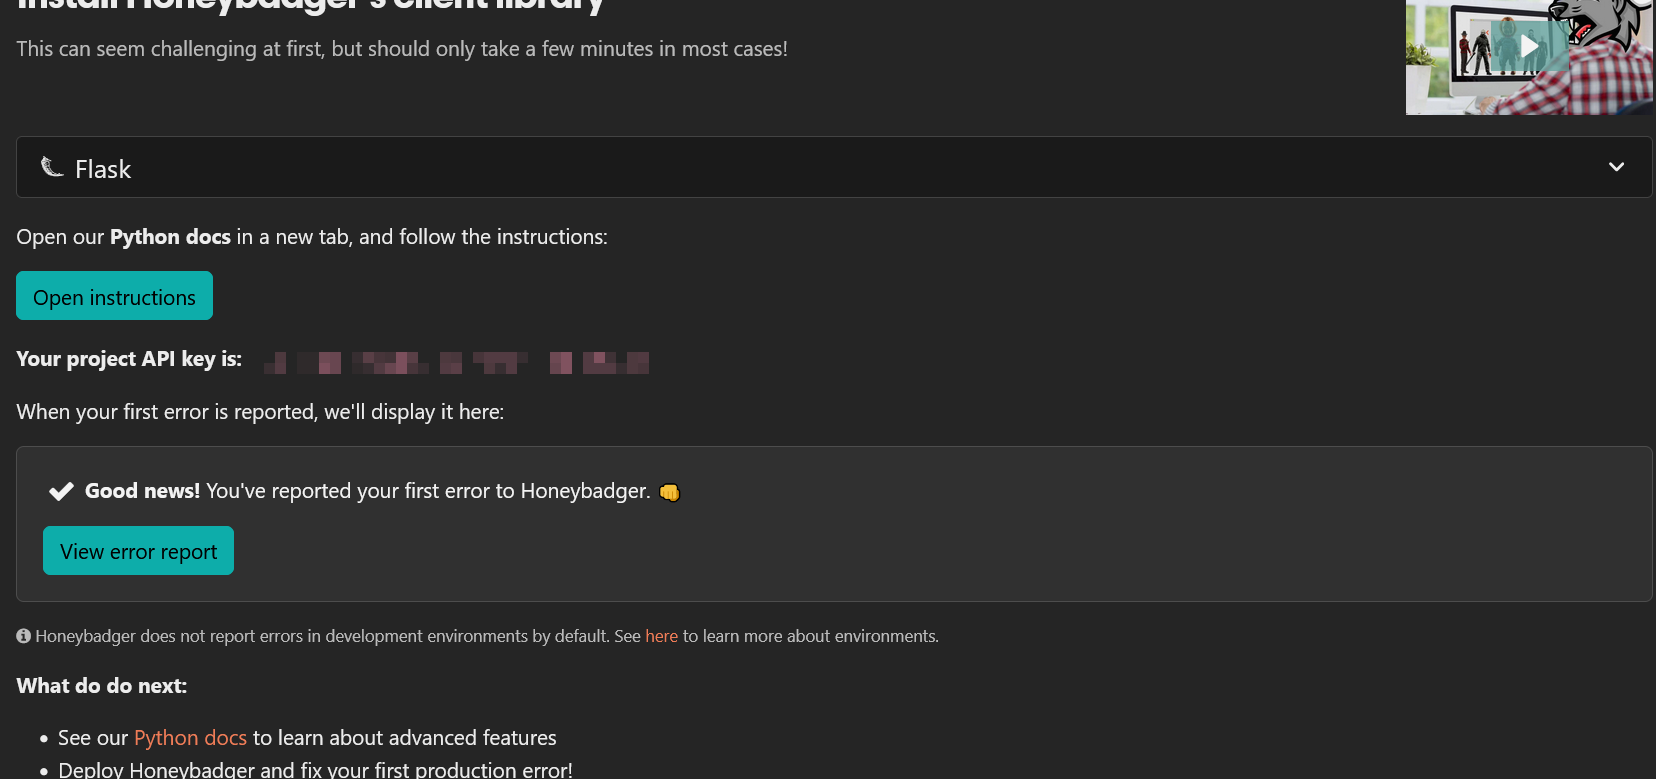 Honeybadger has found its first error
When you’re setting it up, you’ll want to create an error for it to spot. You can do that in several ways, perhaps by calling a bad URL, or by disabling one of your services, or, as in this case, by not importing Honeybadger when adding it to the services module.
Let’s see what Honeybadger can tell us about the error. Detecting the error is just the start. We want data, and that’s what Honeybadger gives us.
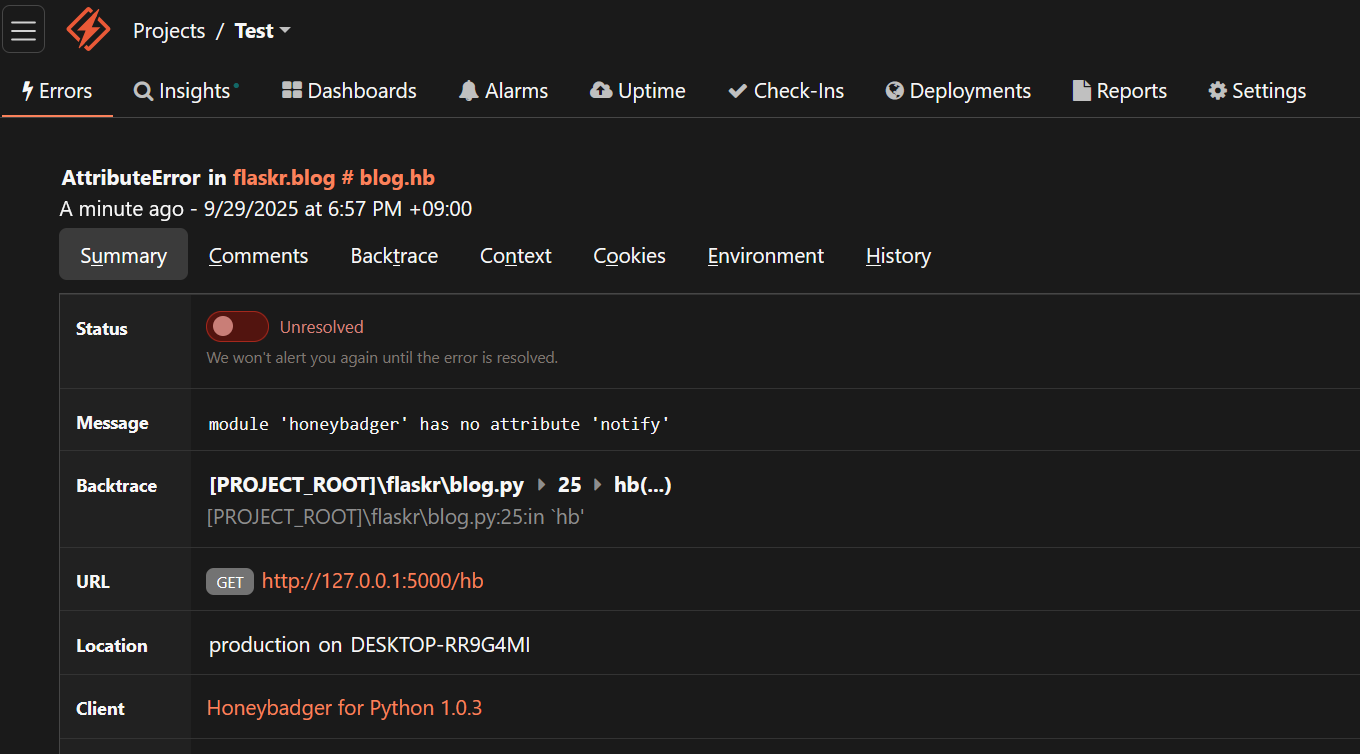 The top of Honeybadger’s error information display
In the screenshot, you can see Honeybadger has logged the URL that threw the error, along with a timestamp. There’s more, though. It also captures a full backtrace showing the line of code and surrounding method code, along with details of the application environment. You can also view a graph showing when and how many errors occur, along with details of any history associated with this particular issue.
There’s none of that history here, as this is a first-time issue, but for ongoing problems, Honeybadger lets you discover insights that can drastically improve your Python integration testing.
This issue was fixed by replacing from honeybadger import * with from honeybadger import honeybadger, so you might want to keep that in mind when setting up your own imports. Even when setting itself up, though, Honeybadger has helped us out, providing far more info than the standard Python error output.
As well as detecting errors throughout your calls, Honeybadger can also fire manual error notifications if you set them up in code using the honeybadger.notify method.
Here’s how that looks on an endpoint that calls a service:
from honeybadger import honeybadger

@bp.route("/get_weather")
def get_weather():

    url='https://api.openweathermap.org/data/2.5/weather?zip=95050&units=imperial&appid=YOUR_KEY_HERE'
    try:
        response = requests.get(url)
        return response.json()
    except requests.exceptions.RequestException as error:
        honeybadger.notify(error)
        print('error ', error)

    return jsonify({"error": "unexpected response", "message": "resource not found."}), 404
This code catches request errors and reports them to Honeybadger before returning an error message to the client. Other types of unhandled errors will be automatically reported to Honeybadger by the the FlaskHoneybadger extension we configured earlier.
You can also use honeybadger.notify to provide info if there’s something funny going on that doesn’t actually cause an error:
honeybadger.notify("Something bad happened!")
All of that happens independently of whatever other logging or detection code you have. It’s another arrow in your testing quiver.
As you can see, it’s easy to get Honeybadger working, and its features are very versatile. What's really useful is its ability to pick up errors that testing frameworks miss. There’s far more to Honeybadger than what I’ve done here, too. This is just a taste of its capabilities.
Hints and tips for getting the most out of integration tests
- Automate testing: Setting up your build pipeline to run tests automatically means you capture errors immediately and saves you from having to run them manually. It’s one of those low-investment, high-return actions you can take to improve your testing.
- Prevent regressions by adding tests: If Honeybadger unearths undiscovered issues, make sure to update your tests to catch the issues. That can prevent regressions.
- Use mocks at the right time: Real data sources and mocks both have their place. Mocks give consistent results, while real sources help detect real-world problems, capturing actual user behavior. Think about which is best to use when writing your tests. In some cases, using both can help.
- Vary the scope of tests: Because integration tests work at the highest level of software project organization, some developers assume they must be broad in scope. However, they can be more effective with a narrower scope. Narrower scoped tests run faster and can be deployed earlier.
- Check the data to learn the frequency and location of problems: Honeybadger’s metrics can help you figure out when and where errors are happening. If problems are happening at a particular time, or in a specific location, knowing that can help you figure out why.
How Honeybadger can help catch production errors your tests miss
- Configure automatic error tracking: Honeybadger monitors your Python apps for errors and alerts you via email, Slack, and other channels when things go wrong—making sure developers know about issues immediately.
- Take advantage of custom errors: Use
honeybadger.notifyto create your own errors, allowing you to capture information wherever you like—even if a standard error isn’t thrown. This is a useful tool when diagnosing problems.
Honeybadger works in harmony with your integration tests
Honeybadger adds a new layer of defense to your applications, complementing your Python integration testing by giving you visibility into problems your tests couldn't catch. It also gives you the information you need to fix the detected problems. It’s quick to get running and great value, making a real difference and putting you in control of your tests.
As well as being the perfect exception tracking tool for Python projects, it provides considerable power, and a host of metrics. If you want to complement your integration tests, sign up for a free trial of Honeybadger.

Written by
James KonikUncertain if he's a coder who writes or a writer who codes, James tries to funnel as much of this existential tension as possible into both of his crafts. When he occasionally hops out from behind his keyboard, you can find him jogging and cycling around suburban Japan.