All applications need some sort of check or permission that controls what each user can do and determine whether the user is authenticated. In this article, you will learn how to set up multiple user roles, as well as how user permissions can be set depending on the user role. Furthermore, I will illustrate how to use Django’s built-in Users and Groups to apply permissions to multiple users. While a lot of articles only cover user permissions and the default Django user permissions, I will take it a step further by building an application with different user roles and then set permissions based on the role of the user.
Prerequisites
To follow this article, the following are required:
- Prior working knowledge of Django and Python
- Python 3.7 or higher versions installed
Working with Django’s Built-in Permissions
By default, Django provides a built-in authorization (permissions). This feature enables you to define what actions each user is permitted to perform. The framework includes built-in models for Users and Groups, which are used to provide permissions to a group of users, permissions/flags that designate whether a user may perform a task, view tools for restricting content, etc. When django.contrib.auth is listed in your INSTALLED_APPS, it will provide the four default permissions – add, change, delete, and the view for each model.
Now, let's assume you have a project with an app product and a model Order. To test which users have basic permissions, you can use the following code.
python manage.py shell
user = User.objects.first()
- add:
user.has_perm('product.add_order') - change:
user.has_perm('product.change_order') - delete:
user.has_perm('product.delete_order') - view:
user.has_perm('product.view_order')Adding permissions to restrict a function to only users that have that particular permission can be done by using a Django built-in decorator,permission_required.
from django.contrib.auth.decorators import permission_required

@permission_required('product.change_name')
def admin_view(request):
    """Raise permission denied exception or redirect user"""
If you are using a class-based view, you just need to use a mixin, PermissionRequiredMixin:
from django.contrib.auth.mixins import PermissionRequiredMixin
from django.views.generic import ListView

class ProductListView(PermissionRequiredMixin, ListView):
    permission_required = 'product.change_name'
How to add Custom Permissions to Models
If permissions are not stated in the views, you can specify them in your models. Attaching permissions is done on the model's class Meta using the permissions field. You will be able to specify as many permissions as you need, but it must be in a tuple. For example, you might define a permission to allow a user to change the name of a product like this:
from django.db import models

class Product(models.Model):
    user = models.ForeignKey(User)
    class Meta:
        permissions = (("change_name", "can change name of product"),)
To implement the changes, run python manage.py makemigrations and migrate.
How to Add Custom Permissions to Templates
The user's permissions can be retrieved by calling {{ perms }} in the template. To check if a particular user has permission to view the template, all you have to do is get perms from the particular model holding the permissions. It should look like this:
{{ perms.<name_of_app>.<permission>}} e.g., {{ perms.app.change_name }} .
With an if statement, you can add a permission to specific portions of your template.
{% if perms.app.change_name %}
<p>can change name of product</p>

{% endif %}
By doing this, only users with change_name permission can use that particular section of the template.
How to add Custom Permissions to Views
Just like when you were working with the built-in Django permissions, you can also add custom permissions to views by using the permission_required decorator or, in a class-based view, using the PermissionRequiredMixin. For function-based views:
from django.contrib.auth.decorators import permission_required

@permission_required('app.change_name')
def the_view(request):
    ...
For class-based views:
from django.contrib.auth.mixins import PermissionRequiredMixin

class MyView(PermissionRequiredMixin, View):
    permission_required = 'app.change_name'
    # Or multiple permissions
    permission_required = ('app.change_name', 'app.edit_name')
    # Note that 'catalog.can_edit' is just an example, you can replace it with
    # whatever permissions you have created
Note
If a user is not permitted to access a view and they try to access it, PermissionRequiredMixin and @permission_required act differently. @permission_required redirects to the login screen, PermissionRequiredMixin returns HTTP 403 (Status Forbidden) if a user is logged in but does not have the correct permission.
The PermissionRequiredMixin default behavior is optimal when building apps. To duplicate this behavior in function-based views, you will have to add the @login_required decorator and apply @permission_required with raise_exception=True. This is how it will look:
from django.contrib.auth.decorators import login_required, permission_required

@login_required
@permission_required('app.change_name', raise_exception=True)
def the_view(request):
    ...
Add Permissions to Multiple User Types
Usually, when you are implementing multiple user types, you'll need to make sure each user type has some restrictions. For example, if you are building an assignment application where the teacher can set questions and students can only answer questions. In this case, you must set the permission system in such a way that students will not have the option to set questions. To illustrate this, let's assume you are trying to build an application where an authenticated teacher can create assignments and authenticated students can answer questions.
Assuming our models.py file looks like this:
from django.contrib.auth.models import AbstractUser
from django.db import models

**class** **User**(AbstractUser):
    is_student **=** models**.**BooleanField(default**=**False)
    is_teacher **=** models**.**BooleanField(default**=**False)

**class** **Student**(models**.**Model):
    user **=** models**.**OneToOneField(User, on_delete**=**models**.**CASCADE, primary_key**=**True)
    subjects **=** models**.**ManyToManyField(Subject, related_name**=**'subject')
To handle permissions for these different users, you need to create a custom decorator of your own.
# decorator.py

from django.contrib.auth import REDIRECT_FIELD_NAME
from django.contrib.auth.decorators import user_passes_test

def for_students(function=None, redirect_field_name=REDIRECT_FIELD_NAME, login_url='login'):
    '''
    A decorator to check logged in user could be a student and redirects to the login page if the user isn't authenticated.
    '''
    actual_decorator = user_passes_test(
        lambda u: u.is_active and u.is_student,
        login_url=login_url,
        redirect_field_name=redirect_field_name
    )
    if function:
        return actual_decorator(function)
    return actual_decorator

def for_teachers(function=None, redirect_field_name=REDIRECT_FIELD_NAME, login_url='login'):
    '''
    A decorator to check whether the logged-in user is a teacher and
    redirect to the login page if the user is not authenticated.
    '''
    actual_decorator = user_passes_test(
        lambda u: u.is_active and u.is_teacher,
        login_url=login_url,
        redirect_field_name=redirect_field_name
    )
    if function:
        return actual_decorator(function)
    return actual_decorator-
Now, to use them in the views, all you need to do is call it as you did previously. It should look like this:
# views.py
from django.contrib.auth.decorators import login_required
from django.shortcuts import get_object_or_404
from .decorators import for_students, for_teachers
from .models import Assignment #this is an assumption

@login_required
@student_required  # <-- here is the decorator
def answer_assignment(request, pk):
    quiz = get_object_or_404(Assignment, pk=pk)
    student = request.user.student

    # body of the view...
If you are using class-based views, your view will look like this:
from django.utils.decorators import method_decorator
from django.contrib.auth.decorators import login_required
from .decorators import for_students

@method_decorator([login_required, student_required], name='dispatch')
class AnswerAssignment(CreateView):

    # body of the view...
Add Permissions to a Group
Thankfully, Django makes it very easy to create groups with the admin panel provided by default.
This section will contain an illustration of how you can potentially add permissions to groups in your application. Let's assume you are building a website that provides real estate suggestions, and if a user is subscribed to "Tier 1", they can view 3 suggestions, and "Tier 2" can view 6 suggestions.
With the above in mind, your models.py file will look like this:
from django.contrib.auth.models import AbstractUser
from django.db import models


class User(AbstractUser):
    first_name = models.CharField(blank = True, max_length = 20)
    last_name = models.CharField(blank = True, max_length = 20)
    # You can add more User fields as required

    # define the custom permissions
    # related to User.
    class Meta:
        permissions = (("tier_1", "Can view 3 suggestions"), ("tier_2", "Can view 6 suggestions"),
        # You can add other custom permissions as required
        )
If you are using AbstractUser in Django, you must add AUTH_USER_MODEL = 'YourAppName.YourClassName' . This way, you are telling Django to use our custom user model instead of the default one.
The code below should go in your admin.py file so that you can see your user model.
from django.contrib import admin
from .models import User

admin.site.register(User)
To implement the changes, run $ python manage.py makemigrations and $ python manage.py migrate.
Next, you will create a superuser that you will use to create the groups.
To do this, run $ python3 manage.py createsuperuser and fill in the necessary details.
Now, run your server with $ python manage.py runserver and head to the admin and login with the user details you just created.
This is what you should see after logging in:
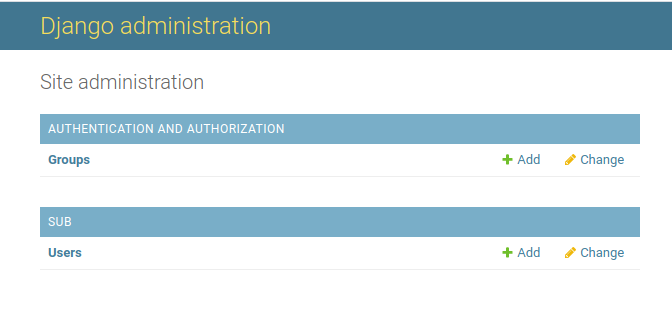 What you will do next is click on the "+ Add" button on the "Groups" row.
You will be prompted with a form that looks like this:
What you will do next is click on the "+ Add" button on the "Groups" row.
You will be prompted with a form that looks like this:
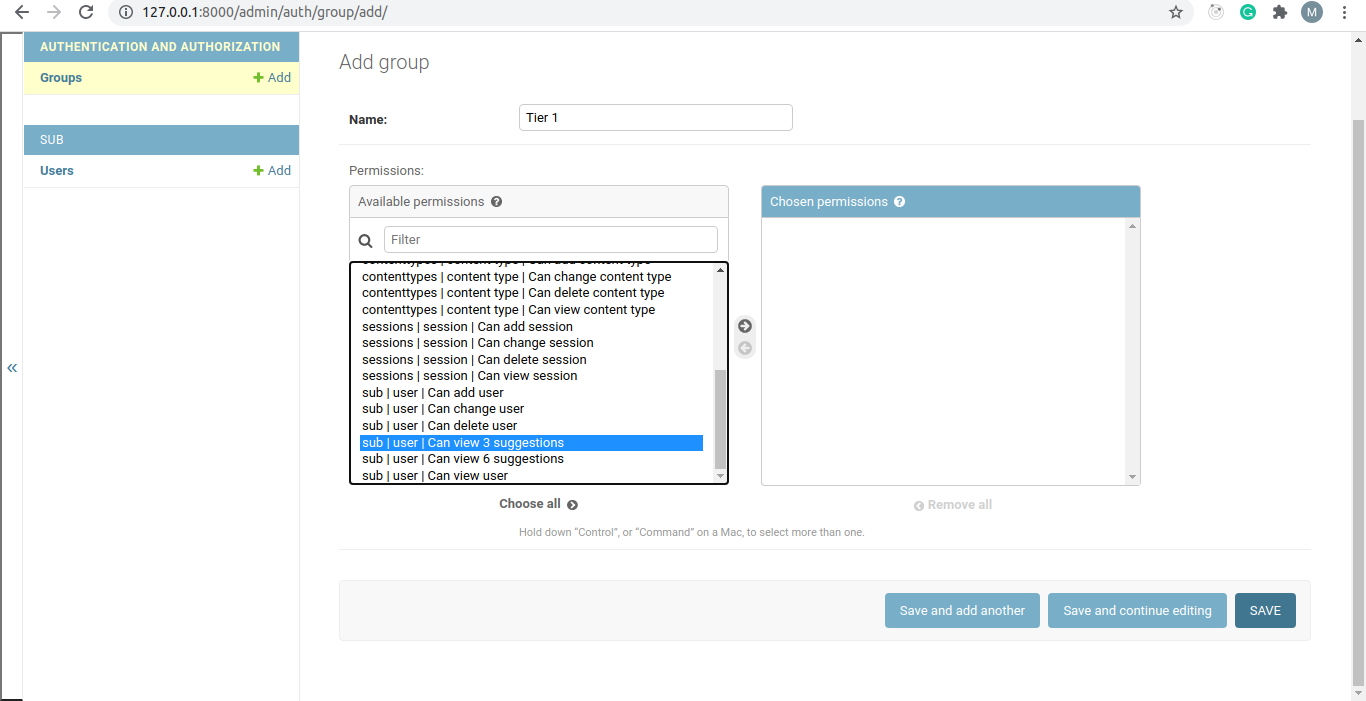
You will see that you can select various permissions and attach them to a particular group.
Conclusion
This article's aim was to take you from not knowing how to manage permissions in Django applications to showing you the different ways in which you can manipulate and manage permissions when building Django applications. Hopefully, I was able to do that. With this article, you should have learned how to add permissions to views, models, and templates. I also showed how you can potentially create your own custom permission. Finally, I was able to show how to add permissions to groups using the Django admin panel. Now that you have learned all these, hopefully you will be able to start implementing the knowledge in your future Django projects.


