Building a Sinatra app in Ruby
Sinatra is a lightweight web application framework written in Ruby. It provides a simple and easy-to-use syntax for building web applications. The framework focuses on being minimalistic, allowing developers to quickly create web applications without having to deal with a lot of the boilerplate code and relatively rigid way of doing things that accompany larger and more popular frameworks like Rails.
In this article, we'll use the Sinatra framework to build a simple URL-shortening app where a user can input a long URL and generate a short URL that redirects to the original URL when clicked. The app will also have a feature for keeping track of how many times a shortened URL is clicked.
Takeaways
By following this tutorial, you'll learn the following:
- What Sinatra is and why you should use it
- How to leverage its powerful routing features
- How to work with a database
- How to Add views.
Pre-requisites
To follow along with this tutorial, it's necessary to have the following:
- Ruby installed on your development environment. Head here in case you don't have it installed and need a step-by-step guide. We'll be using Ruby 3.2.2 for this tutorial.
- A Sinatra installation. If you don't have Sinatra installed, don't worry; we'll cover this in this tutorial.
- Some basic experience with using Ruby.
Now, let's get started by understanding why we need Sinatra in the first place.
Why Sinatra?
With such full-featured Ruby frameworks as Ruby on Rails around, you might be wondering why anything else would be needed for your app development needs. Although Rails can handle almost anything you could throw at it, there are instances where having something else makes a lot of sense. Specifically, Sinatra is a great choice for app development because:
-
It's lightweight: Sinatra has very minimal dependencies, which makes it very lightweight compared to something like Rails. This makes it an easy framework to wrap your head around and allows you to have more control over how you architect your app’s structure.
-
It has powerful routing features: Sinatra’s routing system is flexible and expressive, allowing you to easily define handlers for common HTTP verbs, such as GET, POST, PUT, and DELETE. With Sinatra, you can also define custom and dynamic routes using route patterns, named parameters, and route segments, which can help you build powerful web applications, especially microservices and RESTful APIs.
-
It's modular: Sinatra is designed to be very simple and minimalistic. However, the framework follows a modular design, which allows you to pick and choose the components that meet your specific needs. If you need features like authentication and session management, Sinatra supports middleware that will take care of these and more. This allows for extreme developer flexibility that a more popular framework like Ruby on Rails might not give you.
-
It leverages the extensive Ruby ecosystem: As a Ruby framework, Sinatra seamlessly integrates with Ruby’s large and vibrant ecosystem. You can leverage the extensive Ruby gem library to obtain gems for almost anything you can think of instead of building from scratch. When you hit a roadblock in your app development journey, the Ruby community will be there to help.
Of course, there's more to Sinatra than the features we've highlighted here, but these will suffice for now. Next, let's go over the app we'll be building using the framework.
An overview of the app we'll be building
Our goal is to build a simple URL-shortening app using Sinatra. However, it makes a lot of sense to have an overview of the app's functionality since this will guide us on the build process. First, we should understand how URL shortening works, which we will cover next.
How URL shortening works
Generally speaking, URL shorteners work as outlined below:
- The user enters a long URL, such as 'https://www.this-is-a-long-url-example.com'.
- The app generates a random string, which is appended to a base URL and then associated with the long URL entered by the user, such as 'https://localhost/hn78JH'.
- Then, both the long URL and it's shortened counterpart are saved to the app's database.
- When a website visitor clicks the shortened URL, they are redirected to the original long URL. An optional visits counter can be attached to this flow so that it's incremented automatically with each visit.
Now that we know how the URL-shortening process works, let's kickstart our build.
Quick note: The full app code repo is available here.
Building a URL shortener using Sinatra
We will progressively build our URL-shortening app following the outline we discussed in the previous section on how URL shortening works.
Let's begin by installing the Sinatra gem, but first, it's important that we explain a very important concept that will determine how we build the app: modular vs. classical Sinatra apps.
Modular vs. classical app structure
When it comes to building Sinatra apps, you can go one of two ways: classical or modular. Without going into too many details, classical apps are structured in such a way that all app functionality lives within a single file. Modular apps feature different levels of abstraction, but more importantly, the main application (or applications since they can be more than one) is sub-classed from Sinatra::Base. You can read more on this here. While it is possible to build sophisticated apps using the classical approach, we'll go the modular route for the URL-shortener app.
Installing Sinatra and initializing the project
Installing Sinatra is as simple as running the command gem install sinatra. Then, create a new directory in an appropriate local folder to hold the project files:
mkdir sinatra_url_shortener
Now let's cd into the newly created app directory and create a basic starter file:
cd sinatra_url_shortener && touch app.rb
Next, open the project in your favorite editor and modify app.rb as shown below:
# app.rb

require 'sinatra'

get '/' do
  'Sinatra rocks!'
end
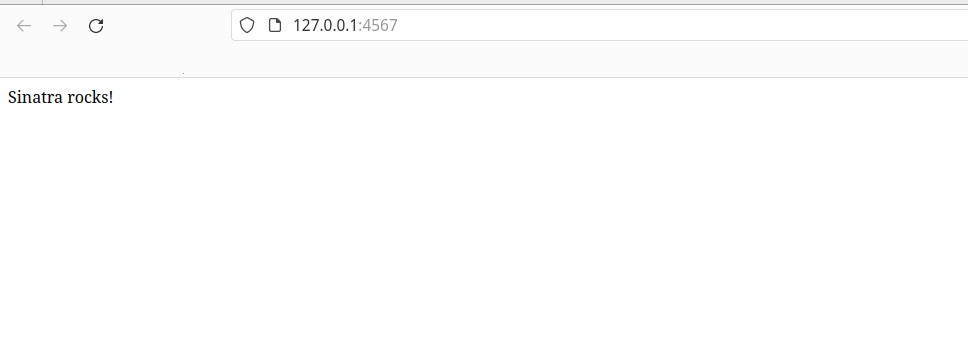
The code above is a very simple Sinatra app composed of a single file with a require statement to include Sinatra and a simple route definition telling the app to respond with the text "Sinatra rocks!" when someone hits the home or root page.
Assuming you're still in the project's root, run the script with the ruby app.rb command and then visit http://127.0.0.1:4567/ to see a Sinatra app running:
Of course, this is a far cry from the vision we have for our app, but it's a great start. Next, let's continue the build by adding a Gemfile and some configuration files.
Adding a Gemfile, Rack configuration and Rakefile
Since our goal is to build a modular Sinatra app with proper abstractions in place, let's continue the build by adding a Gemfile to hold the app's gem dependencies in a separate, dedicated file. We'll also need a Rack configuration file, config.ru, which will define how the app will be run:
# Gemfile

source 'https://rubygems.org'

gem 'dotenv'
gem 'json'
gem 'pry'
gem 'rake'
gem 'sassc'
gem 'sinatra'
gem 'sinatra-activerecord'
gem 'sinatra-contrib'
gem 'sinatra-static-assets'

group :development do
  gem 'foreman'
  gem 'rubocop'
  gem 'sqlite3', '~> 1.3', '>= 1.3.11'
end

group :test do
  gem 'rack-test'
  gem 'rspec', require: 'spec'
end

group :production do
  gem 'pg'
end
We won't go into the details of what each gem does, but we’ll highlight a few important ones:
sinatra- because we are building a Sinatra application.sinatra-activerecord- since we'll be using Active Record as the ORM wrapper around the app's database.sinatra-contrib- which will handle automatic app reloading in development since Sinatra does not come with this functionality by default.rake- to help us run app-specific tasks, such asrake db:createin the command line.rack-testandrspec- for testing purposes.sassc- to use SCSS stylesheets and compile them into CSS (We'll use this later to style our app a bit).json- useful for working with the JSON data format, including returning JSON data via API endpoints.
Next, add a Rakefile in the app's root and edit it as follows:
# Rakefile

require 'sinatra'
require './app'
...

run App
Finally, for this section, we'll need to modify the app.rb file as shown below:
# app.rb
require 'sinatra'
require 'sinatra/reloader'
require 'sinatra/activerecord'
require './helpers'
require 'securerandom'

class App < Sinatra::Base
  configure do
    set :json_encoder, :to_json
    set :erb, layout: :layout
  end

  before do
    headers['Access-Control-Allow-Methods'] = 'GET, POST, PUT, DELETE, OPTIONS'
    headers['Access-Control-Allow-Origin'] = '*'
    headers['Access-Control-Allow-Headers'] = 'accept, authorization, origin'
  end

  options '*' do
    response.headers['Allow'] = 'HEAD,GET,PUT,DELETE,OPTIONS,POST'
    response.headers['Access-Control-Allow-Headers'] =
      'X-Requested-With, X-HTTP-Method-Override, Content-Type, Cache-Control, Accept'
  end

  get '/' do
    erb :index
  end
end
In brief, here's what we've just defined:
configureblock - We set the JSON encoder and a layout file that will be used by the app's views (similar to theapplication.html.erblayout file in a Rails app).beforeandoptionsblocks - These are generally called filter blocks, and we use them here to define some headers.- Finally, we define a root route that uses a view file,
index.erb, which we'll get into a bit later.
Next, let's work on the app's database and the Link model.
Adding a database connection and Active Record model
In development, using SQLite gives us an easy-to-use file-based database that will suffice for our simple URL-shortening service.
To define the database connection, first create a folder called config in the app's root. Then, inside it, create two files: application.rb and database.yml.
Let's edit application.rb as shown below:
# config/application.rb

require 'active_record'
require 'sqlite3'
require 'yaml'

config_path = File.join(__dir__, 'database.yml')
ActiveRecord::Base.configurations = YAML.load_file(config_path)
ActiveRecord::Base.establish_connection(:development)

# Loads all models
Dir["#{__dir__}/../models/*.rb"].each { |file| require file }
Then the database.yml:
# config/database.yml

development:
  adapter: sqlite3
  database: db/app.sqlite3

production:
  adapter: postgresql
  encoding: unicode
  pool: 5
  host: <%= ENV['DATABASE_HOST'] %>
  database: <%= ENV['DATABASE_NAME'] %>
  username: <%= ENV['DATABASE_USER'] %>
  password: <%= ENV['DATABASE_PASSWORD'] %>
To finish this section, run bundle exec rake db:create to create an SQLite database under the db folder in the app's root.
Next, let's work on the URL model.
Defining the ShortLink model and Active Record migration
Let's start with the migration to create the short_links table. In the terminal in the app's root, run the following command:
bundle exec rake db:create_migration NAME=create_short_links
This will create a migration file under db/migrate, which we need to edit as follows:
# db/migrate/XXXXX_create_short_links.rb

class CreateShortLinks < ActiveRecord::Migration[7.0]
  def change
    create_table :short_links do |t|
      t.string :short_url
      t.string :long_url
      t.integer :visits, default: 0

      t.timestamps
    end
    add_index :short_links, %i[short_url long_url]
  end
end
Then, run bundle exec rake db:migrate, which will create the short_links table in the database. Let's now turn our attention to the model.
Create a new file, models/short_link.rb, and edit it accordingly:
# models/short_link.rb

# frozen_string_literal: true
class ShortLink < ActiveRecord::Base
  validates :short_url, presence: true
  validates :long_url, presence: true
end
We won't add any URL validation rules, but this would be a good challenge to test your Ruby skills, right? Go ahead and add such a rule and see how it works out for you. In the meantime, your app structure should look like this:
.
├── app.rb
├── config
│   ├── application.rb
│   └── database.yml
├── config.ru
├── db
│   ├── app.sqlite3
│   ├── migrate
│   │   └── XXXXXXXXXXX_create_short_links.rb
│   └── schema.rb
├── Gemfile
├── Gemfile.lock
├── helpers.rb
├── models
│   └── short_link.rb
├── public
│   └── css
├── Rakefile
├── stylesheets
│   └── style.scss
└── views
Working with Sinatra views
For us to work with the URLs, we'll need a view with a form in it that allows a user to input a long URL and have a short version generated once they submit the form. First, we need to add(or modify) the relevant routes to app.rb:
# app.rb

...

class App < Sinatra::Base
  ...

  get '/' do
    @link = ShortLink.new

    erb :index
  end

  post '/links' do
    generated_string = SecureRandom.alphanumeric(12)

    link = ShortLink.create(
      long_url: params[:long_url],
      short_url: generated_string
    )

    link = ShortLink.create(
      long_url: params[:long_url],
      short_url: short_url_string
    )

    redirect to("/show/#{link.id}")
  end

  get '/show/:id' do
    @link = ShortLink.find(params[:id])

    erb :show
  end

  get '/links/:short_url' do
    @link = ShortLink.find(params[:short_url])
    link_visits = @link.visits.to_i
    @link.update(visits: link_visits + 1)

    redirect to("http://localhost:9292/#{link.long_url}")
  end

  ...

end
Let's break down what's going on. Beginning with the root route, we define an instance variable called @link, which we'll use in the form in the view. We also define a POST route, which deals with creating the ShortLink model and saving the data to the database and then uses the redirect to helper to redirect to the created ShortLink show view.
A point of note is that we use Ruby's SecureRandom to generate a string to represent our short URL string. There are many ways to generate unique strings in Ruby, so take some time to explore other options and use the one that works best for you.
Next, under the views folder, create two files: index.erb and layout.erb. Start with the layout file and edit it with a simple ERB boilerplate as shown below:
<!-- views/layout.erb -->

<!DOCTYPE html>
<html lang="en">
<head>
  <meta charset="UTF-8">
  <meta name="viewport" content="width=device-width, initial-scale=1.0">
  <meta http-equiv="X-UA-Compatible" content="ie=edge">
  <title>Sinatra URL Shortener App</title>
</head>
<body>
  <%= yield %>
</body>
</html>
Notice the use of the <%= yield %> statement like the one used in a Rails app layout; it will render any dynamic content we have.
Next, open the index.erb file and edit it as shown below:
<section class="section is-primary">
  <div class="container">
    <div class="box">
      <h1 class="title is-2">Create Short URL</h1>
      <form action="/links" method="POST">
        <div class="field">
          <label class="label">Name</label>
          <div class="control">
            <input type="text" name="short_link[long_url]" value="#{@link.long_url}" class="input">
          </div>
        </div>
        <div class="field">
          <div class="control">
            <input type="submit" value="Save Link" class="button is-link">
          </div>
        </div>
      </form>
    </div>
  </div>
</section>
Note: We are using Bulma styles here, but you can use whatever you like for styling your app.
Next, we need a view template to render show view. Create a new file, show.erb, under the views folder and edit it as shown below:
<!-- views/show.erb -->

<section class="section">
  <div class="container">
    <h2>Short Link Details</h2>
    <p>Long URL: <%= @link.long_url %></p>
    <p>Short URL: <%= @link.short_url %></p>
    <p>No. of visits: <%= @link.visits %></p>
  </div>
</section>
Running the app
At this point, you have a functioning app that takes a long URL and generates a shortened URL string version. You can run the app using the command rackup in the terminal and visit http://localhost:9292/ to see the app running:
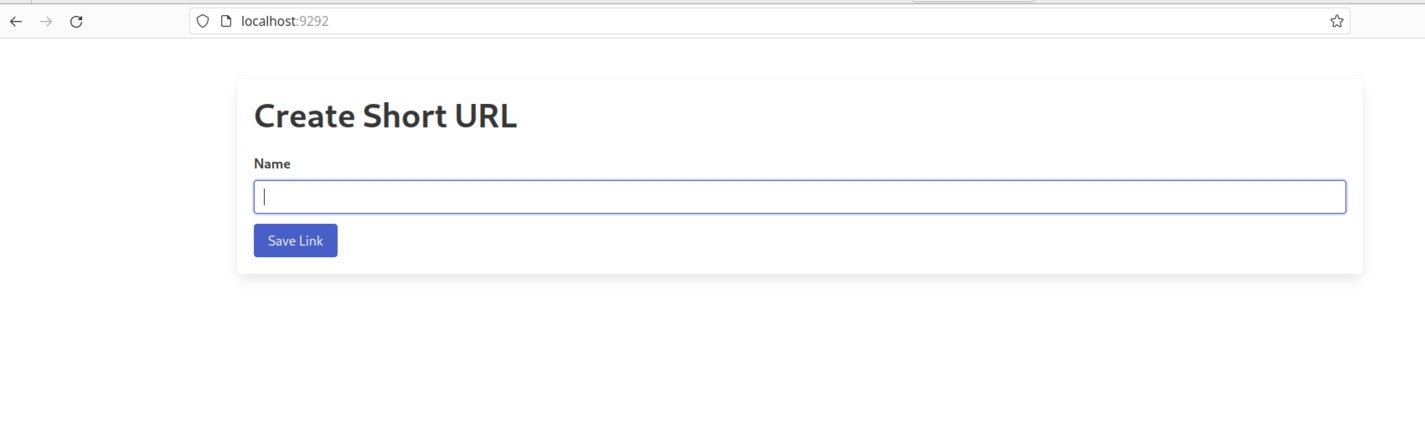
Create a few links; then, try to visit the shortened URL version and see how the redirect happens.
Wrapping up and next steps
In this tutorial, we have learned how to build a simple URL-shortening app using Sinatra. As you've seen, Sinatra is a very powerful Ruby framework that can be used to build all sorts of apps. However, it is especially suited for micro-services and APIs. With the lessons you've learned as while following the tutorial, challenge yourself to build something even more exciting.
Happy coding!

Written by
Aestimo KirinaAestimo is a family guy, Ruby developer, and SaaS enterpreneur. In his free time, he enjoys playing with his kids and spending time outdoors enjoying the sun, running, hiking, or camping.