Hanami is a full-stack Ruby web framework that's been around for over a decade. The Hanami team recently released version 2.1 which now includes everything you need to build a full stack application including a view layer and frontend asset support. Unlike Rails, which has many default assumptions about how an app should be built, Hanami promises developer freedom by not imposing too many such defaults.
The framework is also blazingly fast due to its low memory footprint and focus on minimalism. Combine that with a focus on strict abstractions, and you get a fully-featured Ruby framework that could rival Rails for building some applications, such as APIs and micro-services.
In this tutorial, we'll learn about the framework's structure and features as we go through the steps of building a simple blog application.
Let's get started.
Prerequisites
In order to follow along with this tutorial, ensure you have the following ready to go:
- Ruby 3.0+ installed in your development environment.
- A local installation of Postgresql
That's it.
Installing Hanami and generating a new application
Hanami can be installed by running the command:
gem install hanami
Next, generate a new Hanami app with the command below:
hanami new hanami_blog_app
This should give you an app directory structure like the one shown below (the node_modules directory is omitted to keep things simple):
tree -I 'node_modules'
.
├── app
│   ├── action.rb
│   ├── actions
│   ├── assets
│   │   ├── css
│   │   │   └── app.css
│   │   ├── images
│   │   │   └── favicon.ico
│   │   └── js
│   │       └── app.js
│   ├── templates
│   │   └── layouts
│   │       └── app.html.erb
│   ├── view.rb
│   └── views
│       └── helpers.rb
├── bin
│   └── dev
├── config
│   ├── app.rb
│   ├── assets.js
│   ├── puma.rb
│   ├── routes.rb
│   └── settings.rb
├── config.ru
├── Gemfile
├── Gemfile.lock
├── Guardfile
├── lib
│   ├── hanami_blog_app
│   │   └── types.rb
│   └── tasks
├── package.json
├── package-lock.json
├── Procfile.dev
├── public
│   ├── 404.html
│   └── 500.html
├── Rakefile
├── README.md
└── spec
    ├── requests
    │   └── root_spec.rb
    ├── spec_helper.rb
    └── support
        ├── features.rb
        ├── requests.rb
        └── rspec.rb

18 directories, 30 files
As you can see, Hanami's directory structure is very similar to what Rails gives you, but there are notable differences:
- app - Most of your application's code will go here.
- lib - Here's where you'll put any code to support your app's main codebase.
- config - This is configuration files will go e.g. Puma configurations, routes and other app settings.
- assets - Coming with the release of version 2.1 is support for frontend assets which you'll find resident in this directory.
- views - Hanami 2.1 also introduces a fully functioning view layer which is found here.
To get a complete picture of the Hanami directory structure, see the project's documentation; for now, we'll leave it at that.
You can quickly run the newly generated application using the command below:
bundle exec hanami run dev
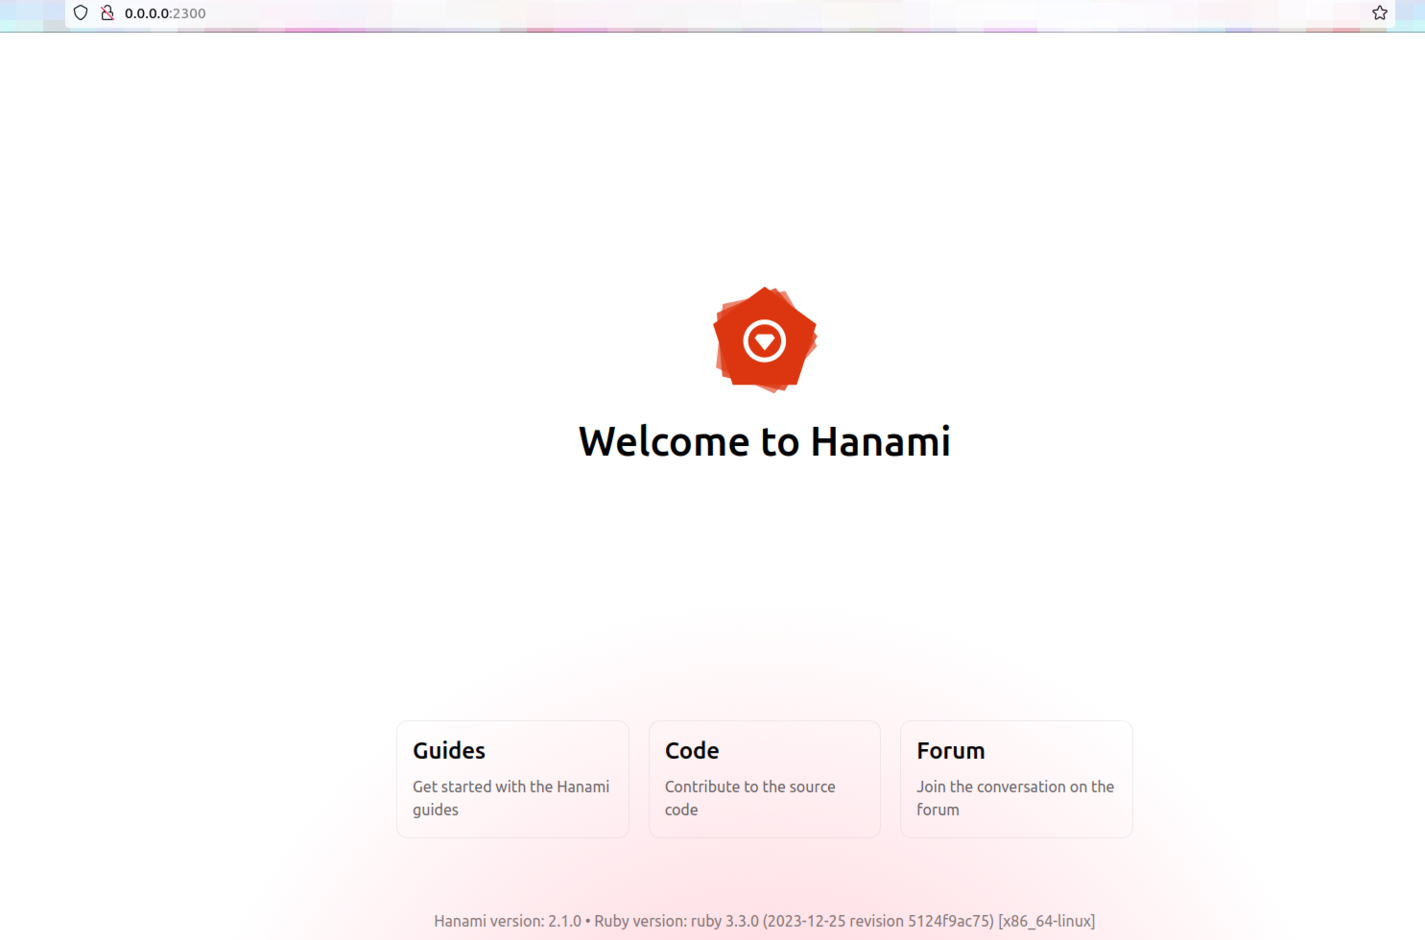
And if everything works as expected, you should see a screen similar to the one below when you visit localhost running off the default port 2300:
Moving on, let's get an overview on the app we'll be building next.
The app we'll be building
In this tutorial, we'll build a simple blog app that will showcase some of the internals of Hanami and give you a good base from which you can build more robust apps that leverage the framework's strengths.
You can find the source code for the completed app here.
Adding database persistence to a Hanami app
The blog app we're building will need to store blog records in a database. For this, we'll be using the awesome Ruby Object Mapper (ROM) as the object relation library to connect to a Postgresql database.
Install the ROM library
Open the app's Gemfile and add the gems listed below, then run bundle install:
# Gemfile

gem "rom", "~> 5.3"
gem "rom-sql", "~> 3.6"
gem "pg"
Create the app database
Next, create a Postgresql database via the terminal in your development machine and give it an appropriate name (I called mine "hanami_blog_app"). If you don't know how to do this, just follow the Postgresql guides here.
Note: It's possible to use the Hanami command createdb <db_name> from within your project root, but depending on how you've configured your Postgresql installation, this might work or not.
Add a persistence provider
The next step is to add a persistence provider. In Hanami, providers are a way of registering app components that exist outside the app's automatic component registration lifecycle. You can read more about them here.
Create a new file config/providers/persistence.rb and edit it as shown below:
# config/providers/persistence.rb

Hanami.app.register_provider :persistence, namespace: true do
  prepare do
    require "rom"

    config = ROM::Configuration.new(:sql, target["settings"].database_url)

    register "config", config
    register "db", config.gateways[:default].connection
  end

  start do
    config = target["persistence.config"]

    config.auto_registration(
      target.root.join("lib/hanami_blog_app/persistence"),
      namespace: "HanamiBlogApp::Persistence"
    )

    register "rom", ROM.container(config)
  end
end
Providers go through a lifecycle with the steps of prepare, start and stop. In the persistence example above, a prepare step takes care of getting a database connection (which we'll define next), and a start step defines what happens after a connection is established.
Adding the database settings
The app's config/settings.rb file is where you define your own app-specific settings and parameters using constructors within the Settings class.
The important thing to note here is that these settings are very different from the App config which are configurations that affect the Hanami framework within the app.
To define the app's database connection string, go ahead and modify the settings file like so:
# config/settings.rb

module HanamiBlogApp
  class Settings < Hanami::Settings
    setting :database_url, constructor: Types::String
  end
end
And since Hanami uses the dotenv gem to read environment variables in development, you can go ahead and define the database URL in an .env file in your app's root like so:
# .env

DATABASE_URL=postgres://<user>:<password>@localhost:5432/<database_name>
You can confirm that the database connection setting is working by opening a Hanami console session with bundle exec hanami console, and running app["settings"].database_url, which should return the database connection URL you've just defined in the .env file.
Creating and running the first migration
As mentioned before, once ROM is integrated into an upcoming version of Hanami, migration commands will be included as well. In the meantime, let's create one manually using some rake tasks.
Open up the Rakefile and edit as shown below:
# Rakefile
...

require "hanami/rake_tasks"
require "rom/sql/rake_task"

task :environment do
  require_relative "config/app"
  require "hanami/prepare"
end

namespace :db do
  task setup: :environment do
    Hanami.app.prepare(:persistence)
    ROM::SQL::RakeSupport.env = Hanami.app["persistence.config"]
  end
end
Then, generate the first migration with the following command:
bundle exec rake db:create_migration[create_posts]
In case you have a zsh shell, the above command will not work since you'll need to escape the square brackets:
bundle exec rake db:create_migration\[create_posts\]
Running that should create a new db/migrate folder with a new migration file in it:
db
└── migrate
    └── 20240115072209_create_posts.rb

2 directories, 1 file
Open up this migration and edit as follows:
# db/migrate/<timestamp>_create_posts.rb

ROM::SQL.migration do
  change do
    create_table :posts do
      primary_key :id
      column :title, String, null: false
      column :body, String, null: false
    end
  end
end
Then run it with bundle exec rake db:migrate.
Up to this point, we have most of what we need in terms of persistence, and the only thing remaining is an interface to read and write data to the newly created posts table. In Hanami, this persistence interface is called a relation. Let's build it next.
Adding a relation
Relations provide adapter-specific API interfaces for reading and writing data to the database. You define relations using explicit classes with methods for reading and writing data as you wish it to be done.
The ROM relations documentation provides a wealth of information on the subject, and I encourage the reader to check it out.
Go ahead and create a relation for interacting with the posts table:
# lib/hanami_blog_app/persistence/posts.rb

module HanamiBlogApp
  module Persistence
    module Relations
      class Posts < ROM::Relation[:sql]
        schema(:posts, infer: true)
      end
    end
  end
end
A couple of things to note here:
- The class name
Postswill be used to interact with the posts table which is set to:posts. ROM::Relation[:sql]specifies that therom-sqladapter will be used for this relation.schema(:posts, infer: true), here the schema will be inferred from the database schema and will include all the posts table columns.
As you can see, the relation defines how data will be read and written to the database, but we still need a way to actually fetch and write posts data. Since Hanami leverages the ROM library, we can easily do this using a repository, which we will cover next.
The post repository
Repositories, also referred to as "repos," provide convenient methods for accessing data from relations. Depending on the set up, a repo can access one or many relations.
Let's set up a repo with some CRUD methods to work with the posts relation.
# lib/hanami_blog_app/persistence/repositories/post.rb

module HanamiBlogApp
  module Persistence
    module Repositories
      class Post < ROM::Repository[:posts]
        commands :create # define CRUD actions here e.g. create, update, delete etc.
      end
    end
  end
end
Here, we define a repo for the posts relation and include a commands macro which defines a Post#create method.
Next, let's add methods for updating and deleting a post.
# lib/hanami_blog_app/persistence/repositories/post.rb

module HanamiBlogApp
  module Persistence
    module Repositories
      class Post < ROM::Repository[:posts]
        commands :create, update: :by_pk, delete: :by_pk
      end
    end
  end
end
Tip: The by_pk ("by primary key") tells ROM the method is to be applied to a particular post specified by its primary key.
Finally, let's add finder methods for fetching all posts and a single post:
# lib/hanami_blog_app/persistence/repositories/post.rb

module HanamiBlogApp
  module Persistence
    module Repositories
      class Post < ROM::Repository[:posts]
        ...

        # find all posts
        def all
          posts.to_a
        end

        # find single post
        def find(id)
          posts.by_pk(id).one!
        end
      end
    end
  end
end
And that's it; we've successfully set up the infrastructure for creating and reading posts. However, we're still missing a way for a user to interact with this infrastructure. Let's work on that next.
Hanami's view layer
The view layer in a Hanami app is used to render the app's data in HTML, JSON, and other formats. With the recent launch of version 2.1, Hanami now includes a complete view system for rendering HTML, JSON and other formats. But before we can build any views, it's important to get an overview of a request cycle in a Hanami app.
The diagram below shows how Hanami handles an incoming HTTP request and the parts involved in processing it and sending a response back:
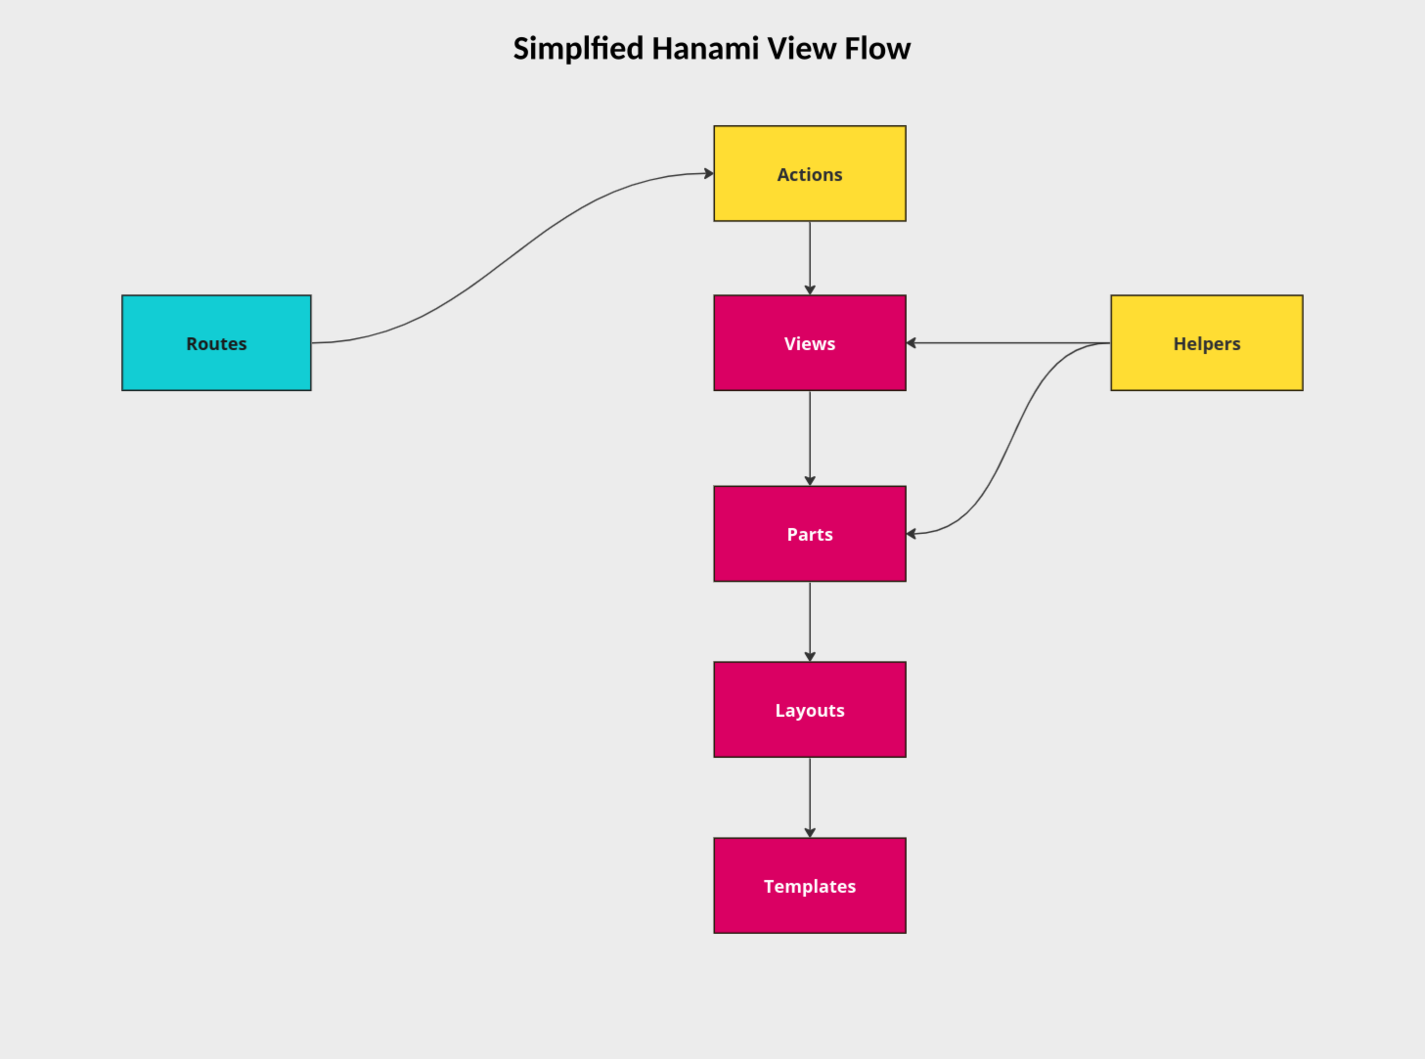
We'll go through what each part of the view layer does, but before we do that, it's important to note that the latest Hanami release now makes it a breeze to generate views. As an example, the command shown below will generate the entire show layer:
bundle exec hanami generate action posts.show

Updated config/routes.rb
Created app/actions/posts/
Created app/actions/posts/show.rb
Created app/views/posts/
Created app/views/posts/show.rb
Created app/templates/posts/
Created app/templates/posts/show.html.erb
Created spec/actions/posts/show_spec.rb
Let's now learn what each view layer is about and how they work starting with actions.
Hanami actions
When a HTTP request comes in, the request will first encounter an action which is an individual class that determines how a HTTP request will be handled e.g. what HTTP response to send back, whether to redirect the request and so forth.
An action will have a handle method which takes two arguments:
- request - basically an object representing the incoming HTTP request.
- response - an object defining the response back.
The code snippet below shows the default generated post show action:
# app/actions/posts/show.rb

module HanamiBlogApp
  module Actions
    module Posts
      class Show < HanamiBlogApp::Action
        def handle(request, response)
        end
      end
    end
  end
end
Now we need to modify this code so that it's able to reference the repository we just created and then make the proper response to the view which we'll talk about shortly:
# app/actions/posts/show

module HanamiBlogApp
  module Actions
    module Posts
      class Show < HanamiBlogApp::Action
        include Deps[
                  repo: 'repositories.posts'
                ]

        def handle(request, response)
          requested_post = request.params[:id] # first get the id from params...
          post = repo.by_id(requested_post) # ..then fetch the respective post referencing posts repo
          response.render(view, post: post)
        end
      end
    end
  end
end
So here's what's going on. We first get the post_id from the params in the incoming request, then reference the repository we created to fetch the respective post via the dependency injection, and then pass this on to the view.
Obviously, this is a very basic outline of what a Hanami action is about and I highly recommend you check out the documentation to dig deeper. For now, let's move on to views.
Hanami views
In Hanami, a view class has two main jobs: decide the data to expose to the template and, to decide the corresponding template to render. When you generated the view layer for show, part of the generated files included an accompanying view and template.
The code snippet below shows the default show view:
# app/views/posts/show.rb

module HanamiBlogApp
  module Views
    module Posts
      class Show < HanamiBlogApp::View
      end
    end
  end
end
Now let's modify this view code to take in the post object passed on by the posts show action that we just dealt with:
# app/views/posts/show.rb

module HanamiBlogApp
  module Views
    module Posts
      class Show < HanamiBlogApp::View
        expose :post
      end
    end
  end
end
In order for the relevant post show template can render the post we want it to, we need for the accompanying view to pass the post object to it, and the way we do this is using an exposure. Read more on the subject here.
Next, let's see how the HTML view is rendered.
View templates
In Hanami, view templates are responsible for rendering the responses from views using HTML, JSON, or other formats.
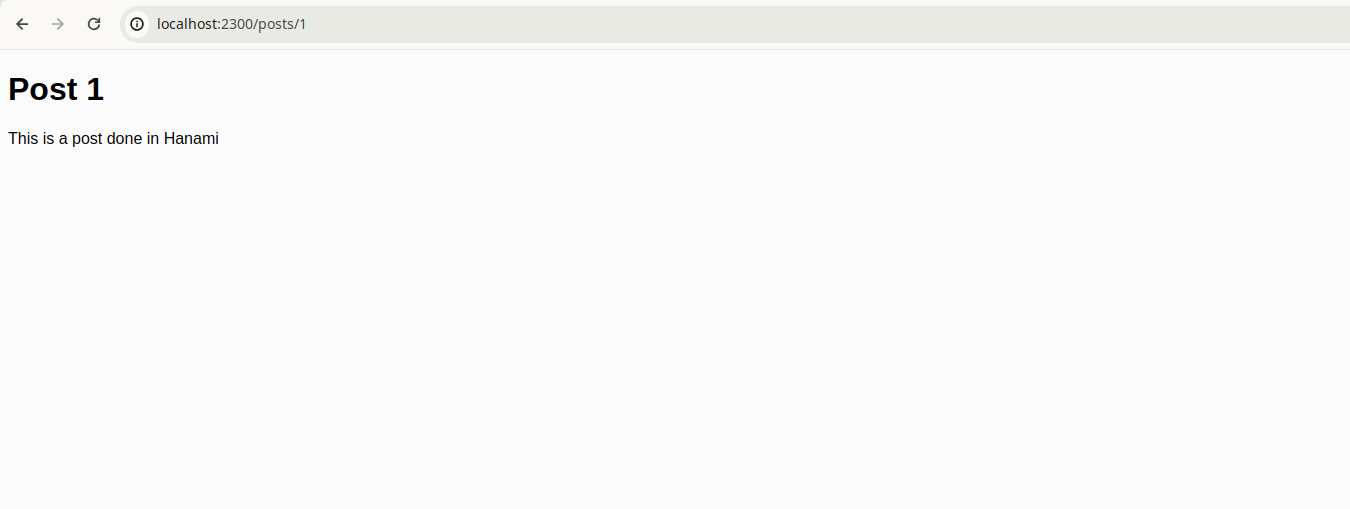
First, we edit the show template as shown below:
<!-- app/templates/posts/show.html.erb -->

<h1><%= post.title %></h1>

<p><%= post.body %></p>
Now run the app with bundle exec hanami server, and assuming everything works as expected, visiting http://localhost:2300/posts/1 gives us a post view template similar to the one shown in the screenshot below:
Wrapping up and next steps
In this tutorial, we've gone through the steps to build a Hanami 2.1 app, from gem installation to learning how to handle an incoming HTTP request and responding with views and templates. Even so, there are many concepts we did not go through in this build, such as taking user data via forms, saving data to the database, catching errors, and so much more. Doing so would make for a very long article; instead, from the foundation set by this tutorial, the reader is encouraged to try and build these features to delve deeper into the Hanami framework.


