 By
By Laravel is one of the fastest growing frameworks in the open-source space. More developers are starting to see the value that Laravel can bring to any project. With "out of the box" routing, queuing, testing, and so much more, Laravel provides a perfect starting point for your next big idea. Included with any default Laravel project is a base starting point for all exceptions and errors to be handled in a graceful way. However, as this is only a starting point, you can expand your error handling capabilities to match any requirements that arise.
In this article, we will explore errors and exceptions within a Laravel application and discuss ways to make errors more robust and scalable.
Understanding Exceptions
To fully understand error and exception handling, let's walk through a basic Laravel project to find out exactly what is meant by errors and exceptions. To begin, let's set up a new Laravel project; fire up a terminal and run the following command:
Note: I have named my project "handled"; you are free to choose any name you like.
composer create-project laravel/laravel handled
This will spin up a brand-new Laravel application for us to play with. First, we should find out what types of errors we have and how they work with the default behavior, so let's break some things!
Head over to routes/web.php and look at the default route:
Route::get('/', function () {
    return view('welcome');
});
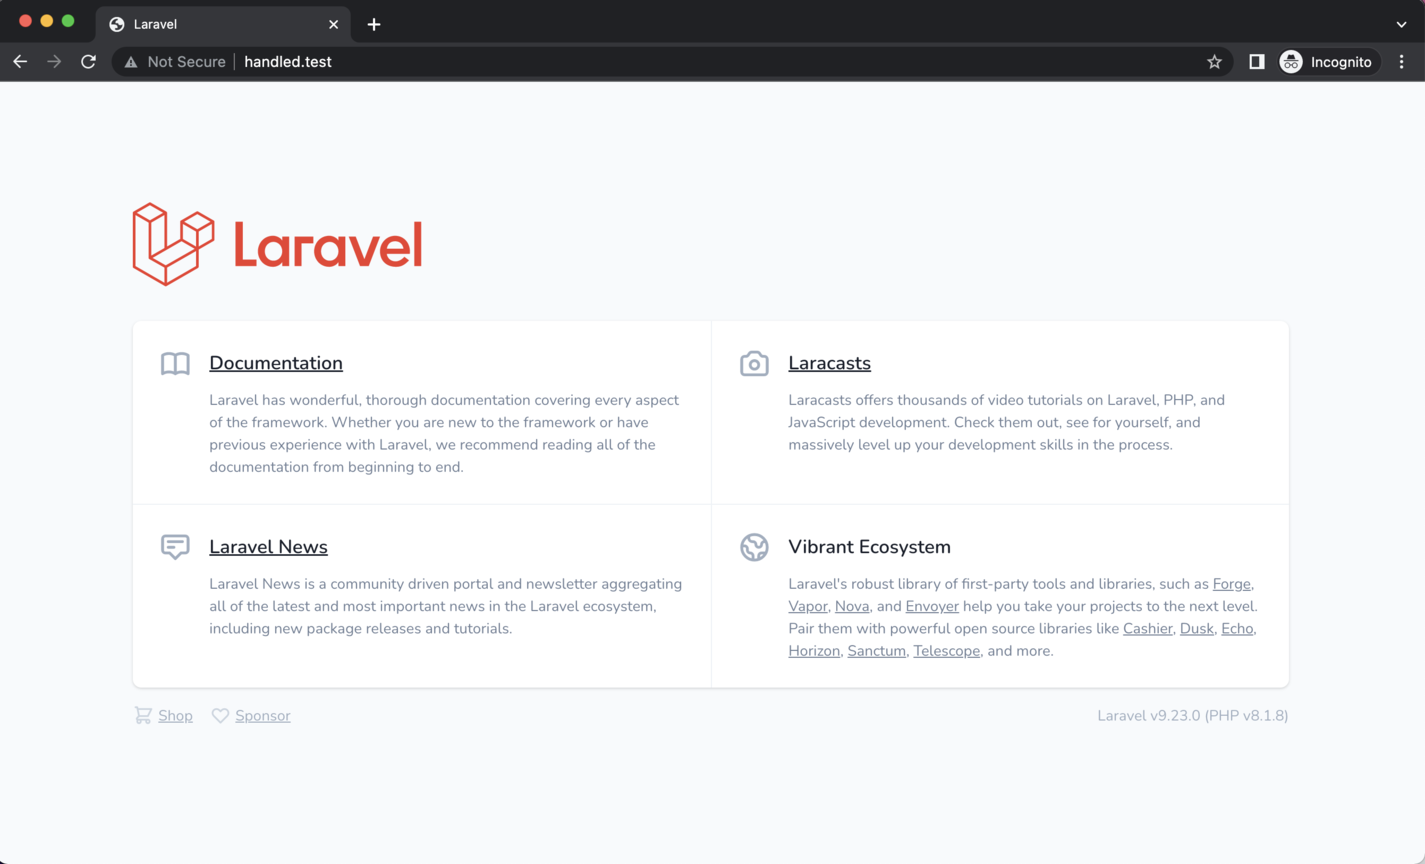
Without going into too much detail about what the above code does, visiting the app in the browser will render the default Laravel home page that can be found at resources/views/welcome.blade.php and looks like this:
Note: I am using Laravel Valet to run this in the browser.
The Lost and Found
To begin our journey to breaking the application, visiting http://handled.test in the browser will render a view and display the content of that view, but what if we visited http://handled.test/nothing-here? We expect to have a 404 page, so how would Laravel handle this?
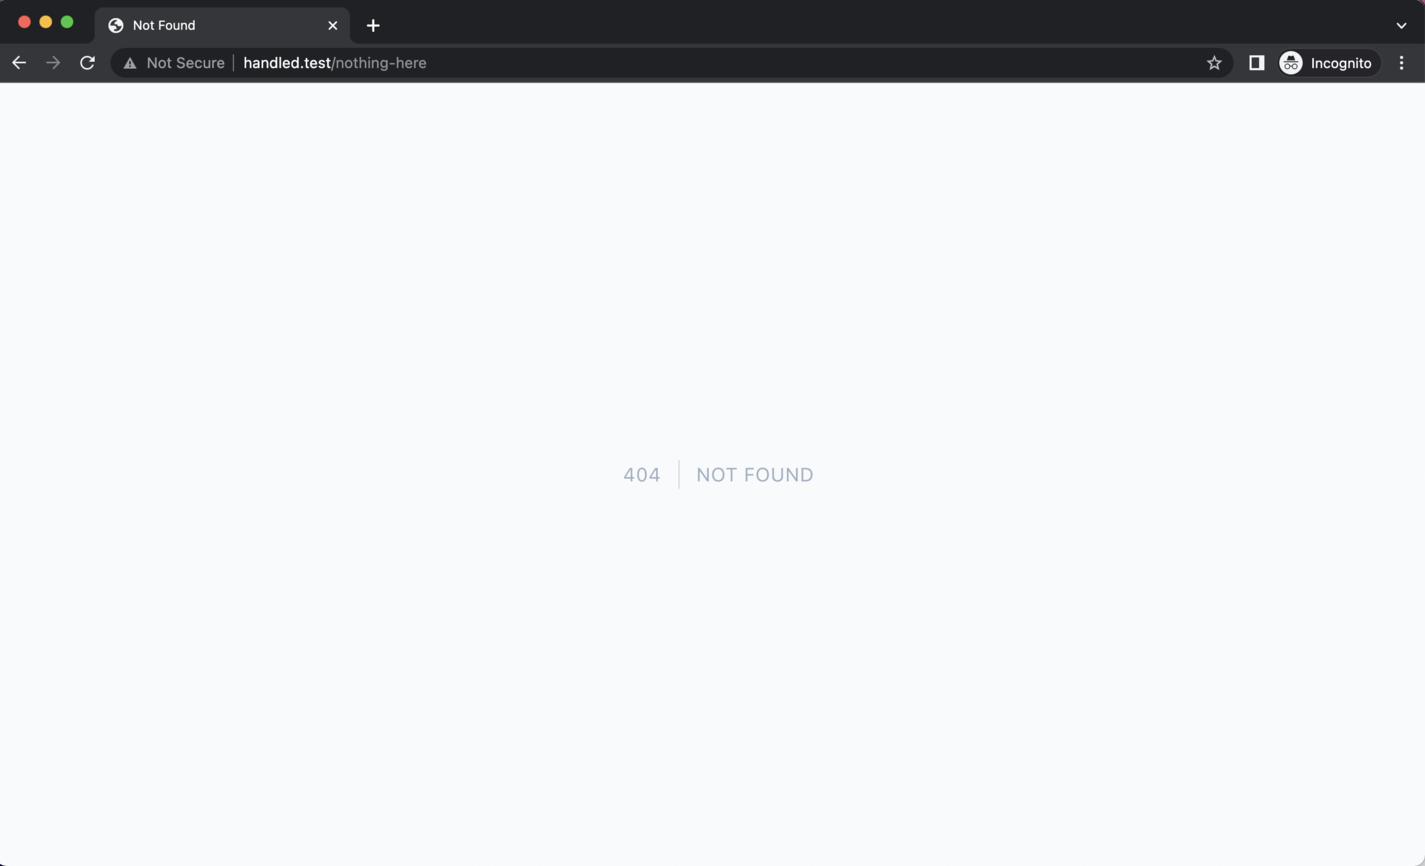
As you can see, it is handled for us. We did not need to build this 404 page; Laravel has included it by default. However, you would not want to keep this in a production application because cat gifs are way cooler, so let's try to replace this with our own. The quick and easy way is to create a file at resources/views/errors/404.blade.php and replace or add some HTML for this file.
<div>
    <h1>No Dice</h1>
    <img src="https://thecatapi.com/api/images/get?format=src&type=gif" alt="404">
</div>
This should do the trick! If we refresh the browser, we should see the following:
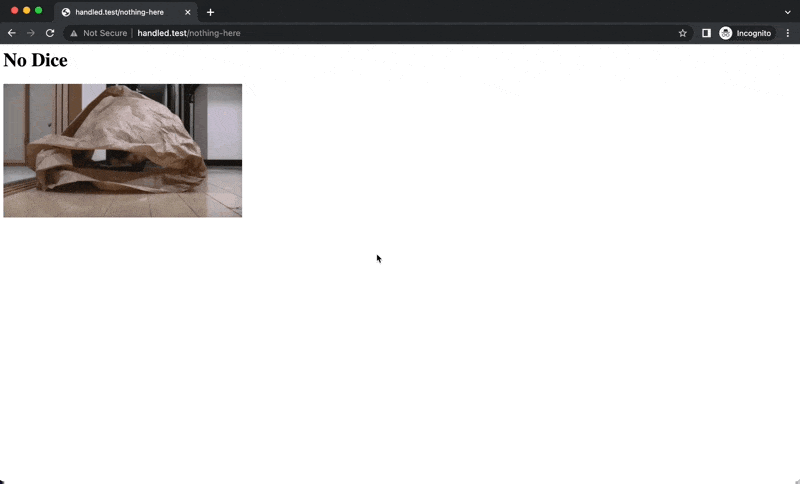
Thus, we have overwritten Laravel's custom 404 Page.
Stronger Exceptions
Although 404 exceptions are unavoidable in any application, luckily, they are easy to handle. However, what about a real exception? What happens when PHP throws a runtime exception? Let's find out. Head back to your routes/web.php file, and we’ll really break something.
Route::get('/', function () {
    return view('welcome', [
        'data' => $variableMissing
    ]);
});
The above code will cause a PHP runtime exception, as the $variableMissing is undefined. Unlike JavaScript, it will continue to run if this happens. PHP will automatically quit on that line and throw an exception. No further code will be run after the error, and it will look like this:
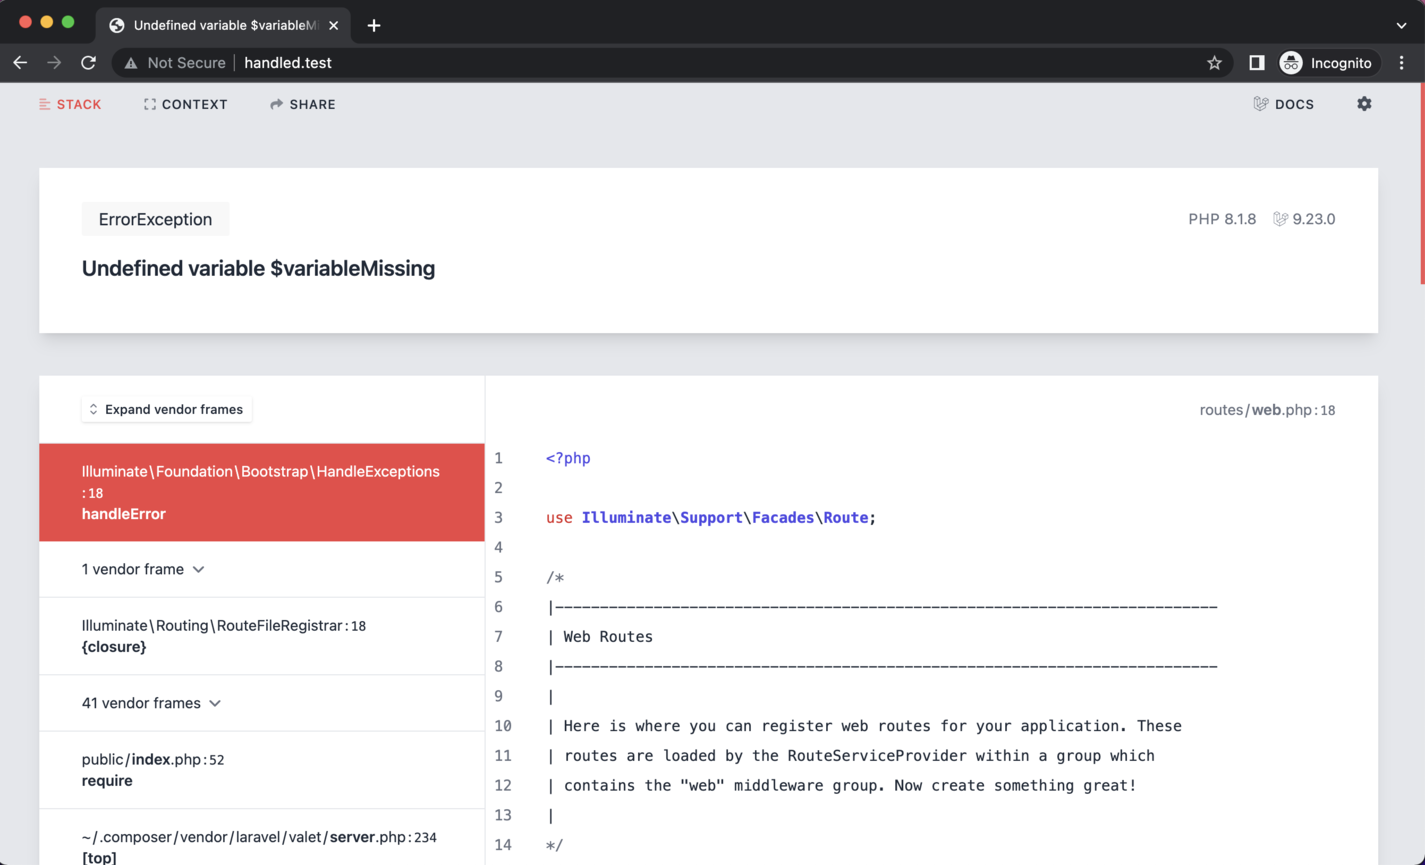
This is a bit more complicated than the previous 404 error, which was simply a page, and there is a good reason for this. The page you can see above should not be available to production applications, but in a local environment, it will help to debug and fix any issues. To see what it would look like in production, we can change one of our env values.
APP_DEBUG=false
Give it a refresh, and it will look like this:

We’ll follow the steps we took to create a custom 404 page, but we’ll create a file named resources/views/errors/500.blade.php to capture all 500 errors and display the page.
Digging Deeper
Now that we have a better understanding of what errors are and how we can handle them with custom views, we’ll take a deeper look into how these errors are displayed and what we can do to hook into them to add additional logic or requirements. To get started, let's ensure our .env file is back to the local settings to allow debug options:
APP_DEBUG=true
Refreshing the page will once again show the Ignition error page with context about the error. As we can see this displays and lets us know that we have the following issue in our routes file:
Undefined variable $variableMissing
However, what if we wanted to perform some logging on these errors? For example, what if I wanted to send this error to error-tracking software, such as Honeybadger? We would need a way to hook into it before it rendered this page.
The Error Handler
In Laravel, all exceptions pass through a file that can be found here: app/Exceptions/Handler.php. In this file, we can interact with an exception before it is thrown, which allows us to perform additional logic for each error we receive.
Given the above example with the undefined variable, let's go into the app/Exceptions/Handler.php and simply hook into this exception to do some logic.
By default, the register method on this file is blank, as shown below:
public function register()
{
    $this->reportable(function (Throwable $e) {
       //
    });
}
This does nothing and simply runs through the exception, but this handler class allows us to register additional reporting and rendering callbacks that can be used to log exceptions to third-party tools such, as Honeybadger. For the sake of simplicity, let's simply attempt to log our exception to our filesystem as the first step.
To do this, we will add some custom code to the reportable callback:
public function register()
{
    $this->reportable(function (Throwable $e) {
       Log::info($e->getMessage());
    });
}
Refreshing the page will show the same error as before, but there will be a new log created in storage/logs/laravel.log that will contain the following message:
[2022-08-03 08:07:56] local.INFO: Undefined variable $variableMissing
This is not typically something one would do, as this log file is not easily accessible on a production server. However, the point is still illustrated, and it is that simple to include additional logic.
Let's try to do something slightly more complicated in the next steps.
Useful Error Logging with Honeybadger
To make this reportable method more useful, let's tackle a real-world situation. For this, we’ll send our error to error tracking software, Honeybadger.io, which is easy to set up and hooks directly into the above code that we’ve already written.
Installing Honeybadger is simple and easy, so please head over to the Honeybadger Laravel Docs and follow the step-by-step guide to install it. You will notice that all you need to do is install the composer dependency and set up the reportable callback:
public function register()
{
    $this->reportable(function (Throwable $e) {
        if (app()->bound('honeybadger')) {
            app('honeybadger')->notify($e, app('request'));
        }
    });
}
After installing the Honeybadger composer dependency, run the following:
php artisan honeybadger:install your-project-api-key
Laravel will now send all error data to Honeybadger instead of a log file, which is much easier and cleaner to work with.
Creating Custom Exceptions
To Recap, we have shown what is considered an error in Laravel, how to edit the default pages, and how to hook into the exceptions that are thrown. However, let's take this tutorial a step further and build a custom exception.
Custom exceptions can be used for a number of purposes. The one I find most useful is to provide context for which area of the application I need to look into. For this simple use case and demo purposes, we’ll name our exception FailedToLoadHomePage and fire this if we are unable to render our home-page view for whatever reason.
Fire up that terminal and let's get started:
php artisan make:exception FailedToLoadHomePage
This will create a new class for us here app/Exceptions/FailedToLoadHomePage.php, and this class contains the following boilerplate:
<?php

namespace App\Exceptions;

use Exception;

class FailedToLoadHomePage extends Exception
{
    //
}
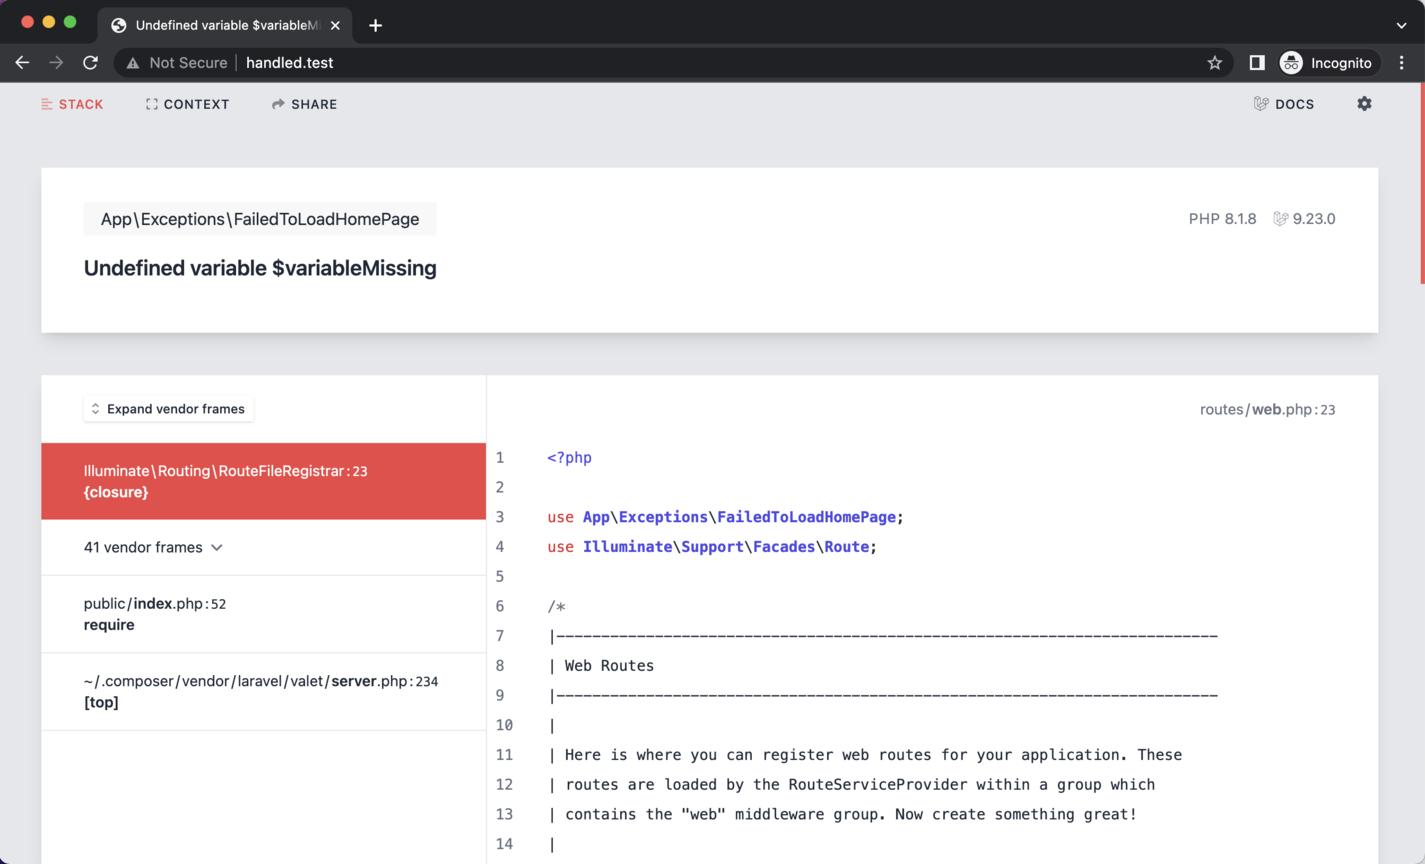
Now what we want to do is return to our route file and throw this exception when something goes wrong.
Route::get('/', function () {
    try {
        return view('welcome', [
            'data' => $variableMissing
        ]);
    } catch (Throwable $exception) {
        throw new FailedToLoadHomePage($exception->getMessage());
    }
});
After giving the browser a refresh, we can see that our new exception has been thrown instead of the default one.
This is pretty neat! We have customized Laravel exceptions to work as needed.
When to use a custom exception?
While the whole process is pretty easy to build and configure, it is generally not required to make a custom exception for every single thing that may break in your app. The best times to use a custom exception is when you need additional behavior for a given exception. A good example of this would be to report to slack when something specific happens.
For example, imagine you are building an app that connects to an API. If the API is returning errors, it may be important to write a custom exception to provide additional context for what has gone wrong and why. This can save development and debugging time by understanding what is wrong before trying to fix it.
Conclusion
Extending and manipulating the exception handlers in Laravel is extremely easy. Laravel provides all the fundamentals needed to get up and running with defaults, and you are free to make it your own.


 Molly Struve, Sr. Site Reliability Engineer, Netflix
