Real-time applications using Laravel
Real-time applications are a great way to keep users on a site for longer periods of time. They also provide an incredibly smooth experience for users interacting with your web application. In this article, we will learn how to make use of real-time technologies and create incredible user experiences with the Laravel Framework.
What we'll build
Imagine you are building an application that notifies users when something happens in real time. By leveraging the existing Laravel architecture, we can build this out fairly easily. Here are the steps we will follow:
- Set up a new Laravel application with some boilerplate code.
- Create a local WebSocket server that receives and pushes events to our authenticated user.
- Create specific notification classes that house the data for each notification.
- Display our notification in real time on our application.
The final code for this tutorial is available on GitHub.
Let's dive in
For this tutorial, I will assume that you already know the fundamentals of Laravel and can set up a new project on your own. However, we will begin by creating a new Laravel application and add in some boilerplate code to get started:
composer create-project laravel/laravel realtime
cd realtime
composer require laravel/breeze --dev
php artisan breeze:install vue
Now that we have set up a simple application using Laravel Breeze with Inertia and Vue, we’ll create a dummy user for testing. Go to the /database/seeders/DatabaseSeeder.php class and create a fake user with an easy-to-remember email address for testing purposes.
<?php

namespace Database\Seeders;

use Illuminate\Database\Seeder;

class DatabaseSeeder extends Seeder
{
    public function run()
    {
        \App\Models\User::factory()->create([
            'name' => 'Test User',
            'email' => 'test@example.com',
            'password' => bcrypt('password'),
        ]);
    }
}
Ensure that your database is set up, and then run the following:
php artisan migrate:fresh --seed
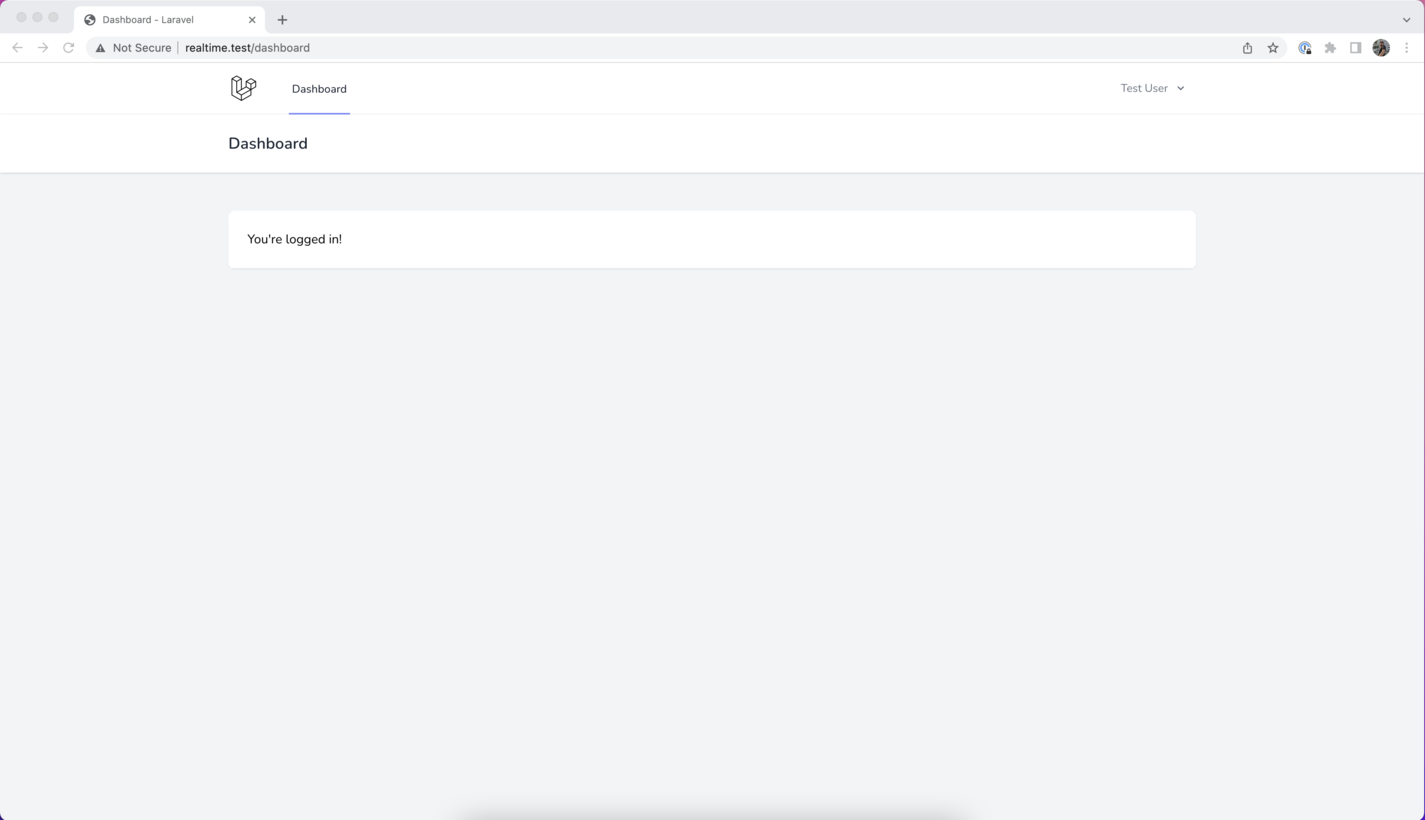
Once this is run, you should be able to log in with the user we just created and see the default dashboard:
Preparing the user model
For the purposes of this demo, we’ll need to prepare the user model to receive notifications. Laravel ships with a Notifiable trait on the user model by default, which makes it easy to get started. The simplest way for us to save notifications for a given user is to use the database, which is also included out-of-the-box. All we need to do is prepare the database to handle this task:
php artisan notifications:table
php artisan migrate
This command will create a new migration that will allow us store notifications for a specific user in the database. To do this, we will need to create a new Notification class and prepare it to save the notification when called.
php artisan make:notification SomethingHappened
This command will create a new notification class in app/Notifications/SomethingHappened.php; we’ll need to amend the default boilerplate to instruct Laravel to store the notification in the database.
<?php

namespace App\Notifications;

use Illuminate\Bus\Queueable;
use Illuminate\Notifications\Notification;

class SomethingHappened extends Notification
{
    use Queueable;

    public function __construct(public string $text)
    {}

    public function via($notifiable)
    {
        return ['database'];
    }

    public function toArray($notifiable)
    {
        return [
            'text' => $this->text,
        ];
    }
}
Great! Now we are ready to perform some testing.
Triggering notifications
To test the triggering of notifications, we will create a simple route that, when run in Laravel, will trigger a notification for our test user. Let's head over to our /routes/web.php file and add the route:
Route::get('/notify/{text}', function (string $text) {
    $user = User::where('email', 'test@example.com')->first();
    $user->notify(new SomethingHappened($text));
});
NB: This is purely for demo purposes and is not intended for use in a production system.
Now when we navigate to http://realtime.test/notify/hello in our browser, it will fire the notification and save it to the database. Open the database in your preferred database tool and see it here:

This means that it is working! Great!
Connecting the frontend
Now that we have the notifications stored in the database, we want to display them in our frontend. To do this, we will need to load the notifications into the View and display them using Vue.js. Let's once again head over to our /routes/web.php file and change the boilerplate code for the dashboard route. All we need to do is pass through our notifications to the dashboard so that we can display them.
Route::get('/dashboard', function () {
    return Inertia::render('Dashboard', [
        'notifications' => \request()->user()->notifications
    ]);
})->middleware(['auth', 'verified'])->name('dashboard');
Note: This is purely for demo purposes; in a production application, you would share this through Inertia's global share function.
After the notifications are being passed, we can edit the /resources/js/Pages/Dashboard.vue file to display them:
<template>
    <Head title="Dashboard" />
    <BreezeAuthenticatedLayout>
        <template #header>
            <h2 class="font-semibold text-xl text-gray-800 leading-tight">
                Dashboard
            </h2>
        </template>
        <div class="py-12">
            <div class="max-w-7xl mx-auto sm:px-6 lg:px-8">
                <div class="bg-white overflow-hidden shadow-sm sm:rounded-lg">
                    <div
                        v-for="notification in notifications"
                        :key="notification.id"
                        class="flex items-center bg-blue-500 text-white text-sm font-bold px-4 py-3">
                        <p v-text="notification.data.text"/>
                    </div>
                </div>
            </div>
        </div>
    </BreezeAuthenticatedLayout>
</template>
<script setup>
import BreezeAuthenticatedLayout from '@/Layouts/Authenticated.vue';
import { Head } from '@inertiajs/inertia-vue3';
import {defineProps} from "vue";
const props = defineProps({
    notifications: {
        type: Array,
        required: true,
    }
})
</script>
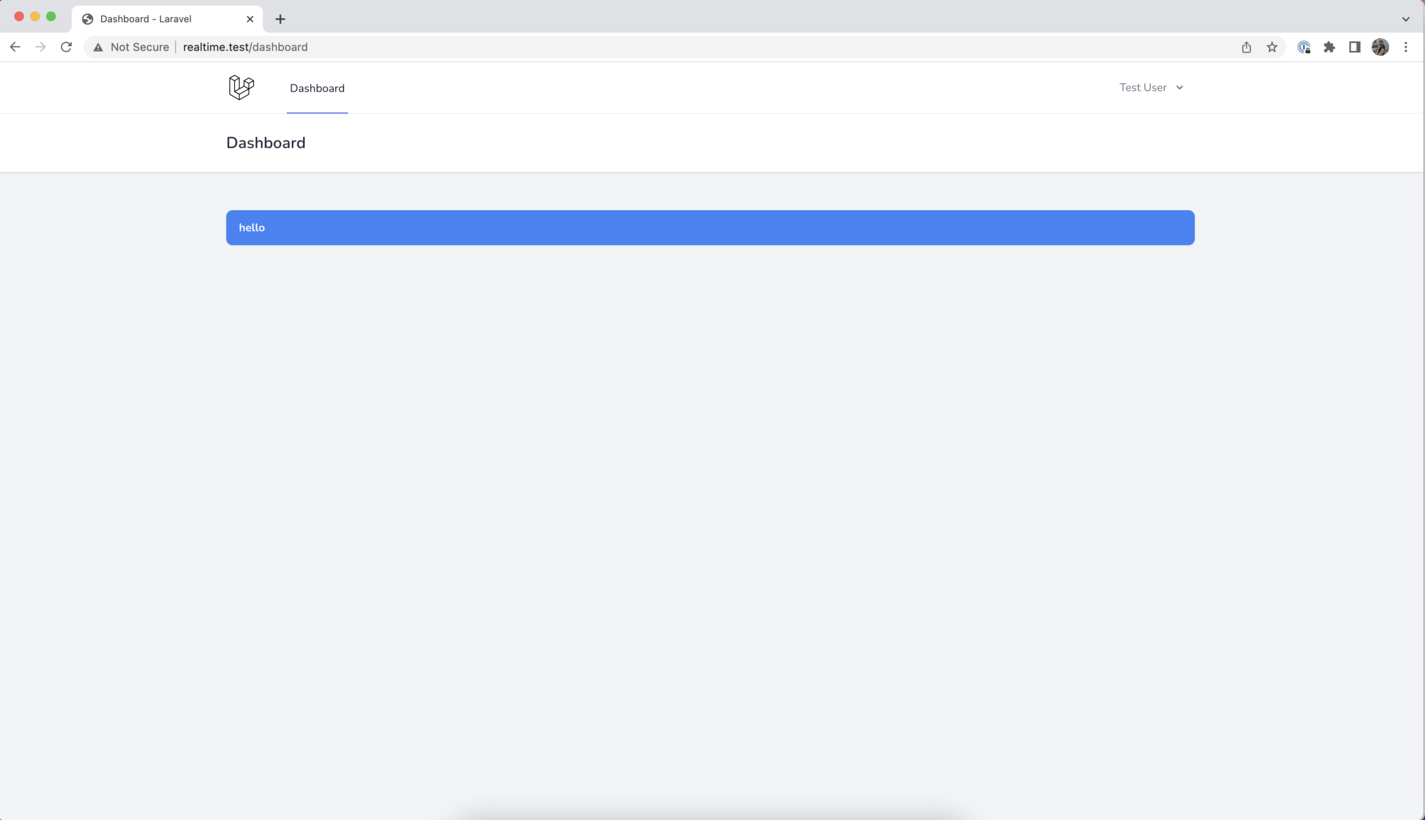
The above code will output the notification we fired to the dashboard, as shown here:
Making this real-time
Now that we’ve displayed the notifications in our frontend, we need to find a way to have the notifications broadcast when fired to the frontend, have the frontend listen for the broadcast event, and then simply reload the notifications array.
To do this, we will need to pull in two packages:
composer require beyondcode/laravel-websockets
composer require pusher/pusher-php-server
These two packages will allow us to create a simple WebSocket server that we can broadcast events to and from. To get this to work correctly, we will need to update our .env files to house the following variables:
BROADCAST_DRIVER=pusher
PUSHER_APP_ID=123456789
PUSHER_APP_KEY=123456789
PUSHER_APP_SECRET=123456789
PUSHER_APP_CLUSTER=mt1
Note that the keys can be simple for local testing; in production environments, I recommend making them stronger.
Now that we have set up the WebSocket server, we can run the server using the commands provided by the WebSocket package:
php artisan vendor:publish --provider="BeyondCode\LaravelWebSockets\WebSocketsServiceProvider" --tag="config"

php artisan vendor:publish --provider="BeyondCode\LaravelWebSockets\WebSocketsServiceProvider" --tag="migrations"
php artisan migrate
php artisan websocket:serve
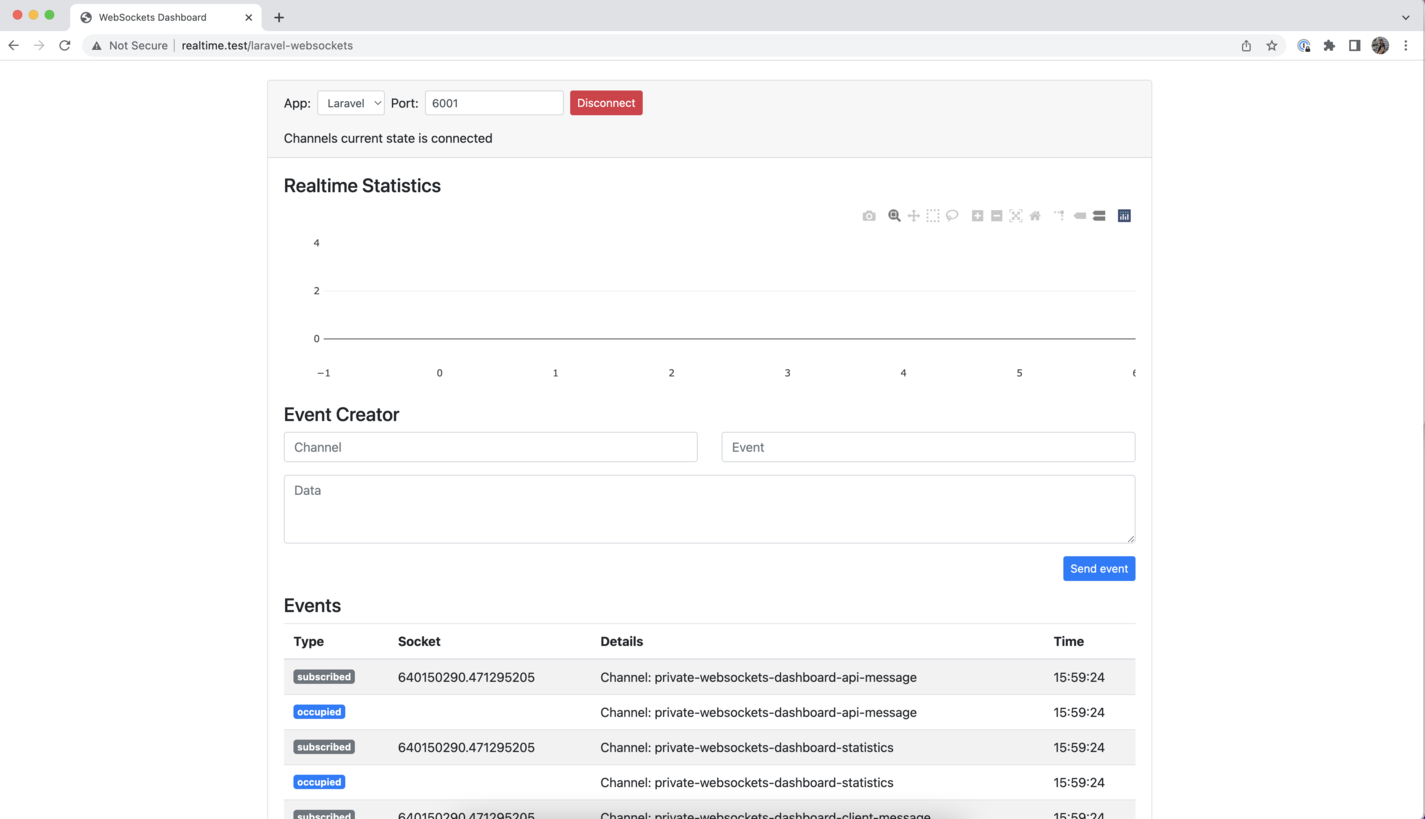
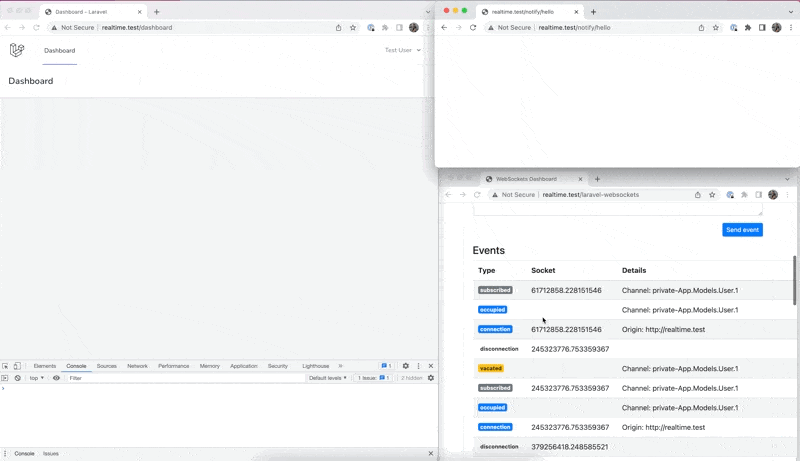
Navigate to http://realtime.test/laravel-websockets, where we can see a new dashboard that will show incoming events pushed to the socket server.

You will need to click connect, which will show some more debugging information, as shown below:
Broadcasting the notification
Now that we have the WebSocket set up, we will need to make a few changes to our notification class to instruct it to broadcast to our WebSocket server:
- Implement the ShouldBroadcast interface.
- Add a new via method called broadcast.
- Add a toBroadcast() methood that returns a BroadcastMessage class.
<?php

namespace App\Notifications;

use Illuminate\Bus\Queueable;
use Illuminate\Contracts\Broadcasting\ShouldBroadcast;
use Illuminate\Notifications\Messages\BroadcastMessage;
use Illuminate\Notifications\Notification;

class SomethingHappened extends Notification implements ShouldBroadcast
{
    use Queueable;

    public function __construct(public string $text)
    {}

    public function via($notifiable)
    {
        return ['database', 'broadcast'];
    }

    public function toArray($notifiable)
    {
        return [
            'text' => $this->text,
        ];
    }

    public function toBroadcast($notifiable): BroadcastMessage
    {
        return new BroadcastMessage([
            'text' => $this->text
        ]);
    }
}
Finally, to get our WebSocket server working as expected, we will need to update our application to make use of our newly installed WebSocket server. To do this, we can edit our config/broadcasting.php file and replace the default pusher array to look like this:
'pusher' => [
    'driver' => 'pusher',
    'key' => env('PUSHER_APP_KEY'),
    'secret' => env('PUSHER_APP_SECRET'),
    'app_id' => env('PUSHER_APP_ID'),
    'options' => [
        'cluster' => env('PUSHER_APP_CLUSTER'),
        'encrypted' => false,
        'host' => '127.0.0.1',
        'port' => 6001,
        'scheme' => 'http'
    ],
],
This should do the trick, and by testing our WebSocket server, we can start to see debugging information coming through!
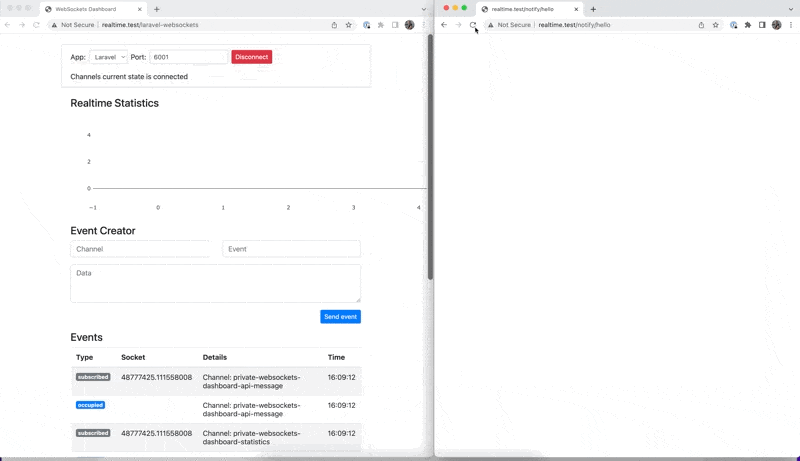
As you can see, whenever I reload the test route, a new message is pushed to our server. This is great! All we need to do now is connect the frontend, and we will be good to go.
Connecting the frontend
Now that we have the messages being pushed to our WebSocket server, all we need to do is listen for those events directly in our frontend application. Laravel provides a handy way to achieve this with Laravel Echo. Let's install and set it up now.
npm install --save-dev laravel-echo pusher-js
And after it is installed, we will need to configure it in /resources/js/bootstrap.js:
import Echo from 'laravel-echo';
import Pusher from 'pusher-js';
window.Pusher = Pusher;
window.Echo = new Echo({
    broadcaster: 'pusher',
    key: import.meta.env.VITE_PUSHER_APP_KEY,
    cluster: import.meta.env.VITE_PUSHER_APP_CLUSTER,
    wsHost: window.location.hostname,
    wsPort: 6001,
    forceTLS: false,
});
Head over to /resources/js/Pages/Dashboard.vue and update the code to look like this:
<template>
    <Head title="Dashboard" />
    <BreezeAuthenticatedLayout>
        <template #header>
            <h2 class="font-semibold text-xl text-gray-800 leading-tight">
                Dashboard
            </h2>
        </template>
        <div class="py-12">
            <div class="max-w-7xl mx-auto sm:px-6 lg:px-8">
                <div class="bg-white overflow-hidden shadow-sm sm:rounded-lg">
                    <div
                        v-for="notification in notifications"
                        :key="notification.id"
                        class="mt-3 flex items-center bg-blue-500 text-white text-sm font-bold px-4 py-3">
                        <p v-text="notification.data.text"/>
                    </div>
                </div>
            </div>
        </div>
    </BreezeAuthenticatedLayout>
</template>
<script setup>
import BreezeAuthenticatedLayout from '@/Layouts/Authenticated.vue';
import { Head } from '@inertiajs/inertia-vue3';
import { Inertia } from '@inertiajs/inertia'
import {defineProps, onMounted} from "vue";
const props = defineProps({
    notifications: {
        type: Array,
        required: true,
    }
})
onMounted(() => {
    Echo.private('App.Models.User.1')
        .notification((notification) => {
            console.log('reloading')
            Inertia.reload()
        });
})
</script>
If we reload the page now, we will see a console error that looks like this:
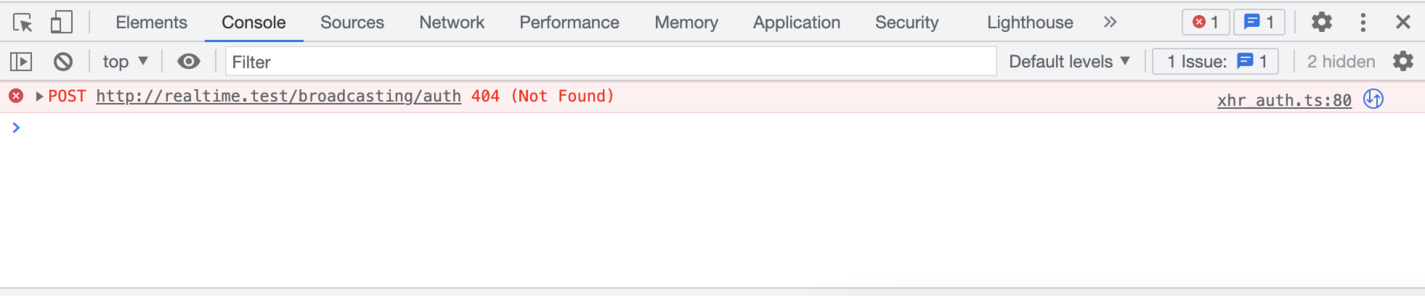
This is completely normal because we are using a private channel, and Laravel excludes the broadcasting routes until needed by default. To fix this error, we can simply open config/app.php and ensure the BroadcastingService Provider is enabled (by default, it is commented out).
/*
 * Application Service Providers...
 */
App\Providers\AppServiceProvider::class,
App\Providers\AuthServiceProvider::class,
App\Providers\BroadcastServiceProvider::class,
App\Providers\EventServiceProvider::class,
App\Providers\RouteServiceProvider::class,
Once this is done, it should do the trick! Let's open up our browser and see how this all works!
Conclusion
As you can see, Laravel provides a simple, clean, and scalable way to interact with real-time events in your application. Although this demo is very basic and straightforward, the applications for this are endless, and developers can build efficient user experiences with just a few lines of code.
