Using AWS S3 For File Storage in Rails Apps
Amazon Web Services' S3 is an object storage service that boasts security, scalability, data availability, and performance. S3 is a cloud service built on buckets in which you store files and manage permissions. Developers of any skill set can leverage this to store files relevant to their applications securely while achieving near-perfect uptime. S3 stores files in 'buckets', which are analogous to folders. Files stored inside the buckets are often referred to as 'objects'.
The three S's in 'S3' stand for "Simple Storage Service", which is an acutely descriptive name. S3 is easy to set up, use, and manage. S3 is relatively ubiquitous. It gives developers of sites of all sizes access to the advantages of Amazon's massive scale. We can directly upload and download files while managing permissions for others (whether applications or individuals) to do the same.
This article will walk you through leveraging S3 in your Ruby on Rails application. S3 provides a method for uploading files that can then be retrieved programmatically or directly by a URL. This integrates directly into Rails' own ActiveStorage, so the actual API calls to Amazon Web Service are abstracted away from us in common use cases. We'll begin by creating an AWS account and an S3 bucket and quickly move on to creating a bare-bones Rails application to use in performing our integration. You'll learn how to transfer data to S3 using the AWS SDK Ruby Gem, store files on behalf of application users, and manage file permissions.
Getting Started
Creating an AWS Account
If you don't have an account with Amazon Web Services, it's not too much work to create one. The free tier is generous and will allow us to get started right away.
Head on over to sign up here and fill in your information to get started!
You'll be prompted to fill in more information, including the account type and contact information, and you will need to enter credit/debit card information to cover any usage outside of the free tier. Our simple usage of Lambda is included in the free tier, but if you're worried about accidental overages, you can set up a budget to control your usage and prevent unexpected billing.
Create an S3 Bucket
In the AWS console, perform a search for "S3" and select the product offering from the drop-down menu.
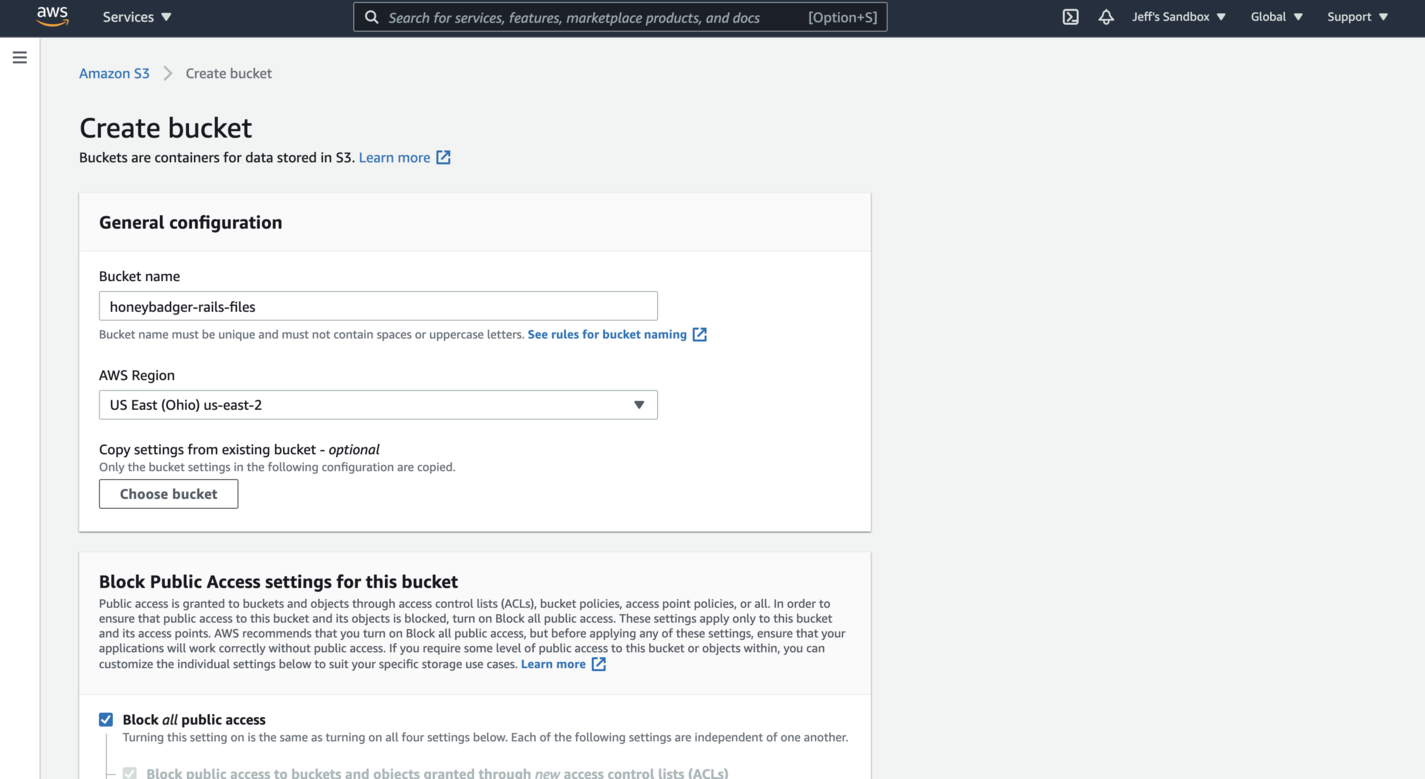
Once you're in the S3 Management Console, click on the "Create Bucket" button. You'll be immediately taken to a wizard where you'll set the bucket details. Create a memorable name and leave the default region for now.

- Keep "Block All Public Access" selected to ensure that your bucket isn't open to anyone who shouldn't be using it.
- You can also leave "Bucket Versioning" set to "Disable". We won't be using it in this tutorial.
- Finally, leave all the tags blank and keep encryption off.
After you click "Create", you'll have a functional S3 Bucket! However, you still need to configure permissions on the bucket. Start by heading over to identity access management (IAM) on the AWS console. Click "Users" on the side panel.
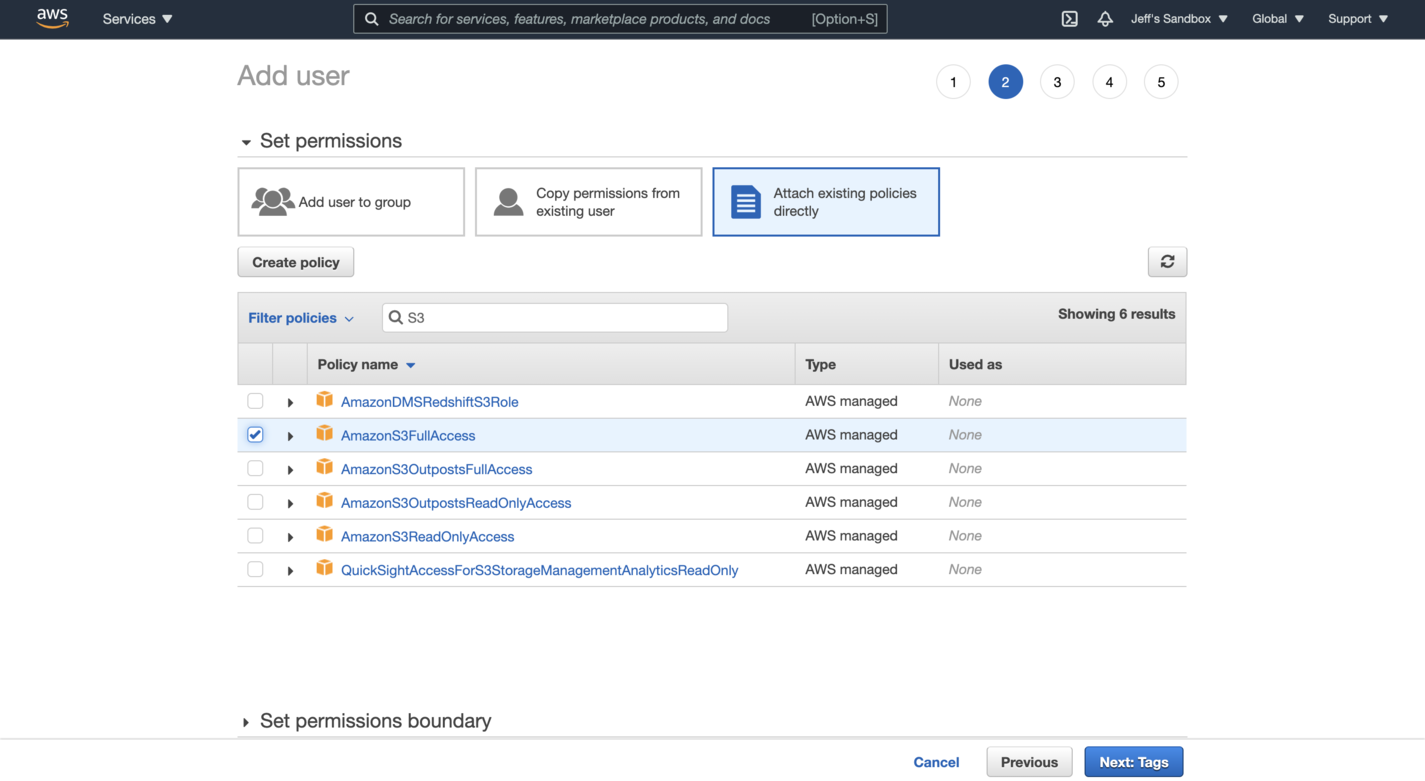
Click "Add User". Name your new user something like active-storage-user and only give it programmatic access. On the next screen, you'll need to set permissions. Click the tab for "Attach Existing Policies Directly". Next, search for S3 and click the checkbox next to AmazonS3FullAccess.

You can skip adding tags to the user, so just go through review and finish creating the user! Take note of the Access key ID and the Secret access key, as we'll need them later in our Rails configuration.
Next, we'll need to create a basic Ruby on Rails application to interact with our bucket. If you already have a Rails app, you can skip this step, but you'll still want to pay attention to the AWS configuration.
Create a basic rails app
I'll use the following versions for this example:
- Rails 6.1
- Ruby 3.0.0
Note that rbenv is a very standardized way to manage different Ruby versions. If you have homebrew, you can install it with
brew install rbenv.
If you're using rbenv, you can install Ruby 3.0.0 with
rbenv install 3.0.0.
Then, you can switch your current directory to Ruby 3.0.0 with
rbenv local 3.0.0.
If it's a new version of Ruby, you'll want to use
gem install rails.
Now that you're set, to go with Rails 6.1 and Ruby 3.0, you can create a new Rails application by running
rails new s3-example.
Replace s3-example with another name for your project, but remember that you'll also have to swap it out in any other code/shell reference to the project name.
Next, change it to the new project directory:
cd s3-example.
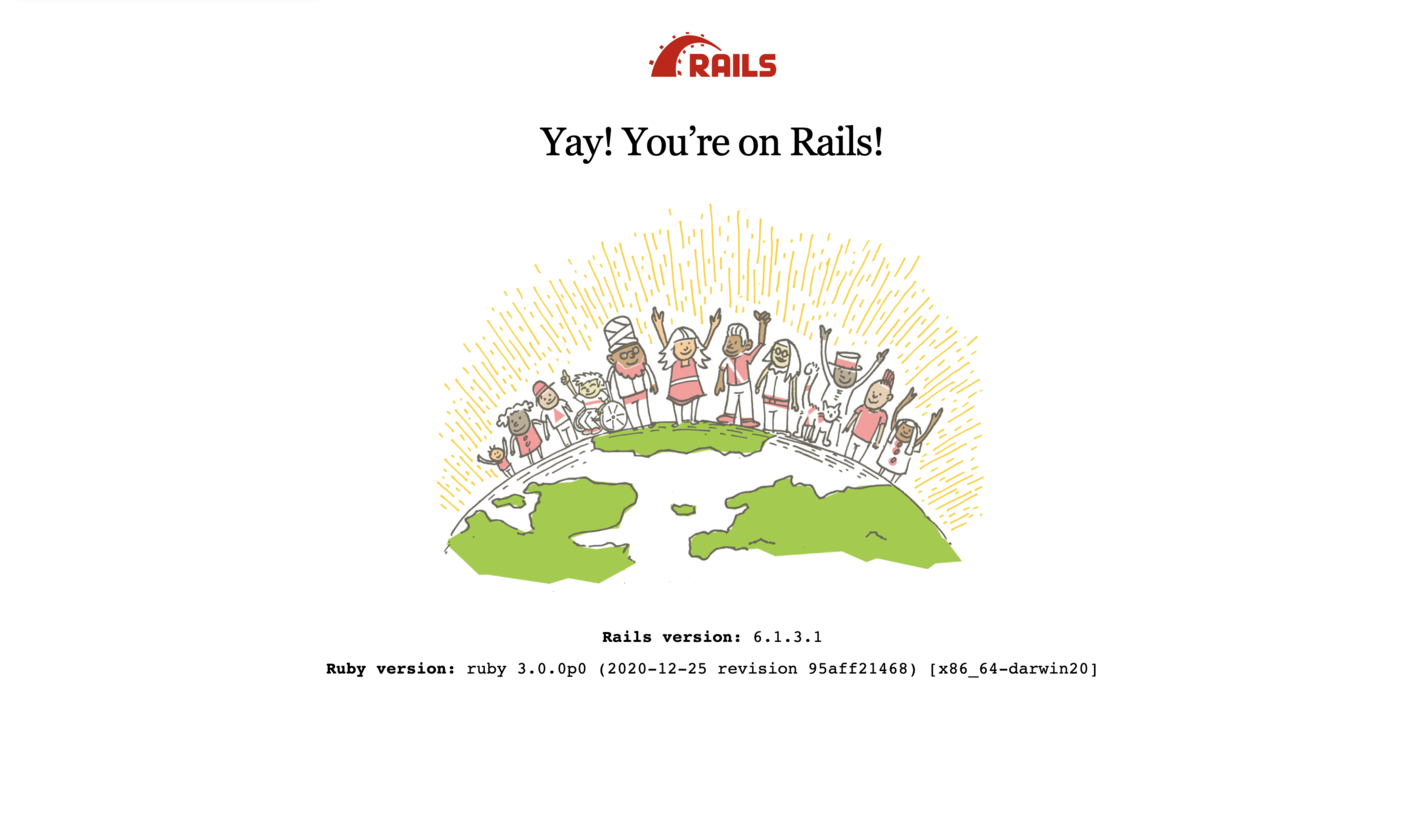
Finally, serve your project locally to verify that everything is working correctly on the Rails server. Then, navigate to localhost:3000 in your browser to see the Rails welcome page! If you see something like this, you're on the right path:

Now that our Rails app is up and running, we'll need to set up the UI to handle some file uploads.
Transferring Data
Configuration
We'll leverage ActiveStorage to talk to S3 on our application's behalf. To set it up, go to config/storage.yml First, uncomment the section headed by amazon. Next, fill in your bucket's name and region. For my application, the Amazon section of config/storage.yml looks like this:
amazon:
  service: S3
  access_key_id: <%= Rails.application.credentials.dig(:aws, :access_key_id) %>
  secret_access_key: <%= Rails.application.credentials.dig(:aws, :secret_access_key) %>
  region: us-east-2
  bucket: honeybadger-rails-files
Next, change a similar setting in config/environments/production.rb. The line that reads config.active_storage.service = :amazon should be changed to config.active_storage.service = :amazon.
If you want to ensure that it is working in your development environment, you'll need to set the same line in config/environments/development.rb.
You could use something like dotenv to manage your secret API keys, but we'll use Rails' built-in encrypted credentials manager. Rails will pull the AWS access key and secret out its encrypted credentials. First, you must set the access key in the Rails credentials file.
In your shell, run EDITOR=vim bin/rails credentials:edit to unencrypt and open the credentials file in vim. Hit the 'i' key on your keyboard to switch to insert mode. Uncomment out the aws line, along with its access_key_id and secret_access_key. Now, replace the placeholder value for access_key_id with what was listed after you created the IAM user. Do the same for secret_access_key.
Next, save the file and exit vim. There are a few ways to do this, but my favorite is by hitting the escape key (to leave insert mode) and then typing :wq, followed by the enter key. If you want to know more about how Rails handles encrypted credentials, this is a good resource.
Now, your Rails application is ready to use ActiveStorage for file storage and AWS S3 completely behind the scenes!
To fully take advantage of S3's power, we'll need to install the relevant Ruby Gem. Add the following to your Gemfile:
gem 'aws-sdk-s3'
Follow it up with running bundle install to install the gem (and anything else in your Gemfile that hasn't been installed yet).
Using ActiveStorage requires running the following:
rails active_storage:install
This creates a migration, so run it with the following:
rails db:migrate
Your application is now ready to work with S3!
Scoping To a User
To do something interesting with S3, we'll first give our application authentication features. Users will be able to make an account, sign in, and sign out. This way, they can upload files to the application and have it scoped to them. The Devise gem is an easy way to add simple authentication to a Ruby on Rails application, so it's what I'll be using here. Start by adding the gem to your Gemfile with this:
gem 'devise'
Next, install the Ruby Gem by running bundle install.
Next, take advantage of the Devise's generators and run
rails generate devise:install.
Devise needs a User model to work with, so create one by running
rails generate devise User.
Finish it all off by running the database migrations:
rails db:migrate.
If you want to be able to see and edit the devise view files (and we do!), then you'll need to run rails generate devise:views.
Your application should now be set up to authenticate users. Run the server with rails server and navigate to localhost:3000/users/sign_up to see your new sign-up page! If you've done everything right, it should look a lot like this:

Don't bother creating a user yet, since we're not quite done with the form itself. If you did create a user, we're in a bit of a pickle. We haven't added a "sign-out" button, so you'll have to delete the session cookie manually and perform a hard refresh.
Let's say we want our users to be able to upload an avatar for their profile. We'll start by adding an attachment to the model. In app/models/user.rb, add the following line:
has_one_attached :avatar
You can call the image anything you want, but here, I’ve called it 'avatar'. The next logical step is to add the avatar field to the form. In app/views/devise/registrations/devise/new.html.erb, add the following to the form (above the submit button):
<div class="field">
  <%= f.label :avatar %>
  <%= f.file_field :avatar %>
</div>
You'll need to permit the :avatar parameter. Again, we can't edit the Devise controller directly, so add the following to app/controllers.html.erb:
  before_action :configure_permitted_parameters, if: :devise_controller?

  protected

  def configure_permitted_parameters
    attributes = [:email, :password, :avatar]
    devise_parameter_sanitizer.permit(:sign_up, keys: attributes)
  end
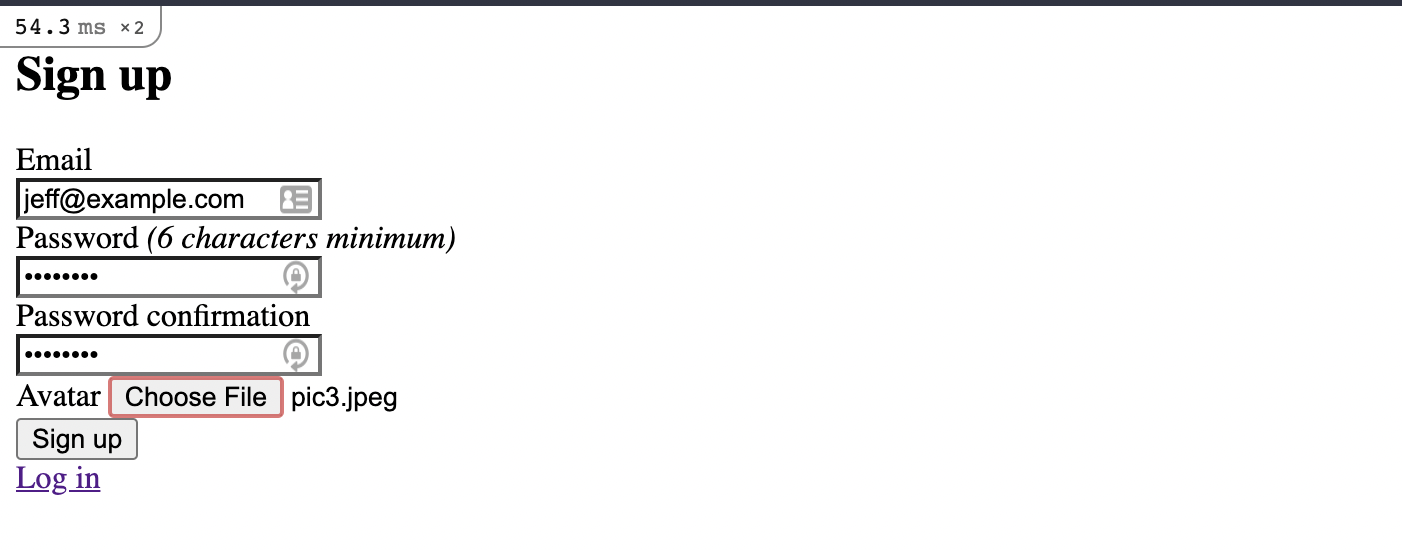
Your new sign-up page will look like this:
 .
.
After you submit the form, the file will be handled by the application and scoped to the specific user.
Devise doesn't come with user authentication built-in, and it doesn't have a public controller we can edit. Create one with
rails generate controller Users index.
Inside the index method in app/controllers/users_controller.rb, paste @users = User.all. Now, in app/views/users/index.html.erb, paste the following:
<h1>Users#index</h1>
<% @users.each do |user| %>
    <%= user.email %><br/>
    <%= user.avatar %><br/>
<% end %>
Next, add the following to your routes.rb file to match the URL to the controller action:
match '/users', to: 'users#index', via: 'get'
Now, hit localhost:3000/users and see that the attached image for each user displays properly.
You will never have to make calls directly to AWS S3. Rails' own ActiveStorage abstracts this away, just like ActiveRecord abstracts away the database.
You can directly retrieve files attached to a user (or any other model you're using) with something like the following:
url_for(@user.avatar)
In your code, you can also directly download a file stored with the following:
file = @user.avatar.download
Permissions
By default, all the files in your S3 buckets are private. We've created a user in IAM who has permission to do whatever he or she wants with the files on behalf of our application. As long as we keep the API keys private, our application will be the only thing that has access to the files. Thus, it is up to us to write our application in a way that secures the files as needed.
S3 files are downloaded via a link. You might be thinking that this method is incredibly insecure. After all, you probably don't want someone scraping files from your application, regardless of what they are. S3's permissions solve this in a way. Because we only granted access to our application's user role, strangers cannot download the file, even if they could find the highly obfuscated URL. With our current configuration, only our application can access the S3 bucket.
This leaves the scoping of private files up to the user. In our example above, we had a user upload an avatar image and then displayed it publicly on the user index page. This is great for a public-facing function, but you may have the need for a user to store files and have them non-accessible by other users. If this is the case, you'll want to ensure that you only expose the url_for on each file to the user who is associated with it. Devise has built-in methods that help with this.
S3 could also be used to host files publicly. Due to its incredibly inexpensive access calls, many applications use it to host web assets. You can do this by opening up permissions on the bucket that stores the files so that it can be reached directly via its URL. This approach, however, leaves your S3 bucket open to the entire internet. It would be even wiser to restrict it to your application and have the application load the images on the client's behalf, much like we're doing with our user avatars.
Hosting for higher traffic levels
While you can technically use S3 to host any file, it's not a great choice to host web assets. Unless you have some serious duplication logic, the files hosted on S3 are only in the region you initially selected. Files hosted in the us-east-2 region might load relatively quickly for someone in, for example, Virginia. When the client is on the other side of the world, however, load times quickly become an issue. This is manageable for some kinds of files, such as the ones used for utility. Things like background images and icons can quickly degrade your site's user experience.
The most common method of delivering web assets is directly from the server. Assets loaded from S3 can take around twice as long to load, depending on the distance to the availability zone. S3 is designed mostly for storage, so it's incredibly common to use a content delivery network (CDN) to deliver files that need to be retrieved constantly. CDNs deliver content with low latency and high transfer speeds, which means your users get your site faster. Beyond that, they can provide extra security and DOS protection, resulting in uptime improvements and even cost reductions should your site become a target.
CloudFront is another AWS offering designed specifically for this purpose. It's intimately integrated with AWS, so it's remarkably trivial to set it up with our S3 bucket. With this configuration, web assets are stored in S3 and delivered by CloudFront to your application.
Simply go into the AWS console and search for "CloudFront". Create a new distribution with the delivery method set to "Web". Rails can be set to serve static assets (precompiled) from CloudFront and S3 by adding the following line to config/environments/production.rb:
config.action_controller.asset_host = "<YOUR DISTRIBUTION SUBDOMAIN>.cloudfront.net"
S3 is a powerful tool for hosting and retrieving files, including static assets, public files, or individual users’ private files.

Written by
Jeffery MorhousJeff is a Software Engineer working in healthcare technology using Ruby on Rails, React, and plenty more tools. He loves making things that make life more interesting and learning as much he can on the way. In his spare time, he loves to play guitar, hike, and tinker with cars.