Working with Markdown in Python
If you use the Internet, you have surely come across the term Markdown. Markdown is a lightweight markup language that makes it very easy to write formatted content. It was created by John Gruber and Aaron Swartz in 2004. It uses very easy-to-remember syntax and is therefore used by many bloggers and content writers around the world. Even this blog that you are reading is written and formatted using Markdown.
Markdown is one of the most widely used formats for storing formatted data. It easily integrates with Web technologies, as it can be converted to HTML or vice versa using Markdown compilers. It allows you to write HTML entities, such as headings, lists, images, links, tables, and more without much effort or code. It is used in blogs, content management systems, Wikis, documentation, and many more places.
In this article, you'll learn how to work with Markdown in a Python application using different Python packages, including markdown, front matter, and markdownify.
Prerequisites
To follow along with this tutorial, you’ll need the following:
- Python v3.x
- Basic understanding of HTML and Markdown
Setting Up a Project
Before proceeding with the project, you’ll need to set up a project directory to work in.
So, first, open up your terminal, navigate to a path of your choice, and create a project directory (python-markdown) by running the following commands in the terminal:
mkdir python-markdown
cd python-markdown
Finally, create and activate the virtual environment (venv) for your Python project by running the following commands:
python3 -m venv
source venv/bin/activate
That’s it. The project setup is complete.
Converting Markdown to HTML in Python
One of the most common operations related to Markdown is converting it to HTML. By doing so, you can write your content in Markdown and then compile it to HTML, which you can then deploy to a CDN or server.
First, install the python-markdown package by running the following command in the terminal:
pip install markdown
Next, at your project’s root directory, create a main.py file and add the following code to it:
# 1
import markdown

markdown_string = '# Hello World'

# 2
html_string = markdown.markdown(markdown_string)
print(html_string)
In the above code, you are doing the following:
- Importing the
markdownmodule. - Converting the markdown (
markdown_string) to HTML (html_string) using themarkdownmethod from themarkdownpackage.
Finally, save your code and run the main.py file by running the following command in the terminal:
python main.py
Once the code execution is complete, you’ll get the HTML output as follows:

You can try a more complex Markdown string like the one in the code below and use it to create HTML:
markdown_string = '''
# Hello World

This is a **great** tutorial about using Markdown in [Python](https://python.org).
'''
In this example, you make use of headings, bold text, and links in Markdown.

Converting a Markdown File to HTML in Python
Most of the time, you’ll be working with Markdown files rather than Markdown strings. Therefore, it makes sense to learn how to convert a Markdown file to an HTML file.
To do so, first, create a sample.md file and add the following code to it:
# Hello World

This is a **Markdown** file.
Next, replace the existing code in the main.py file with the following:
import markdown

# 1
with open('sample.md', 'r') as f:
    markdown_string = f.read()

# 2
html_string = markdown.markdown(markdown_string)

# 3
with open('sample.html', 'w') as f:
    f.write(html_string)
In the above code, you are doing the following:
- Reading the
sample.mdand storing its content in themarkdown_stringvariable. - Converting the markdown (
markdown_string) to HTML (html_string) using themarkdownmethod from themarkdownpackage. - Creating a
sample.htmlfile and writing the HTML (html_string) to it.
Finally, save your code and run the main.py file by running the following command in the terminal:
python main.py
Once the code execution is complete, you’ll see a sample.html file in your project’s root directory:
Converting HTML to Markdown in Python
Sometimes, a situation arises where you might want to convert HTML to Markdown. For this purpose, you can use the markdownify package in Python.
First, install the package by running the following command in the terminal:
pip install markdownify
Next, replace the existing code in the main.py file with the following:
# 1
import markdownify

html_string = '''
<h1>Hello World</h1>
<p>This is a great tutorial about using Markdown in Python.</p>
'''

# 2
markdown_string = markdownify.markdownify(html_string)
print(markdown_string)
In the above code, you are doing the following:
- Importing the
markdownifymodule. - Converting the HTML (
html_string) to Markdown (markdown_string) using themarkdownifymethod from themarkdownifypackage.
Finally, save your code and run the main.py file by running the following command in the terminal:
python main.py
Once the code execution is complete, you’ll get the Markdown output:
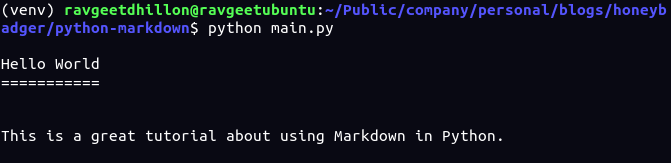
If you see the output above, you’ll see the headings (<h1>) created with the "underlining" with equal signs (=) instead of starting with hashtags (#). This is because Markdown comes with two styles of headers: Setext and atx, and by default, the Markdown parser uses Setext-style headers. You configure markdownify to use ATX-style headers by passing the heading_style='ATX' parameter to the markdownify method.
Markdownify also supports a number of options, including HTML tag stripping, HTML tag conversion, Markdown heading styles, and more.
Converting an HTML File to Markdown in Python
Previously, we converted a Markdown file to an HTML file. However, sometimes, you might need to convert an HTML file to a Markdown file.
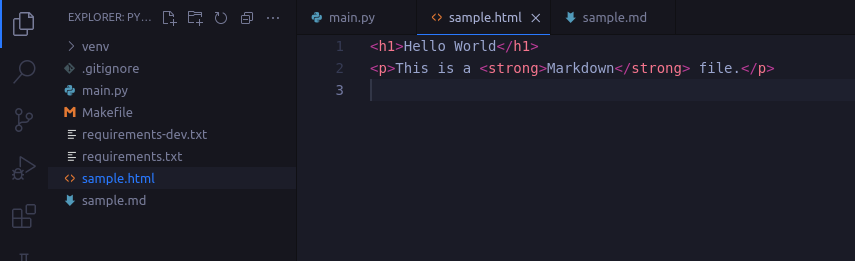
To do so, first, create a sample.html file and add the following code to it:
<!DOCTYPE html>
<html lang="en">
<body>
    <h1>Hello World</h1>
    <p>This is a <strong>HTML</strong> file.</p>
    <a href="https://honeybadger.io/">Visit Honeybadger</a>
</body>
</html>
Next, replace the existing code in the main.py file with the following:
import markdownify

# 1
with open('sample.html', 'r') as f:
    html_string = f.read()

# 2
markdown_string = markdownify.markdownify(html_string, heading_style='ATX')

# 3
with open('sample.md', 'w') as f:
    f.write(markdown_string)
In the above code, you’re doing the following:
- Reading the
sample.htmland storing its content in thehtml_stringvariable. - Converting the HTML (
html_string) to Markdown (markdown_string) using themarkdownifymethod from themarkdownifypackage. - Creating a
sample.mdfile and writing the Markdown (markdown_string) to it.
Finally, save your code and run the main.py file by running the following command in the terminal:
python main.py
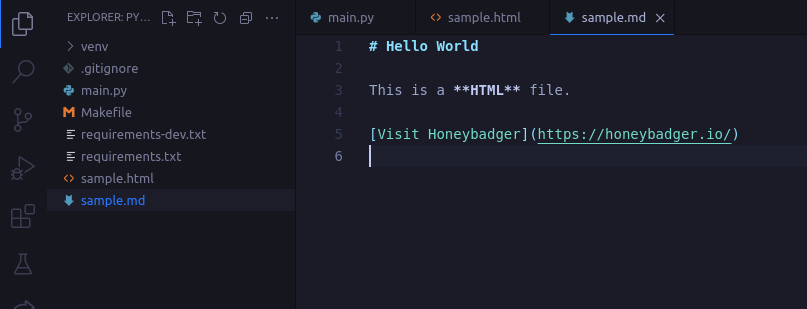
Once the code execution is complete, you’ll see a sample.md file in your project’s root directory as follows:
Reading Markdown Front Matter in Python
In the world of Markdown, there are often some variables or metadata associated with a Markdown file. This is known as front matter. Front matter data variables are a great way to store extra information about a Markdown file. For example, a blog’s markdown files can have front matter variables like Title, Author, Image, Published At, and more.
You can specify front matter at the beginning of a Markdown file by placing the YAML data variables between triple-dashed lines. For example,
---
title: Hello World
Author: John Doe
Published: 2020-01-20
---
In Python, you can parse Markdown front matter with the python-front matter package.
To see this package in action, first, install the package by running the following command in the terminal:
pip install python-frontmatter
Next, add the following front matter to the sample.md file:
---
title: Hello World
date: 2022-01-20
---
Next, replace the existing code in the main.py file with the following:
# 1
import frontmatter

# 2
data = frontmatter.load('sample.md')

# 3
print(data.keys())
print(data['title'])
print(data['date'])
In the above code, you are doing the following:
- Importing the
frontmattermodule. - Reading the
sample.mdfile using theloadmethod from thefrontmatterpackage and storing the result in thedatavariable. - Accessing the front matter variables with the help of
data.keys(). Sincedatais a dictionary, you can also access the individual keys (data['title']ordata['date']).
Finally, save your code and run the main.py file by running the following command in the terminal:
python main.py
Once the code execution is complete, you’ll get the output of the front matter variables as follows:

Updating Markdown Front Matter in Python
Sometimes, a situation arises where you might want to convert HTML to Markdown. For this purpose, you can use the Python’s markdownify package.
You can also update the existing front matter data variables or add new ones using the front matter package.
To do so, first, replace the existing code in the main.py file with the following:
import frontmatter

# 1
data = frontmatter.load('sample.md')

# 2
data['author'] = 'John Doe'

# 3
data['title'] = 'Bye World'

# 4
updated_data = frontmatter.dumps(data)

# 5
with open('sample.md', 'w') as f:
    f.write(updated_data)
In the above code, you are doing the following:
- Reading (
frontmater.load()) thesample.mdfile. - Adding a new key (
author) to the front matterdatavariable and assigning it a value (John Doe). - Updating the existing key (
title) and assigning it a new value (Bye World). - Serializing (
frontmatter.dumps()) thedatavariable to a string and storing the result in theupdated_datavariable. - Updating the
sample.mdfile by writing the updated Markdown (updated_data) to it.
Finally, save your code and run the main.py file by running the following command in the terminal:
python main.py
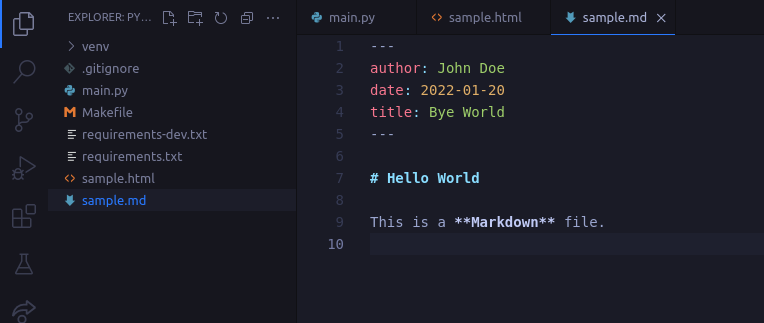
Once the code execution is complete, check the sample.md file for the updated front matter data, as follows:
Using Python Markdown Extensions
The python-markdown package also supports extensions that allow you to modify and/or extend the default behavior of the Markdown parser. For example, to generate a table of contents (TOC), you can use the toc extension. There are other extensions, as well, which you can make use of based on your requirements.
To create a TOC for your Markdown content, first, replace the existing code in the main.py file with the following:
import markdown

# 1
markdown_string = '''
[TOC]

# Hello World

This is a **great** tutorial about using Markdown in [Python](https://python.org).

# Bye World
'''

# 2
html_string = markdown.markdown(markdown_string, extensions=['toc'])
print(html_string)
In the above code, you are doing the following:
- Specifying the
[TOC]string in your Markdown (markdown_string) where you want to add the table of contents. - Adding the
extensionsparameter to themarkdownmethod from themarkdownpackage and specifying the extensions (['toc']) you want to use.
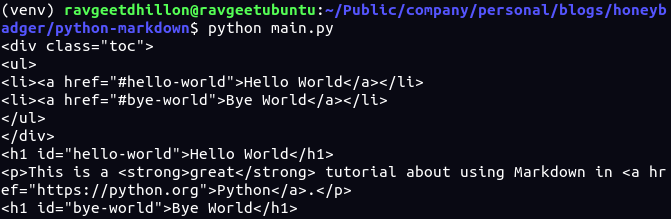
Finally, save your code and run the main.py file by running the following command in the terminal:
python main.py
Once the code execution is complete, you’ll get the HTML output with the Table of Contents as a list:
Conclusion
Learning to work with Markdown can help you in lots of ways. Using Python, you can automate many tasks, including maintaining and manipulating Markdown files. For example, you can write a script that creates an index for all of your Markdown files in your blog or organize your Markdown files into different directories based on the front matter data variables, such as tags/categories.
Honeybadger, which is a cloud-based system for real-time monitoring, error tracking, and exception-catching, also uses Markdown to maintain our documentation. In case you are interested, we wrote a blog post in which we talk about how we built a documentation workflow in Rails.

Written by
Ravgeet DhillonRavgeet Dhillon is a Full Stack Developer - React, Vue, Flutter, Strapi, Python, MySQL, and Technical Content Writer. He runs a one-man freelance agency, RavSam.in, via which he helps startups, businesses, and open-source organizations with Digital Product Development. He loves to play outdoor sports and cycles every day.