The PHPer's Guide to OAuth
OAuth has become a very popular protocol when it comes to integrating with third-party and yet, there are many aspects that are not easy to put into practice for the first time.
In this article, you'll learn the following:
- What OAuth is.
- Why you should use OAuth.
- Some APIs you can use that require OAuth.
- How to implement OAuth in your PHP applications.
What is OAuth?
OAuth is an open standard for implementing secure delegated access, meaning the ability for an application to act on behalf of users of another application without compromising their passwords.
A very simple example will help clarify the issue. Let's say you are designing an application that will post messages to your user's Twitter feed. To do this, your application needs a way to authenticate itself as the user and post to the user’s feed. This would, in turn, require your application to know the Twitter username and password of each of its users, which is something not many people would be willing to provide, right?
What would happen if your application got hacked? Every user's password could be exposed!
So, instead of doing that, your application will store a token, which will indicate to Twitter that it's acting on behalf of the user associated with such a token. This approach provides a safe environment for users and allows your application to take advantage of Twitter's features.
One thing that needs to be clear is that OAuth solves authorization but not authentication: it's meant to inform that some Client can do something on behalf of a User, not to prove that someone is who they say they are. You can think about it as a spare key that you give to a friend; with it, they can enter your house anytime, but this doesn't mean they are the owner.
Because it’s open, anyone can implement it using the technology of their choice.
Later in this article, I'll share some actual PHP code, but before we get into that, let's quickly review how OAuth works.
How Does OAuth Work?
In this section, you'll get a quick overview of OAuth's details to establish a common ground for the topics I'll be discussing later on.
Actors
There are four main actors in OAuth:
- The Resource Owner (An actual human being)
- The Client (The application that wants to do something on behalf of the Resource Owner)
- The Resource Server (The API that has the ability to do that something)
- The Authorization Server (The API that handles the authorization process)
Scopes
Scopes are specific permissions that can be granted for clients: actions they can perform and/or resources they can access.
The exact details of what those scopes mean is particular to every Resource Server.
Grant Types
Finally, what ties it all together is the concept of Grant Type: a workflow that must be followed for the Client to access the protected resources on behalf of the Resource Owner.
There are several Grant Types defined within the Standard. Authorization Code grant is the most widely used, so this is what I'll be discussing here.
The first step of the integration consists of the Client registering at the Authorization Server and getting a Client Id and a Secret (very similar to a username and password). What this means in practice is that the client application creator will have to perform this manual step using some application provided by the Resource Server. With this information in hand, the dance can begin.
Authorization Code Workflow
Assuming everything is in place, the basic workflow looks like this:
- The Resource Owner expresses their wish to have the Client perform a particular action at the Resource Server on their behalf (This usually means clicking on a button or link that will trigger a specific action, such as logging in using some external credentials.)
- The Client authenticates itself with the Authorization Server using its Client ID and Secret.
- The Resource Owner is asked to confirm their intention of granting access to the protected resource by the Client.
- The Client receives an Authorization Code from the Authorization Server.
- The Client sends the Authorization Code back to the Authorization Server asking for an Access Token.
- The Authorization Server issues a new Access Token and sends it back to the Client.
- The Client asks the Resource Server to perform the desired action on behalf of the Resource Owner, offering the Access Token as proof of authorization.
- The Resource Server executes the desired action.
Then, any time the Client needs to execute some action on behalf of the Resource Owner, it simply has to use the Access Token it obtained. At the same time, the Resource Owner retains the ability to revoke such a token when they see fit, thereby preventing the Client from making further requests for them.
Currently, there are two versions of OAuth: 1.0 and 2.0. Unfortunately, they are not compatible with each other, so if you need to interact with an application using OAuth, it makes a lot of sense to learn which version it's using before starting to prevent unpleasant surprises.
As for some technical details, OAuth 2.0 is faster and easier than its predecessor. Furthermore, OAuth 1.0 is deprecated, so if you can choose, you should select OAuth 2.0 rather than 1.0, which is what I'll be doing for the rest of this article. :)
If you want to take a deeper look at OAuth, the best resource is this.
A Few APIs You Can Use That Require OAuth
I already mentioned Twitter, but here are some other interesting APIs you could take advantage of:
- PayPal
- GitHub
In general, every big player out there is using OAuth for API usage by third-party applications (such as the ones you'll be creating).
PHP OAuth Implementation
So, now that you know what OAuth is and what benefits it brings to the table, it's time to get our hands dirty and look some actual PHP implementations.
As usual, you could implement all of OAuth's workflow by yourself. Since it is an open standard, there's nothing stopping you from doing that, but you don't have to start from scratch.
I put together this sample project, which leverages two libraries created by The PHP League and will be discussed in the following sections of this article. If you want to follow along, go ahead and clone the repository.
To keep dependencies to a minimum and the example as generic as possible, the project isn't based on any particular framework, it just uses the libraries needed to get everything working with as much plain PHP as possible and starts from the very basic level, assuming just enough to get things going.
The project is divided into three sub-projects:
- The Client
- The Auth Server
- The Resource Server
To get it working, you'll need to do the following:
- Install the dependencies found in each directory.
A.
cd $PROJECT_ROOT/auth_server; composer installB.cd $PROJECT_ROOT/client; composer installC.cd $PROJECT_ROOT/resource_server; composer install - Start three separate PHP servers:
A.
cd $PROJECT_ROOT;B.php -S localhost:8000 -t clientC.php -S localhost:8001 -t auth_serverD.php -S localhost:8002 -t resource_server - Open a browser at
http://localhost:8000.
You should see a screen similar to the following image:
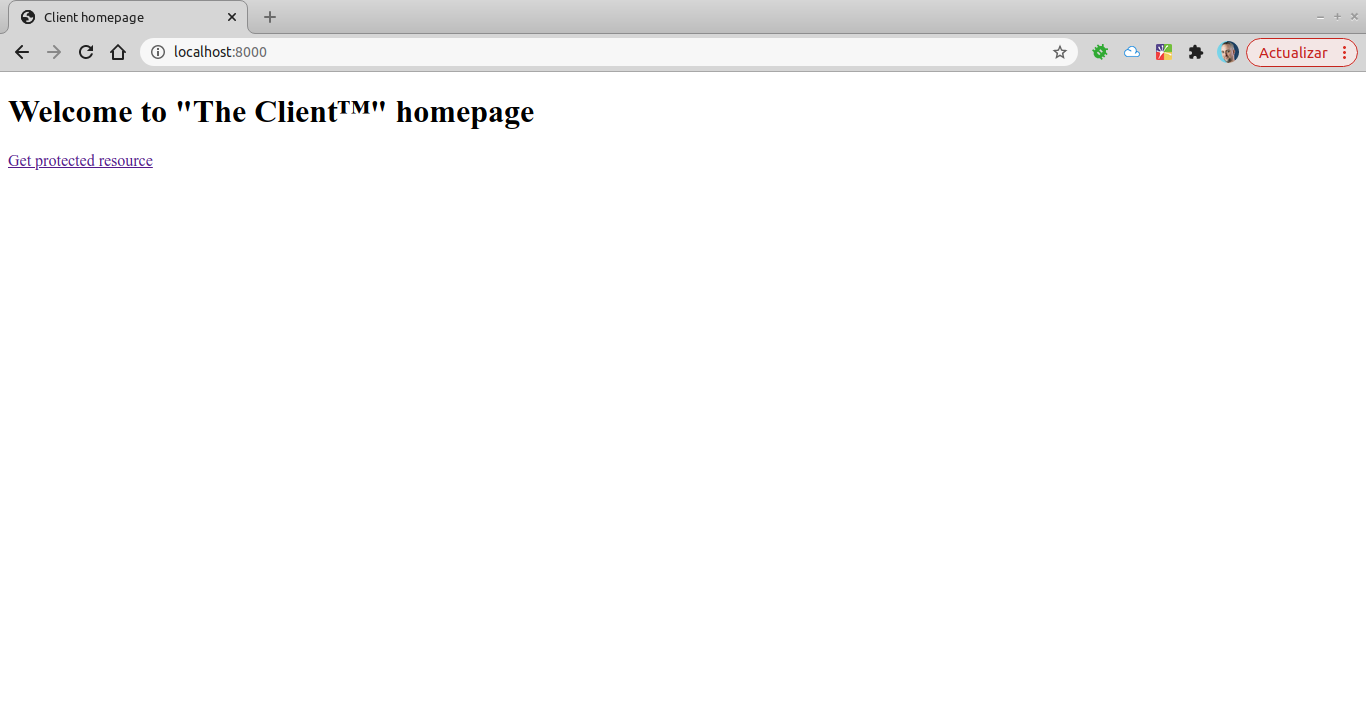
If you want to change the ports used, you can do so by editing the .env file found in each directory.
Now, let's dig in and see what's behind the scenes.
OAuth on the Client Side
For the client side, I'll be using the library league/oauth2-client.
The beauty of this library is that it provides a common interface regardless of the actual service you're going to be connecting to, making it fairly easy to change providers as you go.
Most likely, you'll be talking to a well-known service provider, so your best shot is probably to look for a ready-to-go client. (Here are the official ones, and here are some community-maintained ones).
Notably, the inner workings of the library are all based around the concept of Providers. In fact, the library defines an abstract class, which will later be specialized by each specific client. In my case, I'll be using the class \League\OAuth2\Client\Provider\GenericProvider, which only requires a few parameters for initialization.
The first request to the client will be served by the file index.html, which contains a simple link that allows the Resource Owner to express their intention to grant access to a Protected Resource. Upon following such a link, the user will be redirected to init_oauth.php, which is responsible for starting the workflow.
Since there will be another file using the library (process_auth_code.php), I put the common code inside a bootstrap.php file:
<?php

require_once 'vendor/autoload.php';

$dotenv = \Dotenv\Dotenv::createUnsafeImmutable(__DIR__);
$dotenv->load();

$provider = new \League\OAuth2\Client\Provider\GenericProvider([
    'clientId'                => getenv('OAUTH_CLIENT_ID'),    // The client ID assigned to you by the provider
    'clientSecret'            => getenv('OAUTH_CLIENT_SECRET'),    // The client password assigned to you by the provider
    'redirectUri'             => getenv('CLIENT_REDIRECT_URI'),
    'urlAuthorize'            => getenv('AUTHORIZATION_SERVER_AUTHORIZE_URL'),
    'urlAccessToken'          => getenv('AUTHORIZATION_SERVER_ACCESS_TOKEN_URL'),
    'urlResourceOwnerDetails' => getenv('RESOURCE_OWNER_URL'),
]);

session_start();
Here, I'm using the vlucas/phpdotenv library to process .env files.
The main goal of this file is to configure the GenericProvider, the gateway to OAuth servers (Authorization and Resource).
One important aspect to keep in mind is that the workflow will be initiated by the client, but upon successful authorization, the server will have to make a call-back to the client. This call-back will be a redirection to the URL indicated at redirectUri.
The parameter urlAuthorize will be used as the main entry point for requesting authorization and urlAccessToken as the endpoint where the clients need to connect and exchange the authorization code for an actual Access Token.
Now that we have our provider ready, let's have a look at the workflow steps:
OAuth Initiation
The init_oauth.php file looks like this:
<?php

require_once 'bootstrap.php';

$authorizationUrl = $provider->getAuthorizationUrl(
    ['scope' => 'protected_resource_access']
);

$_SESSION['oauth2state'] = $provider->getState();

header('Location: ' . $authorizationUrl);
To start the flow, we need the user to provide their consent. To do this, they must be redirected to the appropriate authorization URL. In this case, it'd be the URL configured when creating the client.
In this example, the client is requesting authorization to access a protected resource. To do this, the scope option must be used as a parameter to the getAuthorizationUrl method from the AbstractProvider class, which will return a full URL to be used in the redirection.
Of course, the URL itself won't do; there has to be some other parameters to unambiguously identify the request. One such parameter is state, which will be used to prevent CSRF attacks.
The URL produced by this example will look like this:
http://localhost:8001/authorize.php?scope=protected_resource_access&state=0ed589466400cc4e9c48319b11afe415&response_type=code&approval_prompt=auto&redirect_uri=http%3A%2F%2Flocalhost%3A8000%2Fprocess_auth_code.php&client_id=12345
The next step happens on the server side, so let's not worry about it for now and assume everything goes as expected.
Once the user confirms their intent to grant our application an access token, the server will redirect them back to redirectUri with a few parameters.
In our case, redirectUri points to http://localhost:8000/process_auth_code.php. When the user confirms, they get redirected to this URL with a code parameter. This parameter needs to be sent back to the server to obtain the Access Token.
Let's have a look at process_auth_code.php:
<?php

require_once 'bootstrap.php';

if (empty($_GET['state']) || (isset($_SESSION['oauth2state']) && $_GET['state'] !== $_SESSION['oauth2state'])) {

    if (isset($_SESSION['oauth2state'])) {
        unset($_SESSION['oauth2state']);
    }

    exit('Invalid state');

} else {

    try {

        $accessToken = $provider->getAccessToken('authorization_code', [
            'code' => urldecode($_GET['code']),
        ]);

        ?>
        <h1>Access token information</h1>
        <table>
            <tr>
                <th>Access token</th>
                <td><?php echo $accessToken->getToken(); ?></td>
            </tr>
            <tr>
                <th>Refresh Token</th>
                <td><?php echo $accessToken->getRefreshToken(); ?></td>
            </tr>
            <tr>
                <th>Expired in</th>
                <td><?php echo $accessToken->getExpires(); ?></td>
            </tr>
            <tr>
                <th>Already expired?</th>
                <td><?php echo ($accessToken->hasExpired() ? 'expired' : 'not expired') ?></td>
            </tr>
        </table>
        <?php
        ?>
        <h1>Resource owner information</h1>
<?php
        $resourceOwner = $provider->getResourceOwner($accessToken);

        var_export($resourceOwner->toArray());
?>
        <h1>A resource only accessible via OAuth</h1>
<?php
        $request = $provider->getAuthenticatedRequest(
            'GET',
            getenv('RESOURCE_SERVER_URL'),
            $accessToken
        );
        $httpClient = new \GuzzleHttp\Client();
        $response = $httpClient->send($request);

        echo $response->getBody();
    } catch (\League\OAuth2\Client\Provider\Exception\IdentityProviderException $e) {

        exit($e->getMessage());
    }
}
The first lines act as a barrier against CSRF attacks; assuming there's no one trying to do nasty things, the workflow can continue.
If everything goes as expected, the call to getAccessToken will perform a server-to-server call, resulting in an Access Token that will allow the application to ask for the Protected Resource and get a positive response.
And just like that, we have an application that can be authorized to perform actions on behalf of external users without knowing their credentials. Not bad, right?
Okay, but what if you wanted to allow third-party applications to perform actions on your servers on behalf of your users? To do this, you'll need to implement server-side logic.
Let's do it!
OAuth on the Server Side
For the server side, I'll use the OAuth 2.0 server library. The implementation here is more complex, as there are many moving parts that need to be in place.
First of all, a set of cryptographic keys must be set up; (the instructions can be found here).
The whole idea of this library is to provide a clean object-oriented model that can be used with any standard framework (or none of them).
The basic components of the server side are as follows:
- The Authorization Server
- The Resource Server
In the following sections, we'll discuss each in detail. For now, let's go over some elements that play an important role, which are modeled as Entities (which have a corresponding Repository for serialization/deserialization):
- AccessTokens
- AuthCodes
- Clients
- Scopes
First, let's refresh a little about how they all play together. Access tokens and AuthCodes will be generated by the Authorization Sever and exchanged with the Clients.
Client entities represent applications that are properly registered within the Authorization Server. Keep in mind that for any Authorization Server, there can be many Clients, each with its own set of configurations (Call-backs, AccessTokens, etc.).
Scope entities represent the permissions that can be granted to Clients. In the example project, you'll find just one scope: protected_resource_access; but again, your application will probably have a few.
To respond to client requests, the Authorization server will have to implement two endpoints:
/authorize/token
The first will be used by the client to ask for an Authorization Code (via getting the Resource Owner's approval).
The second will be used to get an Access Token in exchange for the Authorization Code.
Setting the Stage
Before we put the Authorization and Resource servers together, the Entity classes and corresponding Repositories need to be defined.
The library I'm using facilitates this by providing Interfaces and Traits that make creating these classes trivial.
Since the library is designed to be easily integrated with different frameworks, it relies on the usage of PSR-7 compliant HTTP messages. To fulfill this requirement, I'll be using the nyholm/psr7 package.
The implementation I'll be showing doesn't have any database behind it; it's all hard-coded for the purpose of simplicity. Clearly, this wouldn't be the case for a real scenario.
Alright, now that all the basic bricks are on the set, let's have a look at the core implementation of the servers.
The Authorization Server
There are some similarities between the two endpoints, so I'll start putting them together in two files:
bootstrap.phpfor the init of everythingoutput.phpfor rendering the response
bootstrap.php looks like this:
<?php

require_once 'vendor/autoload.php';

$dotenv = \Dotenv\Dotenv::createUnsafeImmutable(__DIR__);
$dotenv->load();

$clientRepository = new ClientRepository();
$scopeRepository = new ScopeRepository();
$accessTokenRepository = new AccessTokenRepository();
$authCodeRepository = new AuthCodeRepository();
$refreshTokenRepository = new RefreshTokenRepository();

$privateKey = 'file://'.__DIR__.DIRECTORY_SEPARATOR.'..'.DIRECTORY_SEPARATOR.'private.key';
$encryptionKey = 'w94BP8Vp+hIg7G7MlRyzkJg31tkwjL4J3Z4Rmh8jisw='; // generate using base64_encode(random_bytes(32))

$server = new \League\OAuth2\Server\AuthorizationServer(
    $clientRepository,
    $accessTokenRepository,
    $scopeRepository,
    $privateKey,
    $encryptionKey
);

$grant = new \League\OAuth2\Server\Grant\AuthCodeGrant(
     $authCodeRepository,
     $refreshTokenRepository,
     new \DateInterval('PT10M')
 );

$grant->setRefreshTokenTTL(new \DateInterval('P1M'));

$grant->disableRequireCodeChallengeForPublicClients();

$server->enableGrantType(
    $grant,
    new \DateInterval('PT1H')
);

$psr17Factory = new Nyholm\Psr7\Factory\Psr17Factory();

$creator = new Nyholm\Psr7Server\ServerRequestCreator(
    $psr17Factory,
    $psr17Factory,
    $psr17Factory,
    $psr17Factory
);

$request = $creator->fromGlobals();
$response = new GuzzleHttp\Psr7\Response();

session_start();
In this file, I am creating the following:
- The Authorization Server, which will use the private key to create encrypted tokens.
- The AuthCodeGrant to be used as the strategy for validating the requests and granting access to the protected resources.
- The request and response objects that will be used to interact with the client over HTTP messages.
output.php looks like this:
<?php

http_response_code($response->getStatusCode());
foreach ($response->getHeaders() as $name => $values) {
    header("$name: " . implode(',', $values));
}
echo $response->getBody();
This file simply outputs the response headers and body back to the client.
For the /authorize endpoint, I'll be using a file called authorize.php, which looks like this:
<?php

use League\OAuth2\Server\Exception\OAuthServerException;

require_once 'bootstrap.php';

try {

    if (!array_key_exists('authRequest', $_SESSION)) {
        $authRequest = $server->validateAuthorizationRequest($request);
        $client = $clientRepository->getClientEntity($request->getQueryParams()['client_id']);
        $authRequest->setClient($client);
        $authRequest->setRedirectUri($client->getRedirectUri());
        $authRequest->setScopes([$scopeRepository->getScopeEntityByIdentifier(1)]);
        $_SESSION['authRequest'] = serialize($authRequest);
    } else {
        $authRequest = unserialize($_SESSION['authRequest']);
    }

    if (!array_key_exists('uid', $_SESSION)) {
        $response = $response
            ->withStatus(301)
            ->withHeader('Location', 'login.php?callback=authorize.php');
    } elseif (!array_key_exists('approved', $_SESSION)) {
        $userRepository = new UserRepository();

        $authRequest->setUser(
            $userRepository->getUserEntityById($_SESSION['uid'])
        );

        $_SESSION['authRequest'] = serialize($authRequest);

        $response = $response
            ->withStatus(301)
            ->withHeader(
                'Location',
                'approve.php?scope='.urlencode(implode(',',
                    array_map(
                        fn($scope) => $scope->getIdentifier(), $authRequest->getScopes())
                )).'&callback=authorize.php'
            );
    } else {
        $authRequest->setAuthorizationApproved(true);

        $response = $server->completeAuthorizationRequest($authRequest, $response);

        session_destroy();
    }
} catch (OAuthServerException $exception) {

    $response = $exception->generateHttpResponse($response);

} catch (Exception $exception) {

    $response = $response->withStatus(500);
}

require_once 'output.php';
This is the file where the client will redirect the user for them to provide consent.
As you can see, the library is extremely useful to abstract all the complexity of token handling.
When this file is accessed for the first time, there will be no authRequest stored in the user's session, signaling that it's the beginning of the flow. Thus, I'll create an authRequest object based on the parameters received from the client.
An interesting feature of this object is that in can be serialized and stored into the user's session, which solves the problem of forwarding the whole parameter set throughout the workflow.
The next step would be for the user to authenticate themselves and provide their consent to the Client's request. Once both steps are complete, the authorization request can be completed and the User redirected to the callback established by the client, along with the Authorization Code recently created for them.
The login.php and approve.php files complete the flow but don't have any particular usage of the library, so I won't examine them here.
Once the Client has been authorized, it will send the Authorization Code to the second endpoint, as discussed earlier, by issuing a request to the /token endpoint.
In this case, the endpoint is implemented in the token.php file, which looks like this:
<?php

use League\OAuth2\Server\Exception\OAuthServerException;

require_once 'bootstrap.php';

try {

    $response = $server->respondToAccessTokenRequest($request, $response);

} catch (\League\OAuth2\Server\Exception\OAuthServerException $exception) {

    $response = $exception->generateHttpResponse($response);

} catch (\Exception $exception) {

    $body = new Stream(fopen('php://temp', 'r+'));
    $body->write($exception->getMessage());

    $response = $response->withStatus(500)->withBody($body);
}

require_once 'output.php';
Here, the interaction is much simpler since this communication is done without the Resource Owner's participation (it's 100% app-to-app).
Again, you can see how the library takes care of the heavy lifting inside the AuthorizationServer::respondToAccessTokenRequest method, making it easy for you to effectively implement the OAuth protocol within your PHP applications.
At this point, the Client has an Access Token that grants them access to a Protected Resource within the Resource Server.
It's time to see how we can make sure that's the case and, most importantly, that only clients bearing a valid token can have access to such a resource.
The Resource Server
The Resource Server can be any API you already have; the only thing you'll add to it is the ability to restrict access based on the validity of an Access Token provided by the Authorization Server.
For this example, the resource server only has one endpoint: resource.php. However, it could certainly have many more.
The structure of this file follows the same pattern as the ones already discussed; there's a bootstrap.php at the beginning and an output.php at the end.
The bootstrap.php file is similar to the one used for the Authorization Server.
The main differences are as follows:
- Here, we will use a different class for processing requests and creating responses:
\League\OAuth2\Server\ResourceServer. - We will use the public key instead of the private one for decrypting the tokens received.
This is what the bootstrap.php file looks like:
<?php

require_once 'vendor/autoload.php';

$accessTokenRepository = new AccessTokenRepository(); // instance of AccessTokenRepositoryInterface

$publicKeyPath = 'file://' . __DIR__ . DIRECTORY_SEPARATOR . '..' . DIRECTORY_SEPARATOR . 'public.key';

$server = new \League\OAuth2\Server\ResourceServer(
    $accessTokenRepository,
    $publicKeyPath
);

$middleware = new \League\OAuth2\Server\Middleware\ResourceServerMiddleware($server);

$psr17Factory = new \Nyholm\Psr7\Factory\Psr17Factory();

$creator = new \Nyholm\Psr7Server\ServerRequestCreator(
    $psr17Factory,
    $psr17Factory,
    $psr17Factory,
    $psr17Factory
);

$request = $creator->fromGlobals();
$response = new GuzzleHttp\Psr7\Response();
The output.php file is basically the same as the one from the Authorization Server, so let's move straight into the resource.php file:
<?php

require_once 'bootstrap.php';

$response = $middleware($request, $response, function (\Psr\Http\Message\RequestInterface $request, \Psr\Http\Message\ResponseInterface $response) {

    return $response
        ->withStatus(200)
        ->withBody(\Nyholm\Psr7\Stream::create(json_encode(
            [
                'Resource' => 'A protected resource'
            ])));
});

require_once 'output.php';
To restrict access to the protected resource to valid clients, we will be using a middleware class (\League\OAuth2\Server\Middleware\ResourceServerMiddleware) with the ability to perform such checks.
This class implements the __invoke magic method, which allows it to be used as a simple function and is exactly what I'm doing here: I'm wrapping my response with the middleware. In case the authorization fails (e.g., if the token has expired or wasn't even present), the middleware will throw an Exception, effectively preventing unauthorized access to the protected resource.
And that's it! Now you have a working implementation of server-side OAuth that can serve as a basis for allowing third-party applications to perform actions on your servers on behalf your users.
Conclusion
In this post, you learned the basic ideas behind OAuth, what its benefits are, and how to implement it in your PHP applications (client and server) using the libraries provided by The PHP League.
I hope you have a clearer picture now. :)
If you have any questions, feel free to comment!

Written by
Mauro ChojrinMauro has been working in IT since 1997, mostly teaching programming. He has many years of experience working with PHP and Symfony. He currently works as an independent consultant and trainer.