Containerizing Laravel Applications
Few technologies have gained the kind of widespread adoption that containers have. Today, every major programming language, operating system, tool, cloud provider, continuous integration (CI), and continuous deployment or delivery (CD) platform has native support for containers.
The popularity of containers has been largely driven by ground-up adoption by developers and operations teams who have seen the benefits first-hand.
In this post we'll learn how to containerize an existing Laravel application, and along the way, we'll explore some of the benefits that containers can bring to a developer's workflows.
The Sample Application
For this blog post, we will containerize the sample Laravel task-list application provided on GitHub. This project was written against a reasonably old version of Laravel and has since been archived. However, working with this codebase requires that we address a number of requirements commonly found in production and legacy code bases, such as using specific versions of PHP, database migrations, port mappings, and running integration tests.
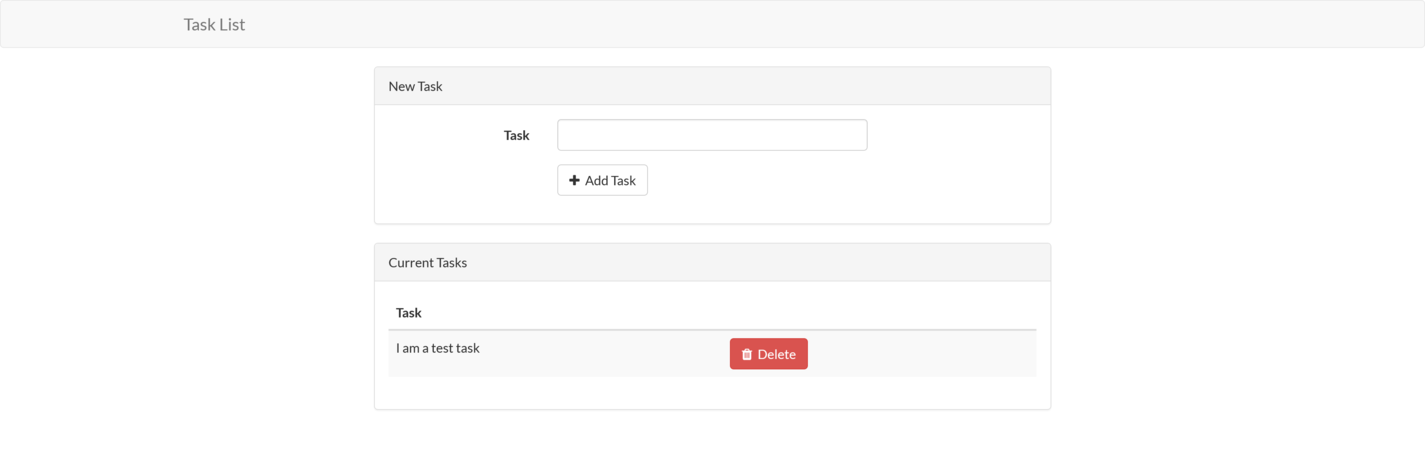
The final version of the sample application looks like this:
Prerequisites
To follow along with this blog post, you must have Docker installed on your local machine.
Windows and macOS users can find downloads and installation instructions on the Docker website.
Docker also provides packages for many Linux distributions.
Note that Windows recently began providing native support for containers. This allows native Windows software to be run inside a container. However, this post assumes that Windows developers are running Docker Desktop with Linux containers. The following PowerShell command ensures that Docker for Windows is set to work with Linux containers:
& "C:\Program Files\Docker\Docker\DockerCli.exe" -SwitchLinuxEngine
Since the application source code is stored on GitHub, the git command line (CLI) tool must also be installed. The git documentation provides installation instructions.
To run the application outside of a container, PHP 7 must be installed. The PHP website provides downloads for PHP 7.
We also need Composer to install the dependencies. The Composer documentation provides instructions on downloading and installing the tool.
Note the application won't run on PHP 8 due to the specific version requirements defined in the composer.json file. If you try to bypass this requirement with the command composer install --ignore-platform-reqs, the following error is displayed:
Uncaught ErrorException: Method ReflectionParameter::getClass() is deprecated
The deprecation of this method is documented here. While there are options available for replacing these deprecated methods if you are willing to update the source code, we'll treat this as an opportunity to leverage containers to resolve specific dependencies.
Cloning the Application Source Code
To clone the git repository to your local workstation, run the following command:
git clone https://github.com/laravel/quickstart-basic quickstart
This will create a directory called quickstart containing the application source code.
Running the Application Outside of a Container
To run the application outside of a container, we first need to install the dependencies:
composer install
Next, the database must be initialized. The sample application has support for a number of databases, including popular open-source projects, such as MySQL and PostgreSQL. The default is set to MySQL, so we'll use it for this post.
Notice that we didn't list MySQL in the prerequisites section. This is because we will run MySQL in a container, which allows us to download, configure, and run MySQL with a single docker command.
The following Bash command runs MySQL as a Docker container:
docker run --name mysql \
  -d \
  -p 3306:3306 \
  -e MYSQL_RANDOM_ROOT_PASSWORD=true \
  -e MYSQL_DATABASE=laravel \
  -e MYSQL_USER=laravel \
  -e MYSQL_PASSWORD=Password01! \
  mysql
Here is the same command for PowerShell:
docker run --name mysql `
  -d `
  -p 3306:3306 `
  -e MYSQL_RANDOM_ROOT_PASSWORD=true `
  -e MYSQL_DATABASE=laravel `
  -e MYSQL_USER=laravel `
  -e MYSQL_PASSWORD=Password01! `
  mysql
This command is doing a lot of work, so let's break it down.
The run argument instructs Docker to run the Docker image passed as the final argument, which is mysql. As we noted in the introduction, every major tool provides a supported Docker image, and MySQL is no exception. The MySQL image has been sourced from the default Docker registry called DockerHub, which provides the repository mysql.
We define the name of the Docker container with the arguments --name mysql. If we do not specify a name, Docker will randomly assign a (often humorous) name, such as modest_shaw or nervous_goldwasser.
The -d argument runs the container in the background.
Ports to be exposed by the container are defined with the -p argument. Here, we expose the local port 3306 to the container port 3306.
Environment variables are defined with the -e argument. We have set the MYSQL_RANDOM_ROOT_PASSWORD, MYSQL_DATABASE, MYSQL_USER, and MYSQL_PASSWORD environment variables to configure MySQL with a random root password, an initial database called laravel, a user account called laravel, and the user password of Password01!.
The final argument mysql is the name of the Docker image used to create the container.
The ability to download and run tools, as we have done with MySQL, is one of the major benefits of Docker and containers. Whereas installing the specific versions of PHP and Composer noted in the prerequisites section requires visiting multiple web pages to download specific packages or run unique installation commands, the command to run a Docker image is the same for every operating system and every tag of a Docker image.
A lot of Docker-specific terms, such as registry, repository, image and container, were used to describe the command above. We'll cover these terms in later sections, but for now, we'll move on to running our sample application locally.
To initialize the database, we first set a number of environment variables read by the application to connect to the database. You'll notice that these values match those used when running MySQL as a container.
The following commands set the environment variables in Bash:
export DB_HOST=localhost
export DB_DATABASE=laravel
export DB_USERNAME=laravel
export DB_PASSWORD=Password01!
These are the equivalent PowerShell commands:
$env:DB_HOST="localhost"
$env:DB_DATABASE="laravel"
$env:DB_USERNAME="laravel"
$env:DB_PASSWORD="Password01!"
We then run the database migration with the following command:
php artisan migrate
Tests are run with the following command:
vendor/bin/phpunit
Finally, we run the sample application, hosted by a development web server, with the following command:
php artisan serve
We can then open http://localhost:8000 to view the task list.
Even though we used Docker to download and run MySQL with a single command, a lot of tools needed to be installed. Some of these tools required specific versions, usually with slightly different processes between operating systems, and many individual commands had to be executed to reach the point of running this simple application.
Docker can help us here by allowing us to compile, test, and run our code with a small number of calls to docker. As we have seen, we can also run other applications like MySQL with docker commands. Best of all, the commands are the same for every operating system.
Before we continue, though, lets dig into some of the Docker terms used above in more detail.
Docker Registry and Repository
A Docker registry is much like the online collection of packages used by Linux package managers, such as apt or yum, Windows package managers like Chocolatey, or macOS package managers like Brew. A Docker registry is a collection of Docker repositories, where each Docker repository provides many versions (or tags in Docker terminology) of a Docker image.
Docker Image and Container
A Docker image is a package containing all the files required to run an application. This includes the application code (e.g., the Laravel sample application), runtime (e.g., PHP), system libraries (e.g., the dependencies PHP relies on), system tools (e.g., web servers like Apache), and system settings (e.g., network configuration).
A container is an isolated environment in which the image is executed. While containers cannot traditionally be relied on to enforce the kind of isolation provided by a virtual machine (VM), they are routinely used to execute trusted code side-by-side on a single physical or virtual machine.
A container has its own isolated network stack. This means that by default, code running in one Docker container cannot interact over the network with another docker container. To expose a container to network traffic, we need to map a host port to a container port. This is what we achieved with the -p 3306:3306 argument, which mapped port 3306 on the host to port 3306 on the container. With this argument, traffic to localhost on port 3306 is redirected to port 3306 in the container.
Creating a Basic PHP Docker Image
We have seen the commands that must be run directly on our workstation to build and run the Laravel application. Conceptually, building a Docker image involves scripting those same commands in a file called Dockerfile.
In addition to running commands to download dependencies and execute tests, a Dockerfile also contains commands to copy files from the host machine into the Docker image, expose network ports, set environment variables, set the working directory, define the command to be run by default when a container is started, and more. The complete list of instructions can be found in the Docker documentation.
Let's look at a simple example. Save the following text to a file called Dockerfile somewhere convenient on your local workstation:
FROM php:8
RUN echo "<?php\n"\
    "print 'Hello World!';\n"\
    "?>" > /opt/hello.php
CMD ["php", "/opt/hello.php"]
The FROM instruction defines the base image that our image will build on top of. We take advantage of the fact that all major programming languages provide officially supported Docker images that include the required runtime, and in this example, we’ve used the php image from DockerHub. The colon separates the image name from the tag, and the 8 indicates the tag, or version, of the image to use:
FROM php:8
The RUN instruction executes a command within the context of the image being created. Here, we echo a simple PHP script that prints Hello World! to the file /opt/hello.php. This creates a new file within our Docker image:
RUN echo "<?php\n"\
    "print 'Hello World!';\n"\
    "?>" > /opt/hello.php
The CMD instruction configures the command to be run when a container based on this image is run. Here, we use an array to build up the components of the command, starting with a call to php and then passing it the file we created with the previous RUN instruction:
CMD ["php", "/opt/hello.php"]
Build an image with the command:
docker build . -t phphelloworld
The docker build command is used to build new Docker images. The period indicates that the Dockerfile is in the current working directory. The -t phphelloworld argument defines the name of the new image.
Then, create a container based on the image with the following command:
docker run phphelloworld
You will see Hello World! printed to the console as PHP executes the script saved to /opt/hello.php.
Creating a Docker image from an existing PHP application follows much the same process as this simple example. The application source code files are copied into the Docker image instead of creating them with echo commands. Some additional tooling is installed to allow the dependencies to be downloaded, and additional PHP modules are installed to support the build process and database access, but fundamentally, we use the same set of instructions to achieve the required outcome.
Let's look at how we can containerize the sample Laravel application.
Containerizing the Laravel application
As we saw with the example above, we can run almost any command we want in the process of building a Docker image.
As part of the process of building the application, we need to download dependencies, and we'll also run any tests to ensure the code being built is valid. The tests included in this application require access to an initialized database, which we must accommodate as part of the image build process.
Running the application also requires access to a database, and we can't assume the database that was used for the tests is also the same database used to run the application. So, before the application is run, we'll need to run the database migrations again to ensure our application has the required data.
Let's look at a Dockerfile that downloads dependencies, initializes the test database, runs tests, configures the database the application is eventually run against, and then launches the application, all while ensuring the required version of PHP is used.
Writing the Dockerfile
Here is an example of a Dockerfile saved in the quickstart directory that the sample application code was checked out to:
FROM php:7
ENV PORT=8000
RUN apt-get update; apt-get install -y wget libzip-dev
RUN docker-php-ext-install zip pdo_mysql
RUN wget https://raw.githubusercontent.com/composer/getcomposer.org/master/web/installer -O - -q | php -- --install-dir=/usr/local/bin --filename=composer
WORKDIR /app
COPY . /app
RUN composer install
RUN touch /app/database/database.sqlite
RUN DB_CONNECTION=sqlite php artisan migrate
RUN DB_CONNECTION=sqlite vendor/bin/phpunit
RUN echo "#!/bin/sh\n" \
  "php artisan migrate\n" \
  "php artisan serve --host 0.0.0.0 --port \$PORT" > /app/start.sh
RUN chmod +x /app/start.sh
CMD ["/app/start.sh"]
Let's break this file down.
As with the previous "Hello World!" example, we based this Docker image on the php image. However, this time, we use the tag 7 to ensure the base image has PHP 7 installed. If you recall, we must use PHP 7 due to methods used by this sample application that were deprecated in PHP 8.
It is worth taking a moment to appreciate how simple Docker makes it to build and run applications with different versions of PHP side-by-side on a single machine.
At a minimum, to run multiple versions of PHP without Docker, you would have to download PHP 7 and 8 to different directories and remember to call the appropriate executable between projects. Your operating system's package manager may offer the ability to install multiple versions of PHP, but the process for doing so would differ between Linux, macOS, and Windows.
With Docker, the ability to match a specific PHP version to the code being run is an inherent feature because each Docker image is a self-contained package with all the files required to run an application:
FROM php:7
The ENV instruction defines an environment variable. Here, we define a variable called PORT and give it a default value of 8000. We'll use this variable when launching the web server:
ENV PORT=8000
The php base image is based on Debian, which means we use apt-get for package management. Here, we update the list of dependencies with apt-get update, and then install wget and the zip development libraries:
RUN apt-get update; apt-get install -y wget libzip-dev
Our Laravel application requires the zip and pdo_mysql PHP extensions to build and run. The php base image includes a helper tool called docker-php-ext-install that installs PHP extensions for us:
RUN docker-php-ext-install zip pdo_mysql
To build the application, we need Composer to download the dependencies. Here, we download the Composer installation script with wget and execute it to install Composer to /usr/local/bin/composer:
RUN wget https://raw.githubusercontent.com/composer/getcomposer.org/master/web/installer -O - -q | php -- --install-dir=/usr/local/bin --filename=composer
The WORKDIR instruction sets the working directory for any subsequent commands, such as RUN or CMD. Here, we set the working directory to a new directory called /app:
WORKDIR /app
The COPY instruction copies files from the host machine into the Docker image. Here, we copy all the files from the current directory into the directory called /app inside the Docker image:
COPY . /app
Here, we install the application dependencies with composer:
RUN composer install
The tests require access to a database to complete. For convenience, we will use SQLite, which is a local in-memory database that requires a file to be created to host the database table:
RUN touch /app/database/database.sqlite
Because the tests in the project require an initialized database, we configure the migration script to use SQLite and run php artisan migrate to create an required tables:
RUN DB_CONNECTION=sqlite php artisan migrate
We then run any tests included in the code. If these tests fail, the operation to build the Docker image will also fail, ensuring we only build an image if the tests pass successfully:
RUN DB_CONNECTION=sqlite vendor/bin/phpunit
If we have reached this point, the tests have passed, and we now configure the image to run the Laravel application when the container starts. The echo command here writes a script to /app/start.sh. The first command in the script runs the database migration, and the second launches the development web server. The command php artisan serve --host 0.0.0.0 --port=$PORT ensures that the web server listens to all available IP addresses, which is required for Docker to map a port on the host into the container and listen on the port defined in the environment variable PORT:
RUN echo "#!/bin/sh\n" \
  "php artisan migrate\n" \
  "php artisan serve --host 0.0.0.0 --port \$PORT" > /app/start.sh
The script file we just created needs to be marked as executable to run:
RUN chmod +x /app/start.sh
The final instruction defines the command to be run when a container based on this image is started. We launch the script created above to initialize the database and start the web server:
CMD ["/app/start.sh"]
Before we build the image, we need to create a file called .dockerignore alongside Dockerfile with the following contents:
vendor
The .dockerignore file lists the files and directories that will be excluded from instructions like COPY . /app. Here, we have instructed Docker to ignore any files that may have been downloaded by a call to composer install on the host machine. This ensures that all the dependencies are freshly downloaded as the Docker image is built.
We can now build the Docker image with the following command:
docker build . -t laravelapp
We can then watch as Docker executes the instructions defined in the Dockerfile to copy and build the sample application.
Assuming that you still have the MySQL Docker container running, run the Laravel image with the following command. Note that the database host is set to host.docker.internal. This is a special hostname exposed by Docker in a container on Windows and macOS hosts that resolves to the host. This allows code running in a container to interact with services running on the host machine:
docker run -p 8001:8000 -e DB_HOST=host.docker.internal -e DB_DATABASE=laravel -e DB_USERNAME=laravel -e DB_PASSWORD=Password01! laravelapp
Linux users do not have access to the host.docker.internal hostname and must instead use the IP address of 172.17.0.1:
docker run -p 8001:8000 -e DB_HOST=172.17.0.1 -e DB_DATABASE=laravel -e DB_USERNAME=laravel -e DB_PASSWORD=Password01! laravelapp
To understand where the IP address of 172.17.0.1 comes from, run the following command:
docker network inspect bridge
This will display technical information about the bridge network, which is the default network we have been running the Docker containers in. The output below has been stripped down to show the important value of Gateway, which defines the IP address a container can connect to reach the host. As you can see, this is where 172.17.0.1 comes from:
[
    {
        "IPAM": {
            "Config": [
                {
                    "Gateway": "172.17.0.1"
                    ...
                }
                ...
            ]
        },
        ...
    }
]
We have used -p 8001:8000 to map port 8001 on the host to port 8000 in the container. We then set a number of environment variables to configure the Laravel application to use the MySQL Docker container.
Open http://localhost:8001 to access the sample application running inside a Docker container.
We now have a self-contained Docker image that can be distributed to other developers or platforms that host Docker containers. However, the image we just created only exists on our local workstation. In the next section, we'll configure a CI pipeline to build this image automatically and publish it to a Docker repository.
Creating a CI Pipeline
There are any number of CI platforms that can be used to build Docker images. For this post, we'll make use of GitHub Actions.
GitHub Actions is a service built into GitHub, and it provides an execution environment and plugin ecosystem that allows us to easily automate common tasks, such as building Docker images.
We will publish the final image to a Docker repository called DockerHub. You can sign up for a free account here. The free account allows you to publish public Docker images to be shared with anyone, making it a convenient option for open-source applications.
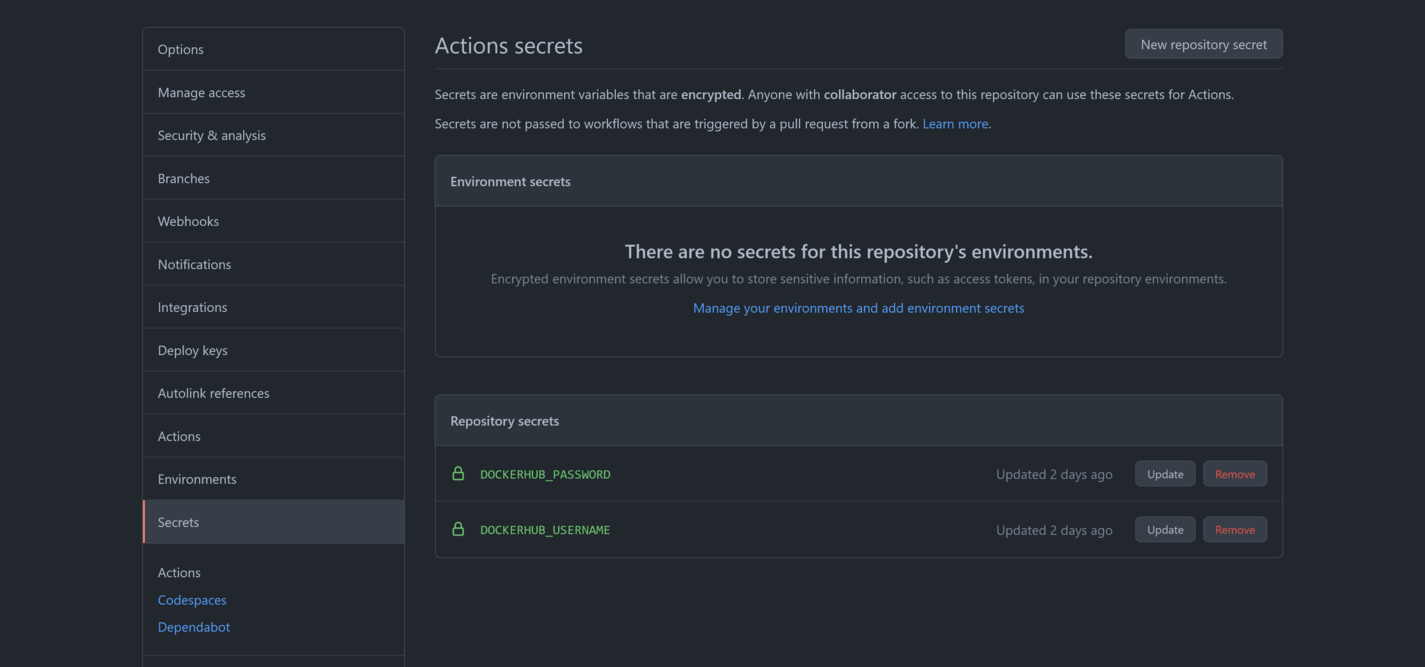
We need to capture our DockerHub credentials as secrets in GitHub. This is done by opening Settings -> Secrets in the GitHub repository. We need to create two secrets: DOCKERHUB_USERNAME, containing our DockerHub username, and DOCKERHUB_PASSWORD, containing our DockerHub password:
The CI pipeline is defined in a file called .github/workflows/main.yaml. The complete code is shown below:
name: CI

on:
  push:

jobs:
  build:
    runs-on: ubuntu-latest
    steps:
      - uses: actions/checkout@v2

      - name: Set up Docker Buildx
        uses: docker/setup-buildx-action@v1

      - name: Login to DockerHub
        uses: docker/login-action@v1
        with:
          username: ${{ secrets.DOCKERHUB_USERNAME }}
          password: ${{ secrets.DOCKERHUB_PASSWORD }}

      - name: Build and push
        id: docker_build
        uses: docker/build-push-action@v2
        with:
          push: true
          tags: ${{ secrets.DOCKERHUB_USERNAME }}/laravelapp
          build-args: |
            db_host=172.17.0.1
            db_username=laravel
            db_database=laravel
            db_password=Password01!
The name property defines the name of the workflow:
name: CI
The on property defines when the workflow is triggered. The child push property configures this workflow to run each time a change is pushed to the git repository:
on:
  push:
The jobs property is where one or more named processes are defined. The build property creates a job of the same name:
jobs:
  build:
The build job will be run on an Ubuntu VM:
runs-on: ubuntu-latest
Each job consists of a number of steps that combine to achieve a common outcome, which, in our case, is to build and publish the Docker image:
steps:
The first step is to checkout the git repository:
- uses: actions/checkout@v2
We then use the docker/setup-buildx-action action to initialize an environment to build Docker images:
      - name: Set up Docker Buildx
        uses: docker/setup-buildx-action@v1
The credentials we configured earlier are used to log into DockerHub:
      - name: Login to DockerHub
        uses: docker/login-action@v1
        with:
          username: ${{ secrets.DOCKERHUB_USERNAME }}
          password: ${{ secrets.DOCKERHUB_PASSWORD }}
Finally, we use the docker/build-push-action action to build the Docker image. By setting the with.push property to true, the resulting image will be pushed to DockerHub.
Note that the with.tags property is set to ${{ secrets.DOCKERHUB_USERNAME }}/laravelapp, which will resolve to something like mcasperson/laravelapp (where mcasperson is my DockerHub username). Prefixing the image name with a username indicates the Docker registry that the image will be pushed to. You can see this image pushed to my DockerHub account here:
      - name: Build and push
        id: docker_build
        uses: docker/build-push-action@v2
        with:
          push: true
          tags: ${{ secrets.DOCKERHUB_USERNAME }}/laravelapp
With this workflow defined in GitHub, each commit to the git repository will trigger the Docker image to be rebuilt and published, giving us a CI pipeline.
The published image can be run with the following command. Replace mcasperson with your own DockerHub username to pull the image from your own public repository.
Here is the Bash command:
docker run \
  -p 8001:8000 \
  -e DB_HOST=172.17.0.1 \
  -e DB_DATABASE=laravel \
  -e DB_USERNAME=laravel \
  -e DB_PASSWORD=Password01! \
  mcasperson/laravelapp
Here is the equivalent PowerShell command:
docker run `
  -p 8001:8000 `
  -e DB_HOST=172.17.0.1 `
  -e DB_DATABASE=laravel `
  -e DB_USERNAME=laravel `
  -e DB_PASSWORD=Password01! `
  mcasperson/laravelapp
You can find a fork of the sample application repository that contains the GitHub Actions workflow above here.
Deploying the Container
If there is one benefit to containerizing your applications, it is the incredible range of platforms that they can be deployed to. You can deploy containers to Kubernetes or any of the managed Kubernetes platforms, such as Azure Kubernetes Service (AKS), AWS Elastic Kubernetes Service (EKS), or Google Kubernetes Engine (GKE). Azure also has Container Instances, while AWS has App Runner, and Google has Cloud Run.
In addition to the major cloud providers, you can deploy containers to Heroku, Dokku, Netlify, and many more.
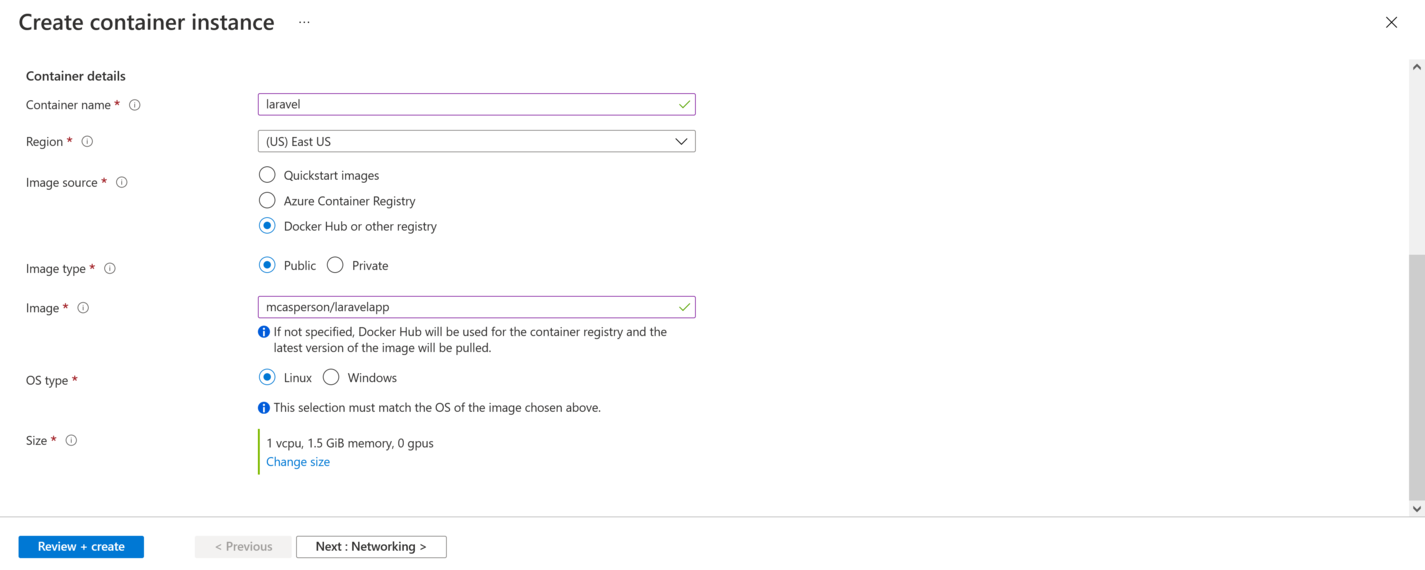
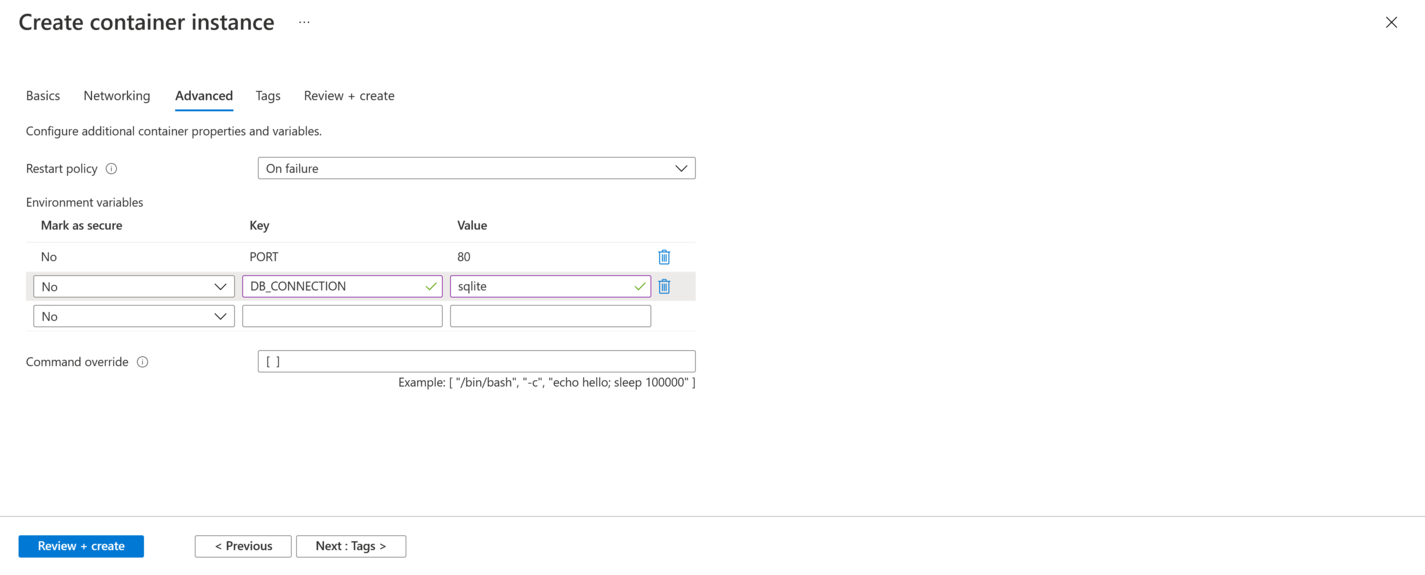
In the screenshots below, I have deployed the image to an Azure Container Instance. It involves pointing the container instance to the public Docker image and setting a few environment variables to configure the port and database settings. With a few clicks, the application is deployed and publicly accessible:
Conclusion
In this post, we presented a process to containerize Laravel PHP applications. By containerizing an old sample application created by the Laravel project, we encountered many real-world concerns, including PHP version dependencies, PHP extensions, integration tests requiring database access, database migration scripts, and initializing supporting infrastructure like MySQL databases.
We also presented a process for continuous integration with a sample GitHub Actions workflow to build and publish the resulting Docker image and saw how the image could be deployed to one of the many hosting platforms that support Docker.
The end result allows us to build and test our Laravel application with one simple call to docker, which, in turn, generates a Docker image that anyone can download and run with one or two additional docker calls. This makes it much easier for developers to consume the project and for operations staff to deploy.

Written by
Matt Casperson
I have loved technology since my first Commodore 64, and that passion remains to this day. By day you'll find me integrating enterprise platforms with Octopus, writing guides and books for platforms like Kubernetes, blogging, and training my colleagues. By night I'm playing with bleeding edge open source projects and contributing to various blogs.