You’ve heard the story before. You already have an application running upon your decentralized and fully-working back-end APIs and a front-end made with any ordinary toolset.
Now, you want to move on to Angular. Or, perhaps you’re just looking for a way to integrate Angular with your Rails projects because you prefer things this way. We don’t blame you.
With such an approach, you can take advantage of both worlds and decide whether you want to use features from Rails or Angular to format stuff, for example.
What We'll Build
There’s no need to worry. This tutorial was written for this purpose. We’ll dive into the creation of a fully-working CRUD application over a domain of users.
At the end of the article, you will have learned some basic concepts around Angular and how to set up a Rails back-end project that directly integrates with Angular for the front-end, as shown below:
 CRUD of users made with Rails and Angular
The application will handle all four CRUD operations over the domain of users retrieved from an external fake-testing web service. The app will be built on top of an MVC architecture, with each Angular layer explained in detail to help you better understand how things tie together. The style is up to Bootstrap.
Setup
As you may have guessed, we will need the following software:
- Ruby (I’ve picked the version 2.7.0preview1),
- Ruby and Rails (I’m using its version 5.0.7.2),
- Node.js (I’m going with v13.7.0),
- Yarn (At least its version 1.22.4)
Make sure to get everything installed properly. Then, we can move on to the project. Select a folder of your preference and run the following command:
rails new crud-rails-angular
Wait for the setup to complete and open the project within your favorite IDE. We’re going to work with VS Code for this article because it’s simple, powerful, and smoothly embraces both Rails and Angular syntaxes.
If you’ve been using Rails 5 for a while, you may have noticed that its new command generates a bug within the Gemfile for the SQLite config. It comes without a minimum version, and that will make it run with errors. Let’s fix this problem by updating it to
gem 'sqlite3', '~> 1.3.10'
Perfect!
Webpacker Setup
The best way to manage JavaScript-like applications in Rails is through Webpacker. It makes use of Webpack behind the scenes to provide features, such as pre-processing and bundling JavaScript apps, like Angular, into an existing Rails application.
To install it, just add a new line to your Gemfile:
gem 'webpacker', '~> 4.3.x'
This will assure that you’ll install a very recent version. Next, run the following commands:
bundle install
bundle exec rake webpacker:install
bundle exec rake webpacker:install:angular
The first command will download and update the added Rails dependencies.
The second is the equivalent to npm install since it creates the node_modules folder and installs a bunch of required Angular dependencies, such as Babel, Sass, Browserlist, and Webpack. Now, we have both a Node and a Rails app in the same project.
In the latest command, we have the equivalent of npm install angular, which will download all the Angular-required dependencies and make it work alongside our Rails project.
At the end of these commands, you can also see the package.json file created. All of our required dependencies are placed there, and you can add whichever you need in the future.
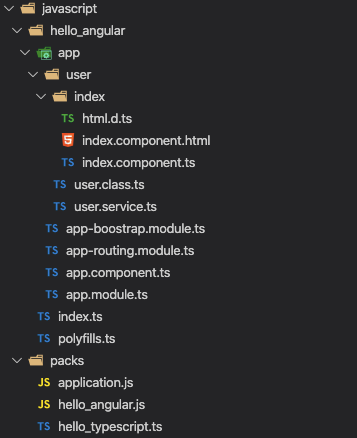
Also, some folders and files were created under the /app folder, such as the new /javascript. In this folder, you already have a /hello_angular folder created to support the beginning of your development.
To gain some time, I’ll ask you to mirror your folders and files structure with the following one:
Some Angular Adjustments
Webpacker recommends a series of adjustments within your generated Rails project. So, let’s take some time to organize the house.
First, open your application.js file placed under the /packs folder (shown in the figure above) and add the following code:
import "core-js/stable";
import "regenerator-runtime/runtime";
These imports work as an auxiliary force to stabilize the JavaScript environment within the Rails project.
Now, we need to inform Rails from where it must pick the output to its pages. Once Webpacker finishes packing things up, it’ll generate a bunch of distributable static files that Rails must be aware of.
Go to the application.html.erb file under the app/views/layout folder and change its <head> tag content to the following:
<head>
  <title>CrudRailsAngular</title>
  <base href="/" />
  <!-- 1 -->
  <%= csrf_meta_tags %> <%= stylesheet_link_tag 'application', media: 'all', 'data-turbolinks-track': 'reload' %>
  <link rel="stylesheet" href="https://stackpath.bootstrapcdn.com/bootstrap/4.5.2/css/bootstrap.min.css" integrity="sha384-JcKb8q3iqJ61gNV9KGb8thSsNjpSL0n8PARn9HuZOnIxN0hoP+VmmDGMN5t9UJ0Z" crossorigin="anonymous" />
  <!-- 2 -->
  <%= javascript_include_tag 'application', 'data-turbolinks-track': 'reload' %> <%= javascript_pack_tag 'application' %>
  <!-- 3 -->
</head>
Let’s break this down a bit:
- Here, we’re adding the
basetag, which tells Rails where to look when the application starts up. - We’ll make use of Bootstrap to infer style to the page, so we can focus on the implementation only.
- Here is where you must place the Webpacker tag that maps to the /packs folder content (the same that will be auto-generated by Webpacker after every compilation).
Model and Database
Move on to the database setup. To make things faster, we’ll scaffold a new model called User. This is the command you must run to achieve it:
rails g scaffold User name:string age:integer address:text && rake db:migrate
It’ll create all of our model’s folders and files, which we will need to make Rails manipulate database information (from SQLite) and store it to our CRUD operations.
Then, you will see that a new file XXX1_create_users.rb was created under the db/migrate/ folder. Open it, and you'll see the newly created CreateUsers record.
Within the app/models/ folder, you will see the then-created User model at the user.rb file.
Now, open the db/seeds.rb file and add the following code:
User.create(name: 'Luke Wan', age: 23, address: '123 Test St.')
User.create(name: 'Mary Poppins', age: 41, address: '123 ABC St.')
User.create(name: 'John Neilman', age: 76, address: '000 Test St.')
This code will initialize our Users table with some data at startup. Save it, and run the command:
rake db:seed
This will seed the table through the commands listed above. Next, you can enter the SQLite database and check if that worked by issuing the command:
sqlite3 db/development.sqlite3
Then, select the table data:
select * from users;
and you may see the results.
The User Component
You will need to install a couple more of the dependencies to help with the conversion of HTML and CSS to our Rails pages; add the Angular router, forms libs, and ngx-bootstrap, which we’ll use to facilitate the creation and manipulation of Bootstrap components. So, issue the following command:
yarn add @angular/router @angular/forms html-loader css-loader ngx-bootstrap
However, before we jump into the component code, there are some important concepts we need to point out, starting with the anatomy of an Angular component.
What is a Component?
In Angular, a component exists to connect your views with the application logic made in TypeScript.
In other words, a component is like a container for all the logic that your views need to support its functioning. It defines the values that the views will present and controls their flows. It's the equivalent of a ‘controller’ in similar frameworks.
To create a component, all you need to do is define a new class, implement the OnInit interface, and annotate the class with the @Component decorator:
export class UserIndexComponent implements OnInit {
    constructor() { ... }

    ngOnInit() { ... }
}
@Component and OnInit
The @Component decorator is important because it marks this class a recognizable Angular component and provides metadata configurations that help Angular deal with them regarding processing, instantiation, and use during the runtime.
Take the following metadata configs:
@Component({
    selector: "users",
    template: templateString,
})
Here, selector tells Angular that the provided value is the CSS selector it may use to identify the current directive into a template; yes, it is the same template provided in the next metadata property.
The OnInit interface, however, is optional, and it's a good way to initialize stuff before the component finishes its lifecycle. It works like a post-construct method.
Dependency Injection
Angular is a DI (Dependency Injection) framework, a characteristic that increases its modularity and productivity.
Dependencies in Angular can vary from your services and repositories to any kind of ordinary object you feel is fit to be injected somewhere else in the code.
To turn a class "injectable", you only need to annotate it with the @Injectable decorator:
@Injectable({
    providedIn: "root",
})
export class UserService {
    ...
}
The providedIn indicates which injector will provide the injectable you're creating. The root value tells Angular that the injector should be the application-level one. There are more that you can check on here.
To inject the class into a component, for example, you ask Angular to do it in the component's constructor:
constructor(
    private userService: UserService,
) {}
It’s as simple as that!
The Finished Component
Below, you can find the final code listing for our User component. Place it into index.component.ts, under the javascript/hello_angular/app/ folder.
import { Component, OnInit, TemplateRef } from "@angular/core";
import { FormGroup, FormBuilder } from "@angular/forms";
import { BsModalRef, BsModalService } from "ngx-bootstrap/modal";

import templateString from "./index.component.html";
import { UserService } from "../user.service";
import { User } from "../user.class";

@Component({
  selector: "users",
  template: templateString,
})
export class UserIndexComponent implements OnInit {
  users: User[];
  modalRef: BsModalRef;
  userForm: FormGroup;
  isNew: Boolean;

  constructor(public fb: FormBuilder, private userService: UserService, private modalService: BsModalService) {}

  public newUser(template: TemplateRef<any>) {
    this.reset();
    this.modalRef = this.modalService.show(template);
  }

  public createUser() {
    this.userService.create(this.userForm.value).subscribe(() => {
      console.log("User created!");
      this.reset();

      this.modalRef.hide();
    });
  }

  public editUser(user, template: TemplateRef<any>) {
    this.isNew = false;
    this.userForm = this.fb.group({
      id: [user.id],
      name: [user.name],
      age: [user.age],
      address: [user.address],
    });

    this.modalRef = this.modalService.show(template);
  }

  public updateUser() {
    const { id } = this.userForm.value;
    this.userService.update(id, this.userForm.value).subscribe(() => {
      console.log("User updated!");
      this.reset();

      this.modalRef.hide();
    });
  }

  public deleteUser(id) {
    if (confirm("Are you sure?")) {
      this.userService.delete(id).subscribe(() => {
        console.log("User deleted!");
        this.reset();
      });
    }
  }

  ngOnInit() {
    this.reset();
  }

  public reset() {
    this.isNew = true;
    this.userService.getUsers().subscribe((users) => {
      this.users = users;
    });

    this.userForm = this.fb.group({
      id: [""],
      name: [""],
      age: [""],
      address: [""],
    });
  }
}
The users array will hold the current table data listed on the screen and retrieved from the reset method that, in turn, calls our Rails API via UserService (to be created).
The userForm is just a reference to help create and update our users since the same form will be used for both operations. The isNew also helps with that, identifying which flow we’re in at the moment.
Here, we have a CRUD-equivalent method for each of the operations. Each of them calls the respective UserService method to commit the process in the Rails API.
We’ll also need to set up the HTML module to convert our templates to HTML (we'll see more on modules soon). So, open the html.d.ts file within the same folder and add:
declare module "*.html" {
  const content: string;
  export default content;
}
The Angular Service and Model
Let’s move on to Angular’s UserService creation. Angular is a framework, just like Rails. So, it means that it’s okay to obey their rules even if this means having duplicate (or very similar) models, for example.
What is a Model?
Angular models are simple objects that hold data attributes that make sense together (i.e., they represent a concise piece of your domain). They are just like any other model in most languages and frameworks.
It helps a lot to have your data concentrated in one place, rather than duplicating it throughout the code like we do with our user's model:
export class User {
  constructor(public id: number, public name: string, public age: number, public address: string) {}
}
Remember that it's TypeScript, so your model's attributes must always have a type defined.
Create a new file called user.class.ts under the javascript/hello_angular/app/user/ folder and place the code above into it.
What about a Service?
Services are a broad concept, but we can understand them as well-defined and purposed objects. They help the components with more complex logic, serving them with processed and transformed data, usually coming from an external service or a database.
A service doesn't need any specific annotation or interface; you just create a class and make it injectable, as we've seen before. Then, you can inject it into your components.
Observable Services
Another interesting feature of Angular is that it allows you to use RxJS with your classes.
For example, the Angular's default HTTP client, the same one that we'll use to fetch information from an external service, returns RxJS Observables. This is why, when you call any of our UserService methods within the user component, you might subscribe to the Observable result:
this.userService.getUsers().subscribe((users) => {
  this.users = users;
});
Note that if you're not familiar with RxJS, I'd strongly recommend a brief read over its documentation; it's not that hard! ;)
Again, in the javascript/hello_angular/app/user/ folder, create another file called user.service.ts. This is its content:
import { Injectable } from "@angular/core";
import { HttpClient, HttpHeaders } from "@angular/common/http";
import { map } from "rxjs/operators";
import { Observable } from "rxjs";

import { User } from "./user.class";

@Injectable({
  providedIn: "root",
})
export class UserService {
  constructor(private http: HttpClient) {}

  httpOptions = {
    headers: new HttpHeaders({
      "Content-Type": "application/json",
    }),
  };

  getUsers(): Observable<User[]> {
    return this.http.get("/users.json").pipe(
      map((users: User[]) =>
        users.map((user) => {
          return new User(user.id, user.name, user.age, user.address);
        })
      )
    );
  }

  create(user): Observable<User> {
    return this.http.post<User>("/users.json", JSON.stringify(user), this.httpOptions);
  }

  update(id, user): Observable<User> {
    return this.http.put<User>("/users/" + id + ".json", JSON.stringify(user), this.httpOptions);
  }

  delete(id) {
    return this.http.delete<User>("/users/" + id + ".json", this.httpOptions);
  }
}
Can you spot the similarities between this one and the component we’ve just created? This is because we need correspondent operations to support the ones in the component.
Note that the HttpClient must also be injected within the class’ constructor, so we get to use it alongside the class.
Each operation makes an HTTP call to our Rails API, the auto-generated one.
Views
Angular works with templates for its views. A template is a sort of hierarchical HTML-and-JavaScript mix that tells Angular how to render each component.
However, before going any further with the construction of our view, let's first understand how Angular splits its template system up.
The Angular Directives
Because the Angular templates are essentially dynamic, some directives are needed to drive Angular through the right way to render stuff.
Directives are simply classes with a @Directive decorator, like the components. Yes, @Component inherits from @Directive, so it's officially a directive too.
However, there are two other types: the structural and attribute directives.
Structural Directives
These directives represents conditional and loop structures translated from JavaScript into the Angular template. They help make the template as dynamic as possible, like if you were programming within your vanilla JavaScript code. Take the following example:
<tr *ngFor="let user of users">
  <td>{{ user.name }}</td>
</tr>
The *ngFor directive tells Angular to iterate over the array of users and print each user's name to the DOM.
Attribute Directives
These work directly with the appearance or behavior of the elements. Take the following example:
<form [formGroup]="userForm" (ngSubmit)="isNew ? createUser() : updateUser()" novalidate></form>
Here, we're modifying the behavior of the form by conditionally setting its submit function and making use of Angular's FormGroup to data-bind each of the form inputs.
Data Binding
Creating forms with web frameworks can be a tricky and error-prone task if it doesn't provide data binding.
Angular supports two-way data binding, which means that you can directly connect pieces of your template to the component and vice versa.
The above form is a good example of the FormGroup data binding power. It automatically binds each form field to the userForm object created within our component.
In the editUser method, for example, you can see the opposite version of the binding, in which the userForm's values are set within the component and shall reflect the form on the view.
Building the Index View
Let’s break down the content for index.component.html into two parts. This is the first one:
<div class="container pricing-header px-3 py-3 pt-md-5 pb-md-4 mx-auto text-center">
  <h1 class="display-4">User's Listing</h1>
  <p class="lead">A quick CRUD example of how to integrate Rails with Angular</p>

  <table class="table">
    <tr>
      <th>Id</th>
      <th>Name</th>
      <th>Age</th>
      <th>Address</th>
      <th>Actions</th>
    </tr>

    <tbody>
      <tr *ngFor="let user of users">
        <td>{{ user.id }}</td>
        <td>{{ user.name }}</td>
        <td>{{ user.age }}</td>
        <td>{{ user.address }}</td>
        <td colspan="2">
          <button class="btn btn-secondary" (click)="editUser(user, template)">Edit</button>
          |
          <button class="btn btn-danger" (click)="deleteUser(user.id)">Delete</button>
        </td>
      </tr>
    </tbody>
  </table>

  <button class="btn btn-primary float-right mt-4" (click)="newUser(template)">Insert New</button>
</div>
Most of it is composed of plain HTML. We won’t go into detail about Bootstrap classes.
The important part here is the ngFor directive on the table’s row. It helps iterate over the users array (remember it?) printing each of its attributes to the HTML output through the {{ … }} operator.
Whenever you want to add one of the DOM events, like the onClick, just wrap the event name with parentheses and add the component function that it will call when clicked.
Building the Modal View
The second part is related to the modal contents, so add it below the previous one:
<ng-template #template>
<div class="modal-header">
<h4 class="modal-title pull-left">{{ isNew ? "New User" : "Update User" }}</h4>
<button type="button" class="close pull-right" aria-label="Close" (click)="modalRef.hide()">
<span aria-hidden="true">×</span>
</button>
</div>
<div class="modal-body">
<form [formGroup]="userForm" (ngSubmit)="isNew ? createUser() : updateUser()" novalidate>
<input type="hidden" formControlName="id" class="form-control" />
<div class="form-group">
<label>Name</label>
<input type="text" formControlName="name" class="form-control" />
</div>
<div class="form-group">
<label>Age</label>
<input type="text" formControlName="age" class="form-control" />
</div>
<div class="form-group">
<label>Address</label>
<textarea class="form-control" formControlName="address" rows="3"></textarea>
</div>
<button type="submit" class="btn btn-primary">Submit</button>
</form>
</div>
</ng-template>
Note that we’re making use of the <ng-template> tag, which allows you to anchor elements between the HTML and Angular. The template ID comes right after the # sign.
Within the form, also note that we’re making use of the isNew component variable to verify whether the current usage of this form is related to a user’s creation or update.
Finally, we need to inject the whole hello_angular application into the Rails index.html.erb page. So, open this file under the views/users/ folder and change its contents to the following:
<hello-angular>We're almost done...</hello-angular> <%= javascript_pack_tag 'hello_angular' %>
Angular Modules
Now, we need to tell Angular where to find stuff out. It happens within its modules’ configurations.
Let’s start by adding content to app-bootstrap.module.ts:
import { NgModule } from "@angular/core";
import { CommonModule } from "@angular/common";

import { ModalModule } from "ngx-bootstrap/modal";

@NgModule({
  imports: [CommonModule, ModalModule.forRoot()],
  exports: [ModalModule],
})
export class AppBootstrapModule {}
This is restricted to the Bootstrap components we’re inheriting from the ngx-bootstrap. The only component we’re making use of for now is the Bootstrap modal.
Then, open the app-routing.module.ts file and change its contents to the following:
import { RouterModule, Routes } from "@angular/router";
import { NgModule } from "@angular/core";

import { UserIndexComponent } from "./user/index/index.component";

const appRoutes: Routes = [
  { path: "users", component: UserIndexComponent },
  { path: "", redirectTo: "/users", pathMatch: "full" },
];

@NgModule({
  imports: [RouterModule.forRoot(appRoutes, { scrollPositionRestoration: "enabled" })],
  exports: [RouterModule],
})
export class AppRoutingModule {}
This will ensure that Angular matches the right User’s component when the /users path is called.
And, finally, register all of them within the main AppModule class. Open the app.module.ts file and make sure it looks like this:
import { BrowserModule } from "@angular/platform-browser";
import { NgModule } from "@angular/core";
import { HttpClientModule } from "@angular/common/http";
import { FormsModule, ReactiveFormsModule } from "@angular/forms";

import { AppComponent } from "./app.component";
import { AppRoutingModule } from "./app-routing.module";
import { AppBootstrapModule } from "./app-boostrap.module";
import { UserIndexComponent } from "./user/index/index.component";

@NgModule({
  declarations: [AppComponent, UserIndexComponent],
  imports: [HttpClientModule, AppRoutingModule, BrowserModule, FormsModule, ReactiveFormsModule, AppBootstrapModule],
  providers: [],
  bootstrap: [AppComponent],
})
export class AppModule {}
Here, everything’s mapped. From our form, the HTTP client and the user component to the Bootstrap module configs, and routing.
Finishing Configs Up
Before we jump into the tests, we need to finish some stuff up, starting with the app.component.ts file:
import { Component } from "@angular/core";

@Component({
  selector: "hello-angular",
  template: "<router-outlet></router-outlet>",
})
export class AppComponent {
  name = "Angular!";
}
The main app component needs to know how to route the paths, so the RouterOutlet will do the job.
Then, we need to make sure that Webpacker understands the HTML extension we’re working with so far. For this, open the webpacker.yml file and, under the /config folder, search for the extensions section and add the following item:
- .html
Webpacker only recognizes the built-in TypeScript loader that comes by default with Angular. We need to process HTML, which is why we previously installed the html-loader dependency. To set it up, open the environment.js file, under the config/webpack folder, and add the following loader config:
environment.loaders.append("html", {
  test: /\.html$/,
  use: [
    {
      loader: "html-loader",
      options: {
        minimize: true,
      },
    },
  ],
});
Finally, to prevent our Angular service from receiving errors on their HTTP calls, we need to disable the CSRF token checks performed by Rails. For this, open the application_controller.rb file, under the app/controllers folder, and change its contents to the following:
class ApplicationController < ActionController::Base
  protect_from_forgery with: :null_session
end
Testing
That’s it! It looks a bit tricky since the setup requires a lot of customizations, but the result is worth it.
To test, save everything, and start the server by issuing the rails s command.
Then, go to your web browser and type the address http://localhost:3000/users. Go ahead and play around with the CRUD web application.
Conclusion
It’s been a long road to get this CRUD up and running. After the first trial, you’ll see that things get easier for your future projects. I hope this project helps to set up a starting point for those of you that want to start a project quickly by joining both techs.
While we don’t have an open-source scaffolding project to help with it, we rely on each other’s efforts to have materials like that. Now, it’s your turn; fork the project (or create it from scratch) and start making your customizations.
The GitHub repository for this example can be found here. Have fun!


