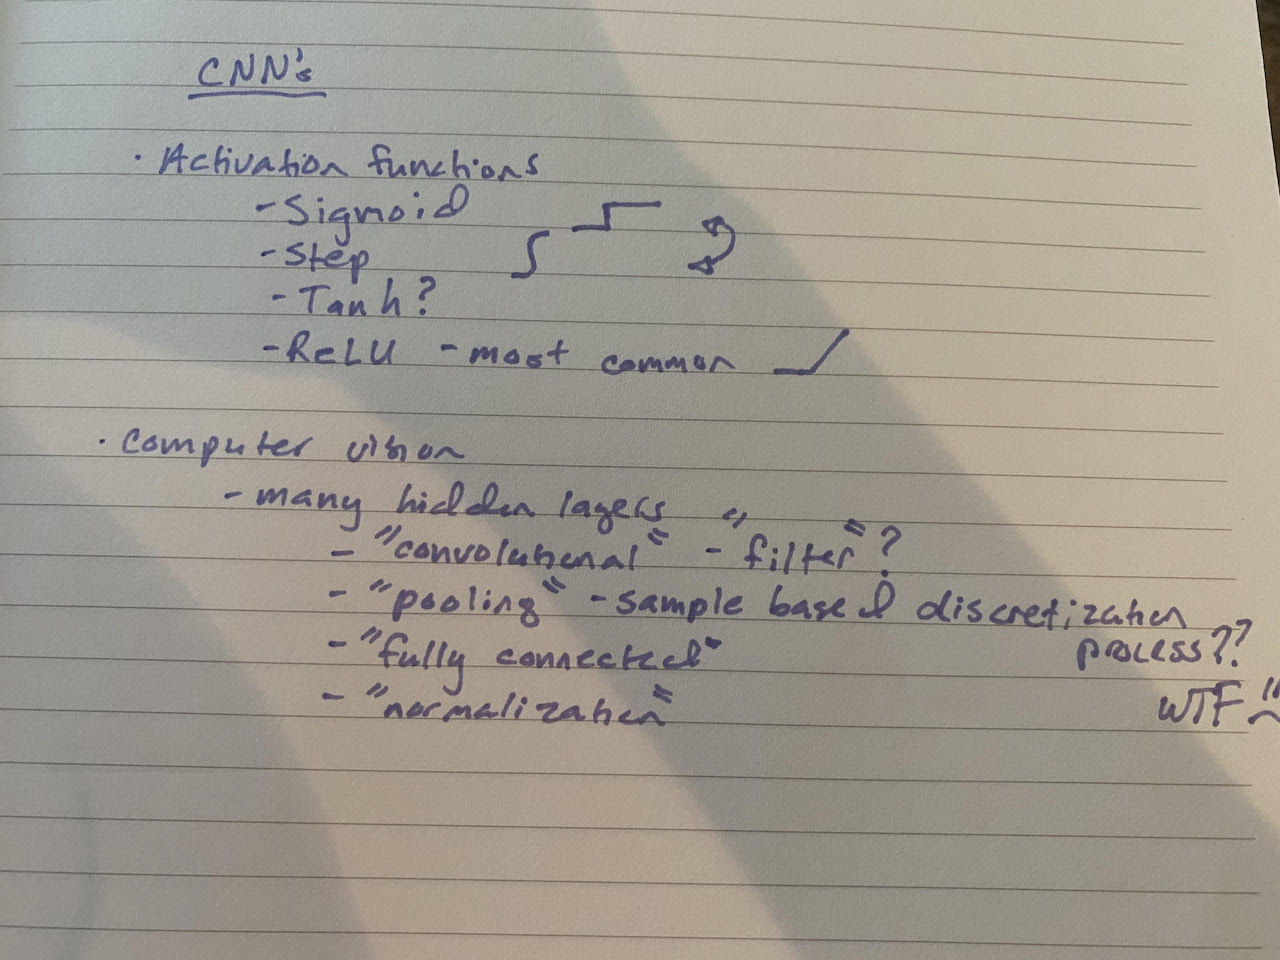
This is a question that puzzled me for a very long time. If you've tried to conduct your own research to find an understandable definition for convolutional neural network and still felt confused at the end of the day, you're not alone. When I would try and Google a definition in layman's terms, I would end up going down a seemingly endless rabbit hole of more and more technical terms that I'd have to look-up. Here is a page of notes from one of my notebooks.
Yep, nine months ago there was no way I could tell you what a convolutional neural network, or CNN, was. It's taken me about that long to do enough reading and tutorials that I feel confident enough sharing a very basic overview with you. My hope is that after reading this post, you have enough of an understanding to continue to explore the topic and work through your own examples.
Wait, Why Should I Care What a CNN is?
Good question. If you are a software engineer, you should care because there's a very good chance that deep learning will inevitably become part of your job in the future. Even if you're not building the models that directly use CNNs, you might have to collaborate with data scientists or help business partners better understand what is going on under the hood.
If you're not a software engineer, I'd argue that you should still care. You're interacting with products powered by CNN's on a daily basis. For example, Google, Facebook, and all of the tech giants are using CNN's to do things like suggest who to tag in your photos, or determine what image search results should be most prevalant. Self-driving cars rely heavily on CNN's to perform image recognition, so if you're curious about how companies like Tesla and Waymo are distrupting transportation, this post will help you too.
The Basics
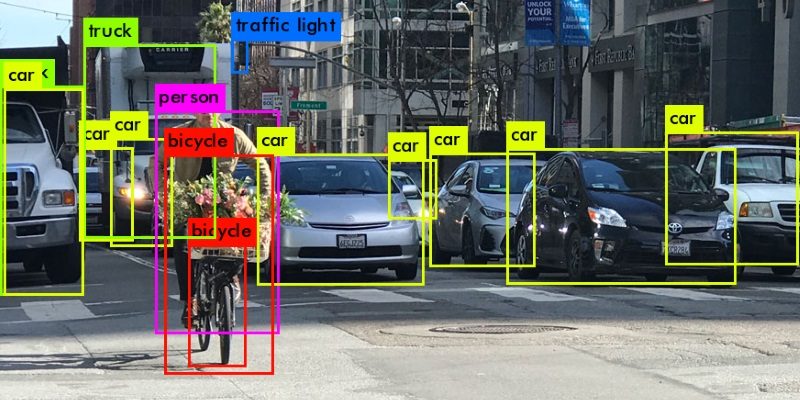
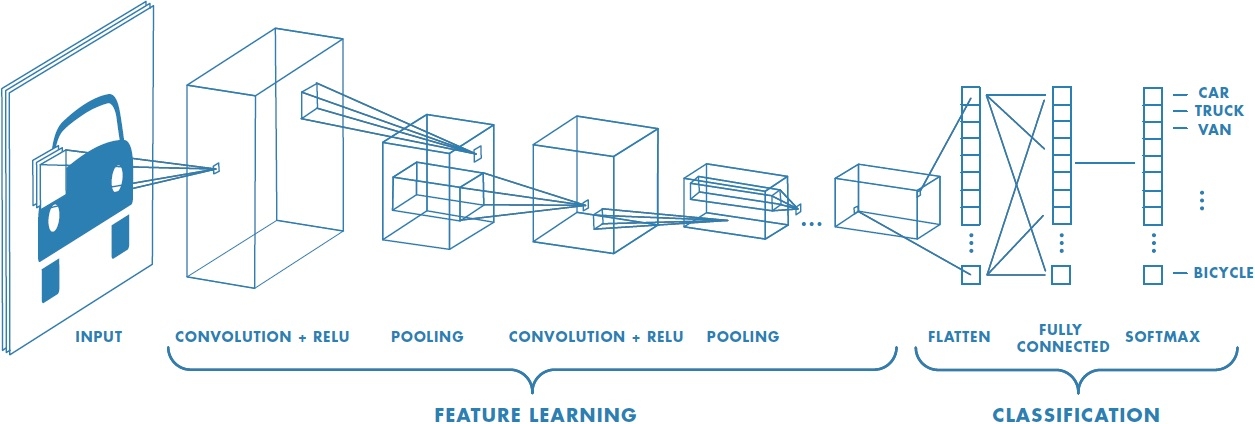
A convolutional neural network is a specific type of neural network, most commonly utilized for image recognition (like the image above demonstrates). Robotics, self-driving cars, and facial recognition software all utilize CNN's. The high level steps are as follows:
- Process the image data into a usable form
- Reshape the data
- Apply convolutional layers
- Apply max pooling
- Flatten data with a fully-connected layer and classify the image!
Let's dive into each of these steps, utilizing as much basic English as absolutely possible! :)
Process the Image Data
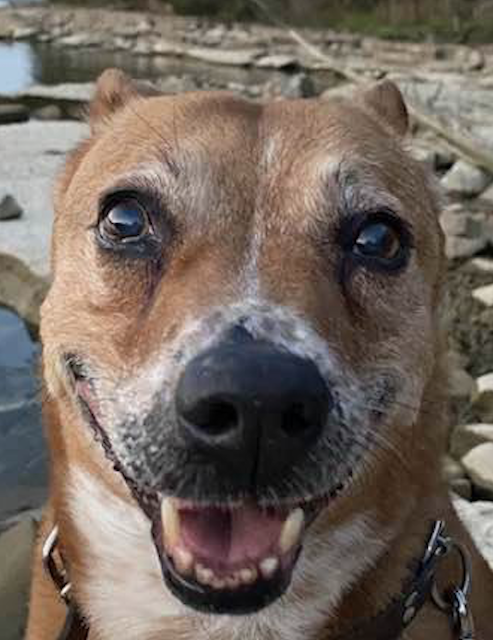
This is what my brain sees when I look at my dog.
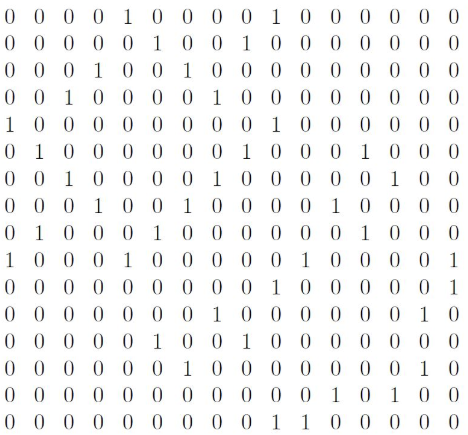
This is what the computer sees when it looks at a picture of my dog (except many more 0's and 1's) :)
I'm sure everyone is familiar with different image file types -- like PNG, JPEG and GIF. I'm sure you're also used to referring to images by their size -- often measured in pixels. For example, 400x300 means that the image is 400 pixels wide and 300 pixels high, for a total of 120000 pixels.
What is a pixel? A pixel is just a point on an image, with a specific shade, color, and/or opacity. Pixels can be represented as one number, or multiple. Most color images utilize RGB, which means each pixel is made up of three integers between 0-255, where each integer represents a pixel's value for red, green, and blue -- hence the acronym, RGB.
To build a CNN, we need to be able to standardize our image byte data into pixel data. There are libraries available with built in methods to accomplish this standardization. One popular library is Tensorflow, and another option is PIL from Pillow. Note: Both Tensorflow and Pillow are written (mostly) in Python. However, you can find ports in other languages. For example, this Ruby Gem that supports basic functionality.
The outcome of this step is often a 2-D matrix.
If you'd like to learn more about how this works, check out the following methods in Tensorflow: read_file, decode_image, resize_images. More info about PIL can be found here
Reshape the Data
If we are using Tensorflow, the next step is to reshape our data into NHWC format. This is an acronym that stands for the following:
- Number of images in the batch
- Height of each image
- Width of each image
- Channels per image (For example, this would be 3 for RGB)
The outcome of this step is to have our data ready for processing via neural network layers.
If you'd like to learn more about how this works with Tensorflow, check out the reshape method.
Apply Convolution Layers & Max Pooling
We've got all of the data ready for our neural net, now what?! We need to start processing it, and to do that we will use a "convolution" layer. According to Wikipedia, "convolution" is defined as "a mathematical operation on two functions (f and g) that produces a third function expressing how the shape of one is modified by the other." I know that might be hard to unpack, but let's just try to remember that "convolution" involves taking inputs and transforming them into a single output.
With that in mind, let's dive deeper into what is going to happen here.
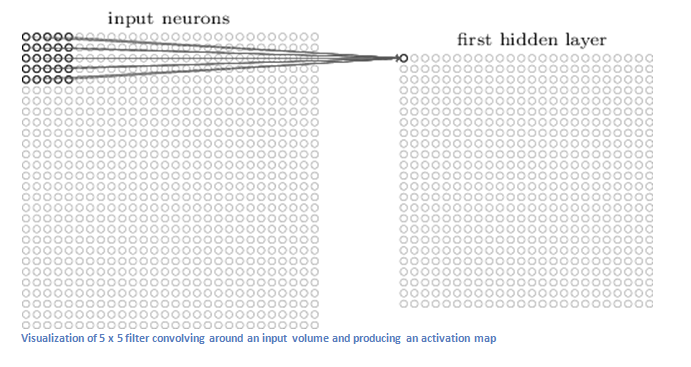
Imagine a flashlight that starts shining at the top-left corner of our input data (which recall is simply a bunch of numbers) and continues to move from left to right through "chunks" of the data (size of the chunk is determined by the array dimensions). For each chunk, the flashlight will perform some fancy math and ultimately output one number for each chunk of data. In technical terms, what we're referring to as a flashlight is called a filter. As you can see in the image above, the 5x5 section of input neurons gets put through a filter, and ultimately results in one neuron.
But what does this actually mean?!
Think of a filter as a feature. Think of a feature as descriptives of an image. One feature might be a curved line. One might be a dot. As we continue to move through more convolution layers, our features will become more complex. While the first layer detects a curved line, a layer much further down the neural net might detect a complete oval. As you can imagine, adding more filters to our layer allows our neural net to extract better features, but requires more training time and computational complexity.
If you'd like to learn more about how this works with Tensorflow, check out the layers.conv2d method.
What is Max Pooling?
By the time we are done with all of the convolution layers, we still may have a large number of features. Pooling is used to reduce the size of the data, thereby allowing our model to train faster because it doesn't have to make as many computations. It also prevents overfitting by extracting the best features.
Flatten Our Data With a Fully-connected Layer and Classify!
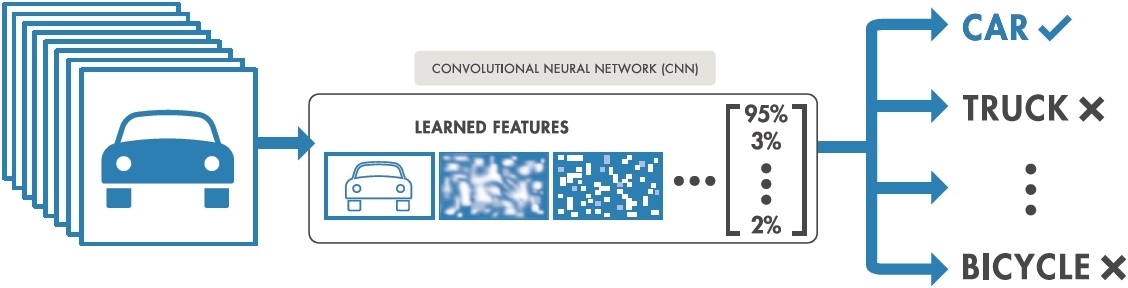
We're almost there!! We've run our data through a bunch of filters, and also applied max pooling to ensure we're not over-fitting and reducing the size of our data. The next step is to flatten our data back into a matrix form (from NHWC) so we can put it through a fully-connected layer. This layer takes in all of our input data and outputs an N dimensional vector where N is the number of classes the program has determined to be relevant. For example, if we were trying to recognize letters of the alphabet, we'd have vectors with weights corresponding to each letter of the alphabet. If the first part of that vector looked like this: [.15 0 .10] this would mean there is a 15% chance the image is an A, 0% chance it's a B, 10% chance it's a C, etc.
Putting it All Together
Let's go back to this picture from the beginning of the article.
I hope that you now have a better understanding as to how a convolutional neural network could be used to produce the classifications in this image. We start with an image, convert it into data the computer can understand, and then run it through many filters that extract "features" -- from there, we get rid of the non-relevant features and ultimately determine what is most likely to be the classification. Note that I said most likely -- there have been several high-profile "snafus" related to image recognition gone wrong.
That said, I believe computers will only improve as time passes, processing becomes cheaper, more data becomes available, and models can be better trained.
What do you think? Are there applications of image recognition that excite you more than others?


