This is a great tutorial about using Markdown in Python.
''' # 2 markdown_string = markdownify.markdownify(html_string) print(markdown_string) ``` In the above code, you are doing the following: 1. Importing the `markdownify` module. 2. Converting the HTML (`html_string`) to Markdown (`markdown_string`) using the `markdownify` method from the `markdownify` package. Finally, save your code and run the `main.py` file by running the following command in the terminal: ```bash python main.py ``` Once the code execution is complete, you’ll get the Markdown output: 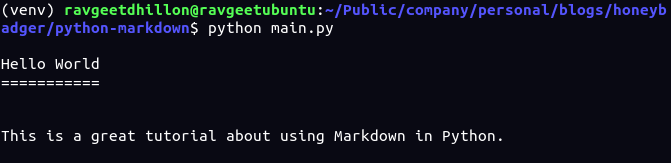 If you see the output above, you’ll see the headings (`This is a HTML file.
Visit Honeybadger ``` Next, replace the existing code in the `main.py` file with the following: ```python import markdownify # 1 with open('sample.html', 'r') as f: html_string = f.read() # 2 markdown_string = markdownify.markdownify(html_string, heading_style='ATX') # 3 with open('sample.md', 'w') as f: f.write(markdown_string) ``` In the above code, you’re doing the following: 1. Reading the `sample.html` and storing its content in the `html_string` variable. 2. Converting the HTML (`html_string`) to Markdown (`markdown_string`) using the `markdownify` method from the `markdownify` package. 3. Creating a `sample.md` file and writing the Markdown (`markdown_string`) to it. Finally, save your code and run the `main.py` file by running the following command in the terminal: ```bash python main.py ``` Once the code execution is complete, you’ll see a `sample.md` file in your project’s root directory as follows: 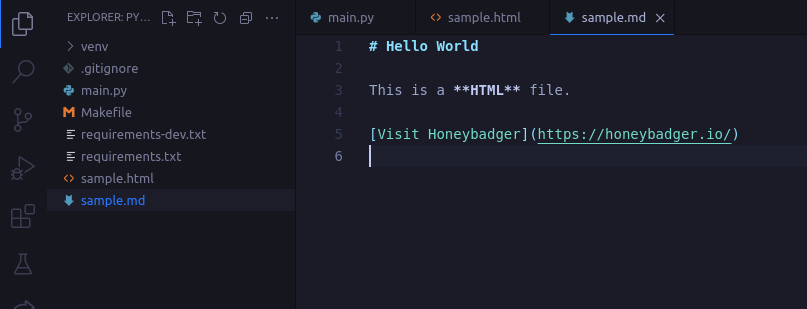 ## Reading Markdown Front Matter in Python In the world of Markdown, there are often some variables or metadata associated with a Markdown file. This is known as **front matter**. Front matter data variables are a great way to store extra information about a Markdown file. For example, a blog’s markdown files can have front matter variables like _Title_, _Author_, _Image_, _Published At_, and more. You can specify front matter at the beginning of a Markdown file by placing the YAML data variables between triple-dashed lines. For example, ```yaml --- title: Hello World Author: John Doe Published: 2020-01-20 --- ``` In Python, you can parse Markdown front matter with the [python-front matter](https://pypi.org/project/python-frontmatter/) package. To see this package in action, first, install the package by running the following command in the terminal: ```bash pip install python-frontmatter ``` Next, add the following front matter to the `sample.md` file: ```yaml --- title: Hello World date: 2022-01-20 --- ``` Next, replace the existing code in the `main.py` file with the following: ```python # 1 import frontmatter # 2 data = frontmatter.load('sample.md') # 3 print(data.keys()) print(data['title']) print(data['date']) ``` In the above code, you are doing the following: 1. Importing the `frontmatter` module. 2. Reading the `sample.md` file using the `load` method from the `frontmatter` package and storing the result in the `data` variable. 3. Accessing the front matter variables with the help of `data.keys()`. Since `data` is a dictionary, you can also access the individual keys (`data['title']` or `data['date']`). Finally, save your code and run the `main.py` file by running the following command in the terminal: ```bash python main.py ``` Once the code execution is complete, you’ll get the output of the front matter variables as follows:  ## Updating Markdown Front Matter in Python Sometimes, a situation arises where you might want to convert HTML to Markdown. For this purpose, you can use the Python’s [markdownify](https://pypi.org/project/markdownify/0.4.0/) package. You can also update the existing front matter data variables or add new ones using the front matter package. To do so, first, replace the existing code in the `main.py` file with the following: ```python import frontmatter # 1 data = frontmatter.load('sample.md') # 2 data['author'] = 'John Doe' # 3 data['title'] = 'Bye World' # 4 updated_data = frontmatter.dumps(data) # 5 with open('sample.md', 'w') as f: f.write(updated_data) ``` In the above code, you are doing the following: 1. Reading (`frontmater.load()`) the `sample.md` file. 2. Adding a new key (`author`) to the front matter `data` variable and assigning it a value (`John Doe`). 3. Updating the existing key (`title`) and assigning it a new value (`Bye World`). 4. Serializing (`frontmatter.dumps()`) the `data` variable to a _string_ and storing the result in the `updated_data` variable. 5. Updating the `sample.md` file by writing the updated Markdown (`updated_data`) to it. Finally, save your code and run the `main.py` file by running the following command in the terminal: ```bash python main.py ``` Once the code execution is complete, check the `sample.md` file for the updated front matter data, as follows: 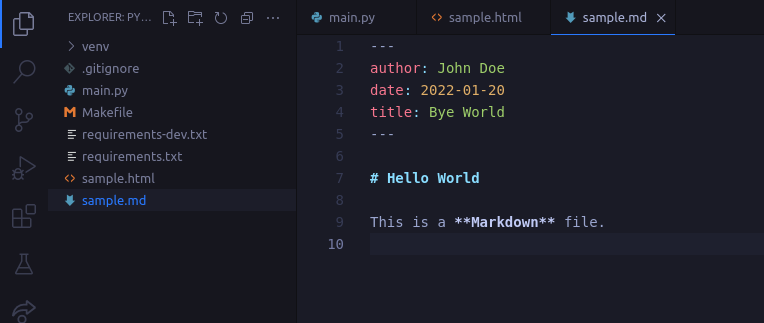 ## Using Python Markdown Extensions The [python-markdown](https://pypi.org/project/Markdown/) package also supports extensions that allow you to modify and/or extend the default behavior of the Markdown parser. For example, to generate a table of contents (TOC), you can use the [toc extension](https://python-markdown.github.io/extensions/toc/). There are [other extensions](https://python-markdown.github.io/extensions/), as well, which you can make use of based on your requirements. To create a TOC for your Markdown content, first, replace the existing code in the `main.py` file with the following: ```python import markdown # 1 markdown_string = ''' [TOC] # Hello World This is a **great** tutorial about using Markdown in [Python](https://python.org). # Bye World ''' # 2 html_string = markdown.markdown(markdown_string, extensions=['toc']) print(html_string) ``` In the above code, you are doing the following: 1. Specifying the `[TOC]` string in your Markdown (`markdown_string`) where you want to add the table of contents. 2. Adding the `extensions` parameter to the `markdown` method from the `markdown` package and specifying the extensions (`['toc']`) you want to use. Finally, save your code and run the `main.py` file by running the following command in the terminal: ```bash python main.py ``` Once the code execution is complete, you’ll get the HTML output with the Table of Contents as a list: 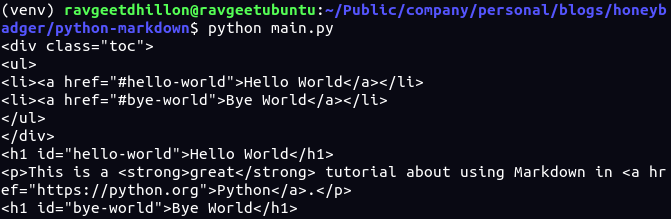 ## Conclusion Learning to work with Markdown can help you in lots of ways. Using Python, you can automate many tasks, including maintaining and manipulating Markdown files. For example, you can write a script that creates an index for all of your Markdown files in your blog or organize your Markdown files into different directories based on the front matter data variables, such as tags/categories. [Honeybadger](https://www.honeybadger.io/for/python), which is a cloud-based system for real-time monitoring, error tracking, and exception-catching, also uses Markdown to maintain our documentation. In case you are interested, we wrote a blog post in which we talk about how we [built a documentation workflow in Rails](https://www.honeybadger.io/blog/documentation-worklow-rails/). --- ## Try Honeybadger for FREE Intelligent logging, error tracking, and Just Enough APM™ in one dev-friendly platform. Find and fix problems before users notice. [Start free trial](https://app.honeybadger.io/users/sign_up) [See plans and pricing](https://www.honeybadger.io/plans/)