---
title: Understanding and Implementing OAuth2 in Ruby
published: "2020-08-12"
publisher: Honeybadger
author: Diogo Souza
category: Ruby articles
tags:
- Ruby
- Oauth
description: "Let me know if this feels familiar. Your users want to \"login with GitHub,\" so you install a gem, follow the setup instructions, then pray it never needs maintenance because you have no real idea how OAuth2 works. Let's fix that. In this article, Diogo Souza shows us the fundamental concepts behind OAuth2 and how to implement them using Devise and Doorkeeper."
url: "https://www.honeybadger.io/blog/oauth2-ruby/"
---
Adding authentication to your Ruby apps can be overwhelming, especially with [OAuth 2](https://oauth.net/2/).
I wrote this article to help orient you. It will introduce you to the fundamental concepts behind OAuth 2 and show how they're implemented in two different libraries: [oauth-plugin](https://github.com/pelle/oauth-plugin) and [Doorkeeper](https://github.com/doorkeeper-gem/doorkeeper). It will show you how these OAuth libraries integrate with [Devise](https://github.com/heartcombo/devise) to provide a complete authentication solution for Rails.
> If this article piques your curiosity, and you'd like to explore the OAuth 2 architecture in greater depth, we recommend taking a look at the [OAuth 2.0 specification](https://oauth.net/2/) and [IETF RFC](https://tools.ietf.org/html/rfc6749).
## Environment Setup
Rails needs Ruby. For this article, we’ll be using version 2.7.0. It’s better if you also use the same to avoid unnecessary complications.
To determine whether you already have it installed, run the following:
```
ruby -v
```
If your version is older, you’ll need to [upgrade it](https://www.ruby-lang.org/en/) before proceeding.
Now run the following:
```
gem install rails
```
If the command runs successfully, then you’re ready to proceed.
> The oauth-plugin was built a while ago, originally targeting version 2.5 or earlier of Ruby. That’s why a couple of changes will be necessary in this article.
## The Server Provider
The project is divided into two parts. The provider is the project that will serve OAuth 2 operations, including token generation and the main authorization flow.
The client, in turn, will simply issue HTTP requests containing the auth data.
So, let’s create the folders of each part accordingly:
```
mkdir hb-oauth2-diy && cd hb-oauth2-diy rails new hb-oauth2-provider
```
If you're a beginner, I’d strongly advise you to review [the structure of a Rails app](https://guides.rubyonrails.org/getting_started.html).
Next, we need to add and update the dependencies our provider project will need. First, add the following to your _Gemfile_:
```ruby
gem 'devise' gem "oauth-plugin", ">= 0.5.1" group :test do gem 'rspec-rails' end gem 'dynamic_form'
```
_Devise_ and `oauth-plugin` dependencies come first. Regarding this last one, make sure to check the [latest version](https://rubygems.org/gems/oauth-plugin/) and include it here appropriately.
We’re also including [RSpec](https://rspec.info/) to see some tests from the plugin repository running at the end of the configuration. More details will be provided on this later.
Since we’re dealing with Rails3 models in the project (differently from the older versions of Rails, for which the plugin was originally designed), we’ll need to include the [dynamic\_form gem](https://github.com/joelmoss/dynamic_form) to easily access its model-helper methods.
Finally, change the line of sqlite3 to the following:
```
gem 'sqlite3', '~> 1.3.13'
```
This change is made to avoid compilation errors for oauth-plugins that also use SQLite to handle user data.
## Rails Configurations
Now, we’re ready to run the `bundle install` command and have our dependencies updated.
With all the gems installed, we can now run the command to properly [install rspec](https://rspec.info/documentation/4.0/rspec-rails/) in our project:
```
rails generate rspec:install
```
This will update `spec_helper.rb` and `rails_helper.rb` in the `spec` folder. If you’re not familiar with rspec, please spend some time reading the comments on them, as well as the [official docs](https://rspec.info/documentation/4.0/rspec-rails/RSpec/Rails.html).
## Devise Installation
Next comes the Devise installation. Since OAuth deals with user data, we’d need to create the proper model for the database that Devise will create and manage, by running the generator:
```
rails generate devise:install
```
It will install an initializer that describes the possible configs. Just like we did with rspec, go ahead and read them.
Now, we need to set up our user model, pointing it to Devise. To do so, run the following:
```
rails generate devise User
```
You can switch the name to _Admin_ or any other name of your choosing. Note the logs after the command ends. It shows which files were created (tests, the model, a db migration, and one route inserted).
Next, we need to create the OAuth 2 provider and its default generated controllers, models, and routes. Begin by running the command into the `hb-oauth2-provider` folder:
```
rails g oauth_provider --test-framework=rspec
```
This time, the test framework must be provided as well, _rspec_. Again, note the logs and the created files/routes. These logs are very instructive; make sure to always refer to any changes they list.
One interesting change was placed at `routes.rb` in the `config` folder. Please, don’t change the routes, since they already map perfectly the endpoints to the respective controller methods.
## HTTP Routing
Note that each mapping also uses an old-fashioned declaration style in which each request can be sent via any HTTP method. However, this no longer applies, so let’s change the mappings to the following:
```ruby
# config/routes.rb Rails.application.routes.draw do resources :oauth_clients match '/oauth/test_request', via: [:get], :to => 'oauth#test_request', :as => :test_request match '/oauth/token', via: [:post], :to => 'oauth#token', :as => :token match '/oauth/access_token', via: [:get], :to => 'oauth#access_token', :as => :access_token match '/oauth/request_token', via: [:get], :to => 'oauth#request_token', :as => :request_token match '/oauth/authorize', via: [:get, :post], :to => 'oauth#authorize', :as => :authorize match '/oauth', via: [:get], :to => 'oauth#index', :as => :oauth devise_for :users root :to => "oauth_clients#index" # For details on the DSL available within this file, see http://guides.rubyonrails.org/routing.html end
```
We provided the routes with the specific HTTP method they’ll navigate through and a root route for the API (_index_ method).
## Database Migration
Now, it’s time to migrate the database. Take a look at the `db/migrate` folder. There, you can see the database migration files that each of the previous commands we’ve issued has auto-generated.
There is one minor change here. For some reason, the oauth-plugin is not generating the files with the correct extension (_.rb_). This will interfere with our Rake migration task working properly, so go ahead and add the extension (ex: _2020xxxx\_create\_oauth\_tables > 2020xxxx\_create\_oauth\_tables.rb_).
Have a look at these files. They’ll basically create the tables and indexes with the patterns that the oauth-plugin uses within its models.
Now, run the command to migrate the database and create our SQLite db.
```
rake db:migrate
```
The logs state the successful creation of the tables. Note that the `development.sqlite3` file was auto-generated in the `migrate` folder. It is our database. You can also open this file and select the tables and data within them, but they're currently empty.
## Getting The Tests Ready
Since we’re using rspec, and as I mentioned, we’ll run some of the oauth-plugin ready tests, let’s also migrate the database for tests:
```
rake db:test:prepare
```
_test.sqlite3_ was created. As the plugin was built to deal with OAuth 1 and 2, we need to remove some files ([more on this](https://github.com/pelle/oauth-plugin/commit/6e24ec0ee2f3dc871756b2e8a75fa2181ff504f4) by the author). They are:
- `spec/controllers/oauth_clients_controller_spec.rb`
- `spec/models/oauth_token_spec.rb`
## Adapting Our Provider
Now’s the time to adapt the provider to deal with OAuth 2 exclusively, as well as understand how it will work with Rails 5+.
Let’s start with the controllers. Open the `application_controller.rb` in the `app/controllers` folder and add the following code snippet to inject the user as a `current_user` (required by oauth-plugin).
```ruby
def current_user=(user) current_user = user end
```
For the other two controllers in the folder, we need to add the following alias:
```ruby
alias :login_required :authenticate_user!
```
This is necessary because the oauth-plugin only understands this alias structure that, in turn, will trigger the `:login_required` when called.
The `oauth_clients_controller.rb` still needs to be changed. The `create` method needs to state the required params before using them. Change its first line of code to the following:
```ruby
@client_application = current_user.client_applications.build(user_params)
```
This is the `user_params` method:
```ruby
def user_params params.require(:client_application).permit(:name, :email, :url) end
```
## Creating The API Controllers
We’ll also need two API controllers: `Base` (default root) and `Data` (to serve some test data). To create them, run the following:
```
rails generate controller API::V1::Base rails generate controller API::V1::Data
```
They will be created in the `app/controllers/api/v1` folder. It’s important to define the version so that the API will be ready for major changes in the future.
The first change here is related to the format types our `Base` controller will accept. Add the following:
```ruby
respond_to :json, :xml
```
Feel free to add any other type you prefer for testing purposes.
Then, add the following to ensure only the OAuth flow will be processed (rather than the default login one) by setting `false` on `interactive` flag.
```ruby
oauthenticate :interactive=>false
```
For the `data_controller.rb`, let’s set a default response to the show method by adding the following:
```ruby
def show respond_with ({:super_secret => "oauth_data"}) end
```
For this response to work, we need to map the respective route at `routes.rb`:
```ruby
namespace :api do namespace :v1 do match "data" => "data#show", via [:get] end end
```
## Adapting The Models
We’re done with the controllers. Let’s move on to the models.
First, let’s modify the relationships of the _user_ table with the `client_applications` and `tokens` tables. A user must _have many_ client applications and tokens. So, add this code to the class body:
```ruby
has_many :client_applications has_many :tokens, -> { includes(:client_application) }, :class_name => "Oauth2Token"
```
Second, to match the current oauth-plugin models to the tables, the `app/models/oauth_token.rb` needs to have an expiration date. Add the following accessor:
```ruby
attr_accessor :expires_at
```
We also need to adapt the main application config file, `application.rb`. Open it, and then add the [Rack’s oauth-filter](https://www.rubydoc.info/gems/oauth-plugin/OAuth/Rack/OAuthFilter) to help ensure filtering, sanitizing, and other features default to OAuth 2 protocol. It will be added to the `application.rb` class’ body:
```ruby
config.middleware.use OAuth::Rack::OAuthFilter
```
Don’t forget to import it properly at the beginning of the file:
```ruby
require 'oauth/rack/oauth_filter'
```
## Fixtures and Helpers
That’s it. Let’s test it. But first, we need to have fixtures and spec helpers to define what and how to run them.
To avoid verbosity, please download the `api/v1`, `fixtures`(data for the tests), `support` (rspec configurer), and `spec_helper.rb` (the same as `rails_helper.rb`; you can choose either one or another) files from the `spec` folder, from [my version](https://github.com/diogosouza/hb-oauth2-diy/tree/master/hb-oauth2-provider/spec) of the source code. They were copied from the oauth-plugin repository to enable us to test the OAuth setup.
The `data_controller_spec.rb` file basically defines two tests: one with a valid and another with an invalid token. They test the input, processing, and output of our OAuth endpoints for both JSON and XML formats.
Now, let’s run it. For this, run the command `bundle exec rspec spec` and check the results. You should see the following message:
```
Finished in 0.27095 seconds (files took 2.61 seconds to load) 28 examples, 0 failures
```
## The Consumer
With the oauth-plugin’s OAuth provider API fully functional, we can focus on the consumer.
However, first, we need to change the application name and URL shown in `oauth2_authorize.html.erb`, the view of the authorization step. Open it and replace the `@token` with `@`.
```erb
<%= link_to @client_application.name, @client_application.url %> (<%= link_to @client_application.url, @client_application.url %>)
```
Next, let’s create the consumer folder, named `hb-oauth2-consumer`, at the same level as the provider.
For this part of the project, we’ll make use of [Sinatra](http://sinatrarb.com/) (a DSL for quickly creating web applications in Ruby) to simplify our lives, along with [oauth2](https://github.com/oauth-xx/oauth2) (a Ruby wrapper for the OAuth 2.0 specification). For this, create a Gemfile file at the root of the consumer folder and add the following:
```ruby
gem 'sinatra' gem 'oauth2'
```
Then, run `bundle install` to download the dependencies.
## Setting Up User Credentials
Before proceeding to the client code, we need to create, in the provider, the client application that will host the user credentials for OAuth 2. For this, inside of the provider folder, run the `rails server` command.
It will start the server application and enable access via [http://localhost:3000](http://localhost:3000). Click the _Sign up_ link, and a screen like the following should appear:
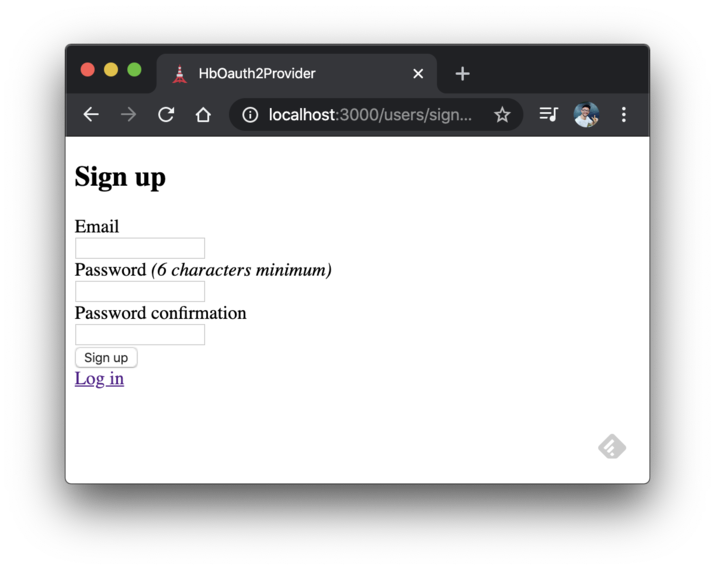_Default sign up page._
Type any email and password, and then click _Sign up_. The following screen will appear, stating the success of the previous action.
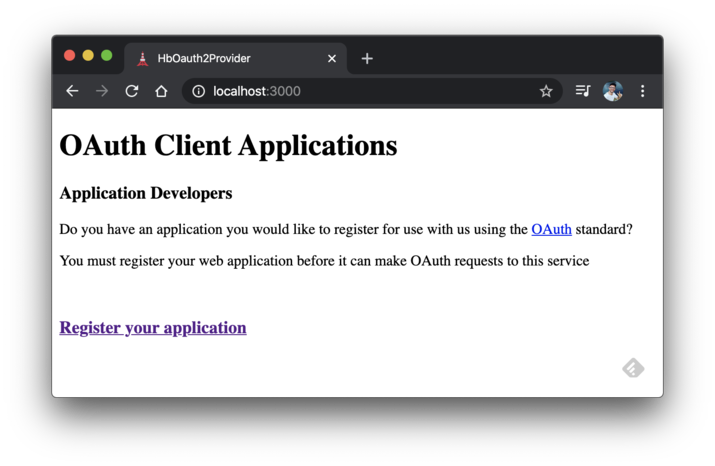_Welcome page._
Next, click the “_Register your application_” link and, once redirected, fill in the following application data:
- _Name_: hb-oauth-app
- _Main App URL_: [http://localhost:3000](http://localhost:3000)
- _Callback URL_: [http://localhost:4567/auth/test](http://localhost:4567/auth/test) (the one our Sinatra app will handle, where the server must redirect after successful login)
- _Support URL_: leave it empty.
Click the _Register_ button, and you’ll be redirected to the OAuth details page.
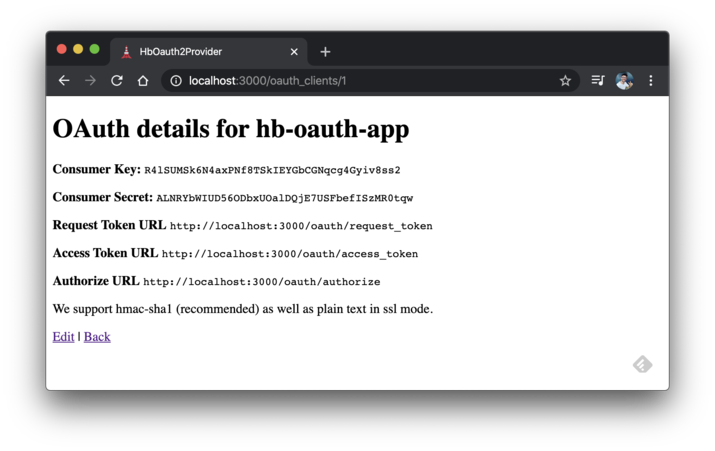_OAuth details page._
## Creating Our OAuth Wrapper Client
The process used to create an OAuth wrapper client is very simple. Create a new file called `app.rb` in the root folder and add the imports and the OAuth client definition:
```ruby
require 'sinatra' require 'oauth2' require 'json' enable :sessions def client OAuth2::Client.new("client_id", "client_secret", :site => "http://localhost:3000") end
```
The `client_id` and `client_secret` are exactly the same as the ones displayed in the step from the details page. Replace them accordingly. Immediately below it, let’s add the endpoints:
```ruby
get "/auth/test" do redirect client.auth_code.authorize_url( :redirect_uri => redirect_uri) end get '/auth/test/callback' do access_token = client.auth_code.get_token( params[:code], :redirect_uri => redirect_uri) session[:access_token] = access_token.token @message = "Successfully authenticated with the server" erb :success end get '/page_2' do @message = get_response('data.json') erb :success end get '/page_1' do @message = get_response('data.json') erb :page1 end
```
Once the `client` is defined and okay, you can access OAuth 2 operations under the `auth_code` object, such as retrieving a token or authorizing an URL.
The GETs for _page\_1_ and _page\_2_ are just for you to check whether the session is working. They make sure the authentication worked and is keeping the session up.
## The Auxiliary Methods
Last, but not least, it follows the definition of the two auxiliary methods to extract the access token from the response and for the redirect URL, respectively:
```ruby
def get_response(url) access_token = OAuth2::AccessToken.new( client, session[:access_token]) p access_token JSON.parse(access_token.get("/api/v1/#{url}").body) end def redirect_uri uri = URI.parse(request.url) uri.path = '/auth/test/callback' uri.query = nil uri.to_s end
```
## The Views
Now, we only need the two .erb files in the `views` folder (please, make sure to create it) to serve the HTML responses.
Create two files:
- _page1.erb_: to display the message from the API and a link to check the session persistence.
- _success.erb_: to display the success message and a link to page1.
#### views/page1.erb
```erb
Page #1
<%=@message.inspect%> Verify if session persists
```
#### views/success.erb
```erb
Success page
<%=@message.inspect%> Test Page 1
```
Finished. Now, on to the tests. In the consumer folder, run the following:
```
ruby app.rb
```
Your client application will be served at [http://localhost:4567](http://localhost:4567). To test it, go to [http://localhost:4567/auth/test](http://localhost:4567/auth/test). An authorization screen will appear, asking you to allow access to the given client application. Make sure to check the checkbox and click the _Save changes_ button.
The result is going to be our success page. Now, you can flip from one page to another and verify the session remains up.
## Devise/Doorkeeper Strategy
Until now, we had a lot of code. Although we were using a plugin to help with boilerplate code, ready endpoints, and webpages for sign in/sign up management, a lot of adaptations were necessary.
This is when [Doorkeeper](https://github.com/doorkeeper-gem) comes to the rescue. It is not only an OAuth 2 provider for Rails but also a full OAuth 2 suite for Ruby and related frameworks (Sinatra, Devise, MongoDB, support for JWT, and more).
Let’s dive into this fresher universe, so you can analyze the differences.
Regarding the setup, we don’t need anything other than what’s already installed. So, let’s create the new Rails app:
```
rails new hb-oauth2-devise-doorkeeper
```
Now, repeat the step from the previous strategy and add the dependencies to your Gemfile:
```ruby
gem 'devise' gem 'doorkeeper' gem 'sqlite3', '~> 1.3.13'
```
The version of sqlite3 is important, as otherwise your app may show an error `“Specified 'sqlite3' for the database adapter, but the gem is not loaded. Add gem 'sqlite3'”`.
Run the `bundle install` command to install the gems.
## Scaffolding Our Notes CRUD
Since we won’t have any webpages ready at this time (i.e., there's no longer an oauth-plugin), let’s create a simple CRUD API for you to see the data flowing through the authentication flows.
```bash
rails generate scaffold note name:string description:text quantity:integer due_date:datetime
```
Review the created folders and files. Next, repeat the steps of Devise installation and user creation:
```
rails generate devise:install rails generate devise User
```
Now, let’s install Doorkeeper properly:
```
rails generate doorkeeper:install rails generate doorkeeper:migration
```
The last command will print a message stating the Doorkeeper needs Rake db migration. However, first, we must adapt the database creation file. A lot of unnecessary tables for more fine-grained OAuth controls were included, and we must remove them.
To do so, change the code of your `db/migrate/xxx_create_doorkeeper_tables.rb` file to the one shown [here](https://github.com/diogosouza/hb-oauth2-devise-doorkeeper/blob/master/db/migrate/20200415125121_create_doorkeeper_tables.rb).
Then, migrate the database:
```
rake db:migrate
```
## Skipping Unwanted Configs
Now, let’s add the code to the routes.rb that skip some Doorkeeper controllers.
```ruby
use_doorkeeper do skip_controllers :authorizations, :applications, :authorized_applications end
```
Since we won’t be making use of applications this time, the respective controllers must be avoided.
Plus, add the root route for our API.
```ruby
root to: 'notes#index'
```
ALso, add the namespace for our Notes API resource (to be created):
```ruby
namespace :api do resources :notes end
```
## Base and Data API Controllers
Just like we did for the DIY solution, we need two controllers to manage the base routes and specific data:
```
rails generate controller API::Base rails generate controller API::Notes
```
Remember that these commands create controller classes, not API ones. Open them up and change their declaration:
#### app/controllers/api/base\_controller.rb
```ruby
class Api::BaseController < ActionController::API respond_to :json end
```
#### app/controllers/api/notes\_controller.rb
```ruby
class Api::NotesController < Api::BaseController before_action :doorkeeper_authorize! def index @notes = Note.all respond_with @notes end end
```
The `:doorkeeper_authorize!` is equivalent to `authenticate_user!`.
You’ll also need to add the same `before_action` to the `controllers/notes_controller.rb`.
Regarding our user model, only one minor code snippet must be added to it:
```ruby
class << self def authenticate(email, password) user = User.find_for_authentication(email: email) user.try(:valid_password?, password) ? user : nil end end
```
## Authenticating With Devise and Doorkeeper
Since the strategy to test the API is going to be a plain username/email and password, let’s integrate Devise with Doorkeeper by letting the `User` class (devise) perform the authentication.
This mechanism must be set at `doorkeeper.rb`. These are the changes:
- Check whether the resource owner is authenticated:
```ruby
resource_owner_from_credentials do |_routes| User.authenticate(params[:email], params[:password]) end
```
- Allow the specified grant flow of the password. Here, you can change to authorization or client credentials as you wish. The file is self-documented, including links for more information:
```ruby
grant_flows %w(password)
```
- Uncomment `use_refresh_token` to allow tokens to be refreshed automatically.
- Skip the authorization flow:
```ruby
skip_authorization do true end
```
## Testing The Endpoints
That’s it. Now, on to the tests. Start the server via the `rails server` command.
Before running the commands to get an access token, you may go through the same steps of entering [http://localhost:3000/](http://localhost:3000/notes) and signing up. This time, you’ll see that the CRUD form is available immediately. Go ahead a play a bit with creating, updating, and deleting some notes.
Then, to retrieve a valid access token, run the following:
```bash
curl -X POST -d "grant_type=password&email=email&password=password" localhost:3000/oauth/token
```
Don’t forget to replace the email and password with the ones you’ve created. The result may be similar to the following:
```json
{ "access_token": "XtL9QgAXS1UxRivPtqMbtDL0bBXn2gDcM7SdGnFRPsQ", "token_type": "Bearer", "expires_in": 7200, "refresh_token": "lqReFBjlt5FqPMFjN0kUIP5yymM6fIjkmBQBOcdWG5s", "created_at": 1586959874 }
```
If we were using the client credentials flow, like the previous example, you’d have a similar path to get there.
To get the list of notes, for example, which is the only endpoint we’ve created in the API so far, you’d go with
```bash
curl -v localhost:3000/api/notes? access_token=lqReFBjlt5FqPMFjN0kUIP5yymM6fIjkmBQBOcdWG5s
```
Change the `access_token` to yours, and the list of notes will be displayed in response.
It’s important to note that the session is already being managed by Devise, just like we’ve had before. That’s why you can close the browser, open it again, and still see the listing working.
## Summary
In this article, we’ve explained two different approaches to achieve the same result. Prior to Doorkeeper, it was a painful process to set up an OAuth 2 provider in the simplest way possible, not to mention the lack of good documentation or tutorials for the more recent versions of Ruby on Rails.
Even with a plugin to save a lot of boilerplate code, many adaptations are still needed, and migrating from one version of Ruby/Rails to another is almost an impossible task.
With such a mature framework like Doorkeeper, we'll leave the hard work of adapting to new versions to the community and focus on what really matters: your app development.
For our second example, most of the changes were more related to the CRUD business logic (fine tuning the OAuth flow, auth steps, etc.) rather than trying to make the framework itself work properly.
You can find the source code repositories of both examples [here](https://github.com/diogosouza/hb-oauth2-diy) and [here](https://github.com/diogosouza/hb-oauth2-devise-doorkeeper).
---
## Try Honeybadger for FREE
Intelligent logging, error tracking, and Just Enough APM™ in one dev-friendly platform. Find and fix problems before users notice.
[Start free trial](https://app.honeybadger.io/users/sign_up)
[See plans and pricing](https://www.honeybadger.io/plans/)