---
title: Migrating From Turbolinks To Turbo
published: "2022-01-10"
publisher: Honeybadger
author: Julio Sampaio
category: Ruby articles
tags:
- Rails
- Ruby
- JavaScript
description: "Turbolinks is no longer being developed. It's been superceeded by Turbo, which is part of Hotwire. In this article, Julio Sampaio shows us how to port our existing Turbolinks apps to Turbo."
url: "https://www.honeybadger.io/blog/hb-turbolinks-to-turbo/"
---
[Turbolinks](https://github.com/turbolinks/turbolinks), a great tool to make navigating your web application faster, is no longer [under active development](https://github.com/turbolinks/turbolinks). It has been superseded by a new framework called [Turbo](https://github.com/hotwired/turbo), which is part of the [Hotwire](https://hotwire.dev) umbrella.
The team behind it understood that other stuff could adopt similar concepts extracted from Turbolinks to adhere to a faster web, such as frames, forms submissions, and native apps.
This article aims to provide a guide for the [Turbo](https://github.com/hotwired/turbo) framework, the new substitute for Turbolinks, including a practical migration guide that'll explain how to use the most important and commonly used pieces of Turbolinks in Turbo.
To better understand what we’ll talk about, it’s essential to have some knowledge of Turbolinks. You can read more about it [here](https://www.honeybadger.io/blog/ditching-your-single-page-app-for-turbolinks/) and [here](https://www.honeybadger.io/blog/turbolinks/).
## Introducing Turbo
Turbo is a collection of several techniques for creating modern and fast web apps with less JavaScript. It does so by allowing the server to deal with all the logic that'll be delivered in the form of HTML directly to the browser. In turn, the only responsibility of the browser is to process plain HTML.
In order to do this, Turbo divides itself into four main parts:
- **Turbo Drive**, the heart of Turbo, avoids full page reloads via the automatic interception of all clicks on your links and forms, prevents the browser from calling it, changes the URL via History API, requests the page behind the scenes via Ajax, and renders the response appropriately.
- **Turbo Frames** deals with page subsets/frames by reinventing the way front-end devs dealt with frames for treating subsets of a page independently. It decomposes pages into independent sets of context with separate scopes and lazy load capabilities.
- **Turbo Streams** helps substitute the common partial page updates via async delivery over web sockets with a simple set of CRUD container tags. With them, you can send HTML fragments through the same web sockets and have the page understand and re-process the UI.
- **Turbo Native** provides all the necessary tooling to deal with Turbo in embedded web apps for native shells if you’re going native on iOS/Android.
## Project Setup
To help speed things up, I decided to provide you with a ready-to-use Rails app project with a scaffolded posts form-flow embedded within it, along with Bootstrap for styling.
This will prevent you from losing time setting things up, as well as give you a working project with Turbolinks automatically added. If you already have a project of your own, that’s ok too; you’ll still be able to follow the article.
You can also generate a new scaffolded Rails app with the `rails` command.
You can find the GitHub link of the repository [here](https://github.com/iamjuliosampaio/rails-turbolinks-app). Make sure to clone it locally and run the command `bundle install` to install all the Rails dependencies.
Once everything’s set, start the Rails server via the `rails s` command and check out the `/posts` URI, as shown below:
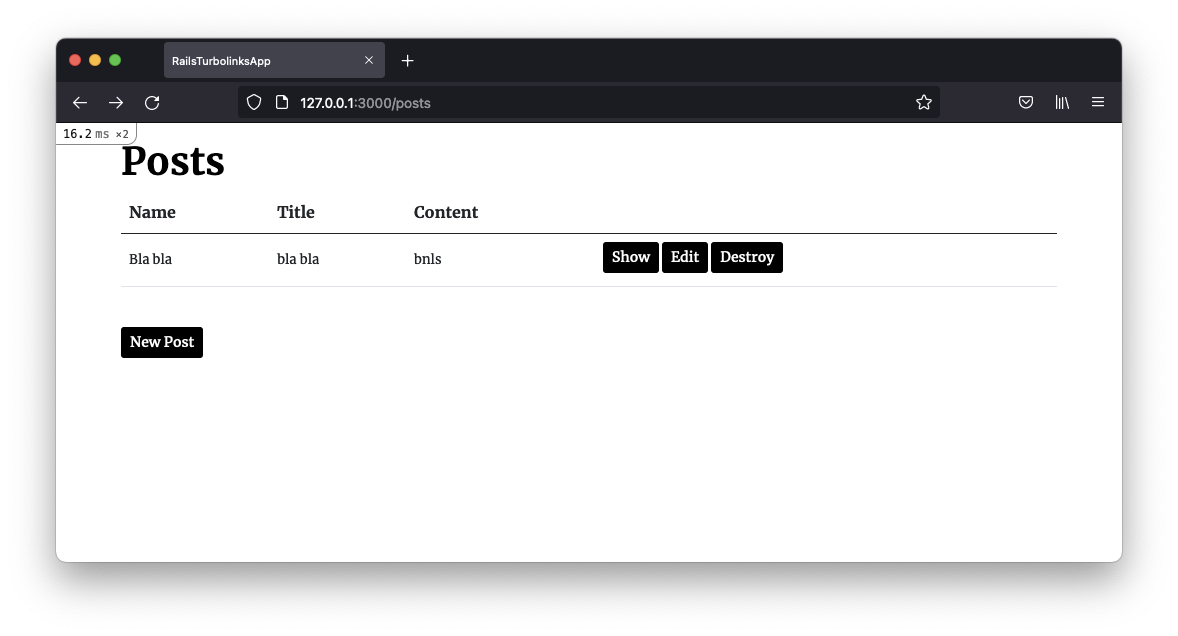_Posts CRUD in Rails_
To check out Turbolinks’ features in action, just navigate through the links to create new posts or display an item. You’ll see that the URL changes without the page reloading.
## Migration Steps
Let’s start with the proper Node package installation. Since you no longer need `turbolinks`, we can simply wipe it off of our Node list and add the [turbo-rails](https://github.com/hotwired/turbo-rails) dependency, as shown in the two commands below:
```bash
yarn remove turbolinks yarn add @hotwired/turbo-rails
```
Another great way to make sure everything’s installed properly, if you’re working with Rails, is by running the following command:
```bash
rails turbo:install
```
This will install Turbo through npm if Webpacker is installed in the application, which it is. This command also tries removing all Turbolinks old dependencies from your project in case you missed something.
Then, open the _app/javascript/packs/application.js_ file and locate the following lines of code:
```javascript
import Turbolinks from "turbolinks"; Turbolinks.start();
```
Note that the imports may change slightly depending on the version of your Rails app (older versions used `require` instead of `import`). Still, the process is the same for both.
Then, substitute them with the following respective:
```javascript
import "@hotwired/turbo-rails";
```
Yes, just a single import; there’s no need to start anything manually. The `Turbo` instance is automatically assigned to the `window.Turbo` object upon import, which is easier to manage.
To test it out and see if we’re only looking for Turbo and not Turbolinks anymore, let’s add the following code snippet to the end of the file:
```javascript
$(document).on("turbolinks:load", () => { console.log("turbolinks!"); }); $(document).on("turbo:load", () => { console.log("turbo!"); });
```
After the page reloads in your browser, check the console logs to see what’s printed:
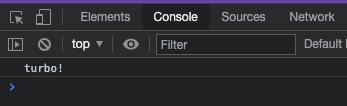_Checking out Turbo load event log_
There’s another change we need to make to the _app/views/layouts/application.html.erb_ file, which is basically to change the old Turbolinks data attributes to Turbo’s equivalent. Locate the two tags using the `data-turbolinks-*` attributes and substitute them with the following:
```erb
<%= stylesheet_link_tag 'application', media: 'all', 'data-turbo-track': 'reload' %> <%= javascript_pack_tag 'application', 'data-turbo-track': 'reload' %>
```
This is going to be important to allow Turbo to automatically track all of the imported assets in the `head` tag and make sure to reload them in case they change. This applies to all files, including all the scripts and styles you’ve added there.
## Exploring Turbo Features
Because Turbo automatically intercepts all links in your application to call them without reloads, if you need to disable that functionality for a particular link, for example, you’d have to explicitly code this.
Let’s test it out by updating the “New Post” button in the _app/views/posts/index.html.erb_ file to the following:
```erb
<%= link_to 'New Post', new_post_path, :class => "btn btn-primary btn-sm", "data-turbo" => "false" %>
```
Note that we’re explicitly adding the new data attribute `data-turbo`, to ask Turbo not to look for this specific link when it’s clicked.
If you reload your application and click the “New Post” button, you’ll see that the page is now fully reloading as it typically does in normal apps.
That’s also a great way to test if Turbo is set and working in your application.
The same goes for your forms. Turbo automatically takes care of all form submissions, so they happen asynchronously. If you want to disable it for the form under the \_app/views/posts/_form.html.erb_ file, you should change the submit button to the following:
```erb
<%= form.submit class: "btn btn-primary btn-sm", "data-turbo" => false %>
```
Reload the app and test it out! You’ll see the same behavior when creating a new post.
### Form Submissions
Speaking about forms, Turbo deals with them in a very similar manner as it does with links. However, form requests do not always finish successfully.
Let’s see it in practice! First, add a couple of validations to turn the post’s `name` and `title` properties required. For this, open the _app/models/post.rb_ file and change it to the following:
```ruby
class Post < ApplicationRecord validates :name, presence: true validates :title, presence: true end
```
Reload the app and try to add a new post now, leaving all the fields empty. You’ll note that nothing happens. If you inspect your browser console, you’ll see something like the following:
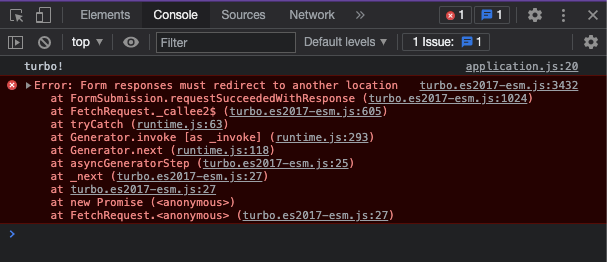_Form responses must redirect to another location_
To fix that, we have two possible approaches. The first consists of adding the `status` to each of the post controller updatable actions (POST, PUT, etc.) and make it receive the unprocessable entity object as its value.
Below, you can find the code changes for both the `create` and `update` (_post\_controller.rb_) methods:
```ruby
# def create format.html { render :new, status: :unprocessable_entity } # def update format.html { render :edit, status: :unprocessable_entity }
```
Save your edits and test the form again. You’ll see that the errors are correctly displayed this time:
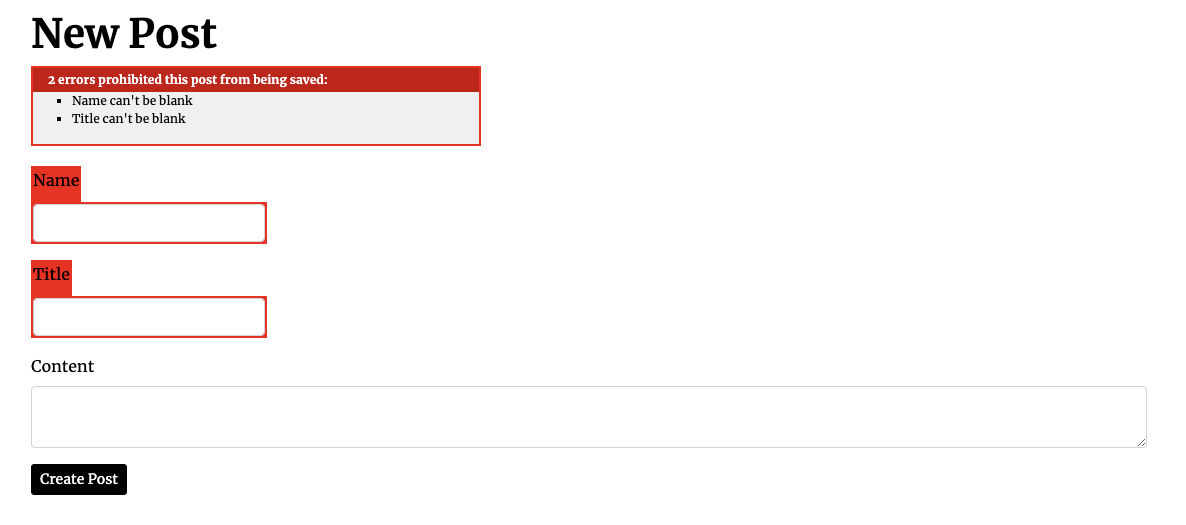_Displaying validation errors in the UI_
The second way to do this is via `turbo_frame_tag`. In a Rails app using Turbo, the Turbo Frames we spoke about are rendered by this tag.
It’s a great resource when you want to isolate a piece of your page and open a direct tunnel with the backend app so that Turbo can attach requests and responses to this specific frame.
To test it out, you first need to wrap the whole content of your \__form.html.erb_ file within this tag:
```erb
<%= turbo_frame_tag post do %> ... <% end %>
```
The post is there for obvious reasons in the case of forms. When you return to your browser and test it again, the same validation errors will show up as expected.
Another interesting thing to note here is the generated HTML for that form. Take a look:
```html
```
This custom HTML element is how Turbo differentiates frames from whole-page-based actions.
### Progress Bar
It’s common sense that when you remove the browser’s default loading mechanism, you provide another one for cases in which the page loads slowly.
Turbo already provides a built-in CSS-based progress bar at the top of the page, very similar to the ones provided by major libraries such, as Bootstrap and Material Design.
It’s set to display only when the requests take more than 500 ms to process, which is not long enough for our test project.
If you’re willing to change its style or even remove it completely, you can play around with the `.turbo-progress-bar` CSS class, as shown below:
```css
.turbo-progress-bar { height: 15px; background-color: gold; }
```
To test it, you’ll need to decrease the progress bar delay in the _application.js_ file with the following code:
```javascript
window.Turbo.setProgressBarDelay(1);
```
The time provided is in milliseconds. Below, you can find the updated style representation for the progress bar.
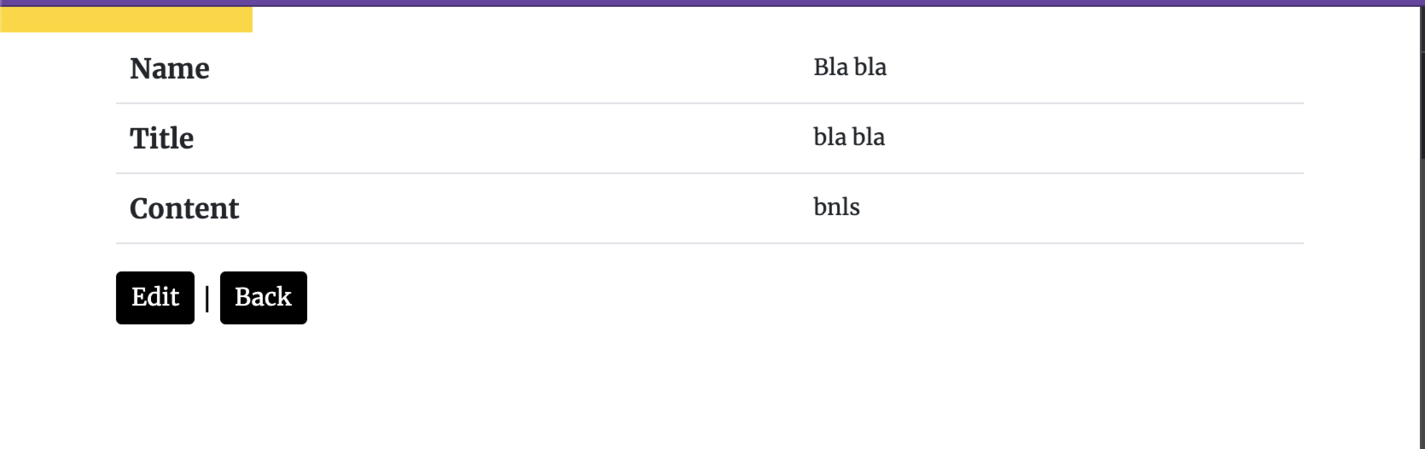_Displaying updated progress bar_
## Wrapping Up
There’s much more to discuss about Turbo and its amazing features, such as the Streams and Native modules. However, to keep the article focused, we’ll stick to these initial steps.
As always, I couldn’t avoid recommending the official [Turbo Handbook](https://turbo.hotwired.dev/handbook/introduction), as it was very useful when I got started with this whole migration process. There, you’ll find all the material you need to deal with the special conditions your project requires.
If your app is using Devise, for example, chances are that you’ll need some adaptations. Luckily, the Turbo team provided a great [tutorial on this topic](https://gorails.com/episodes/devise-hotwire-turbo) to help with the minutiae around Devise with Turbo.
---
## Try Honeybadger for FREE
Intelligent logging, error tracking, and Just Enough APM™ in one dev-friendly platform. Find and fix problems before users notice.
[Start free trial](https://app.honeybadger.io/users/sign_up)
[See plans and pricing](https://www.honeybadger.io/plans/)